After a desperate attempt to flee from the Devil’s Triangle, you end up crashing on a group of uncharted islands. You have Kathy with you, but there is only so much she can do to help you. You are forced into an exciting adventure and have to do whatever it takes to stop a dangerous pirate. This Hidden Expedition – The Uncharted Islands Walkthrough will help you get through the game and uncover the secrets.
Contents
General Tips & Tricks
– To start a game or continue where you left off, click on Play in the main menu.
– If you want to adjust the music, screen size, sound or cursor you have to click on Options. Here you can choose the settings you want.
– The game difficulty can also be set under options. There is the Casual Mode and Expert Mode. With the casual mode, you start with five hints and the hint recharges at a rate of 20 seconds. Expert mode is more challenging and starts you off with only three hints and the recharge rate is a minute.
– You are allowed to have more than one Player Profile. You can choose the one you want to play with, delete an existing profile or create a new profile by clicking on the “Or sign in here” button found under the player name.
– To end the game and close the window, click on Exit.
– While playing the game you will notice that the cursor changes. This is an indication of what actions have to be taken in a given area.
– In the lower right of the screen there is the Hint button. You can click on this if you need help finding something or are not sure what to do.
– The Inventory is found at the bottom of the screen. Open it by holding the mouse cursor on the bar and it will appear. There are times when objects need to be used together and to do this, simply click on an item and drag it over to the one you want to combine it with.
– In the lower left corner of the screen you will see the Journal. Here is where information gathered is documented.
– To return to the main menu, click on the Menu button found under the journal.
– Under Objective, you will be shown the current task. The journal will contain more information on whatever task you are working on.
Hidden Expedition – The Uncharted Islands Walkthrough
Chapter 1 – The Strange Savages
– First, speak with Kathy.
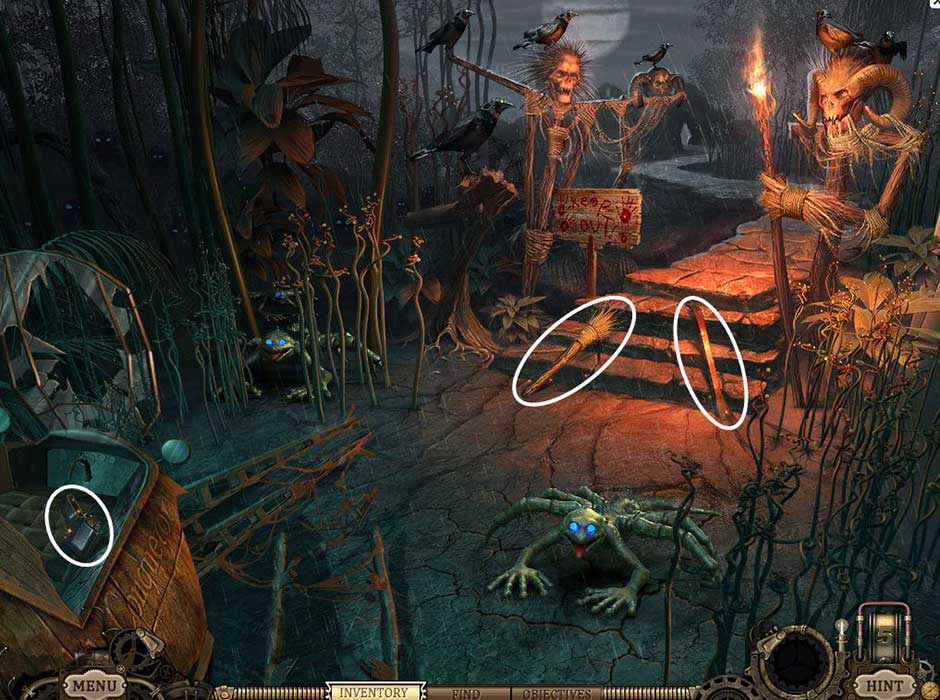
– Pick up the Torch, Crowbar and Lighter.
– Once you have the items, continue on and then look at the Telegram found on the boulder.
– Take the Journal that Kathy gives you. You can view it anytime by clicking on the corresponding icon in the lower left part of the screen.
– Pick up the Rubber Hose.
– The boulder has to be moved and this is done by using the Crowbar on it. Once it is out of the way, continue on.
Hidden Expedition – The Uncharted Islands – Chapter 1a
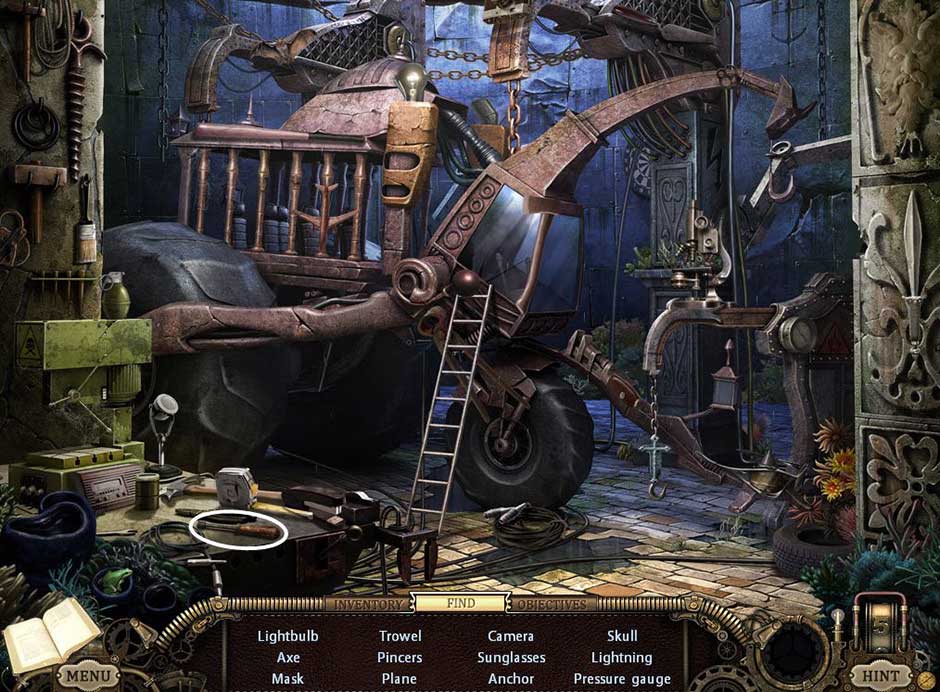
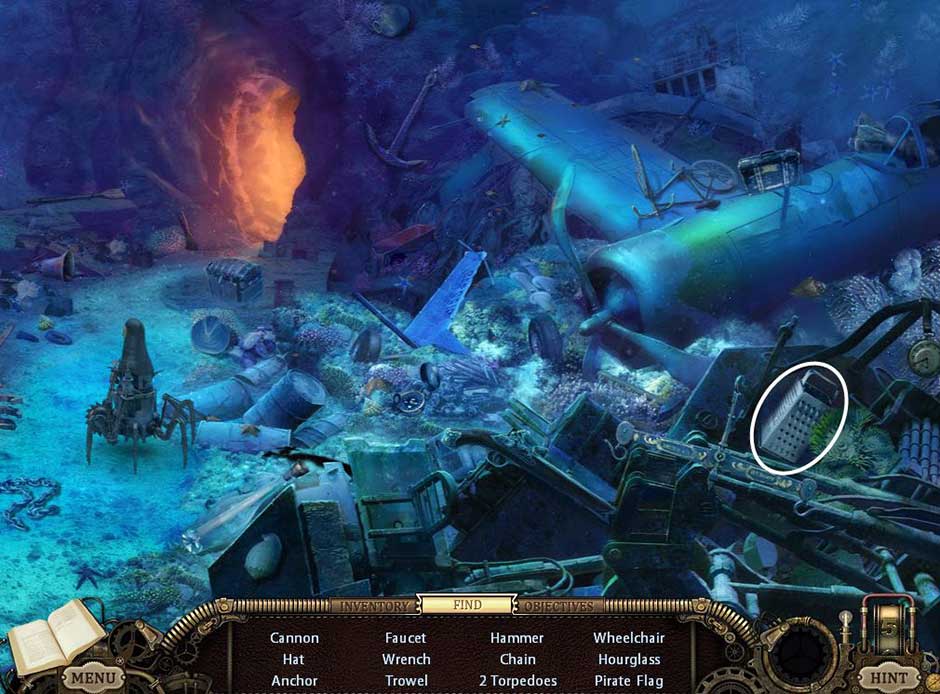
– Take the Lighter and Torch from your inventory and put them together. The Lit Torchcan now be used to light the ones on the side of the ship. This triggers a puzzle and you will have to find all of the objects.
Hidden Expedition – The Uncharted Islands – Chapter 1b
– Pick up the Boat Prop and get the Letter to Delia that will appear once Kathy stops talking to you.
– Continue to move forward.
Hidden Expedition – The Uncharted Islands – Chapter 1c
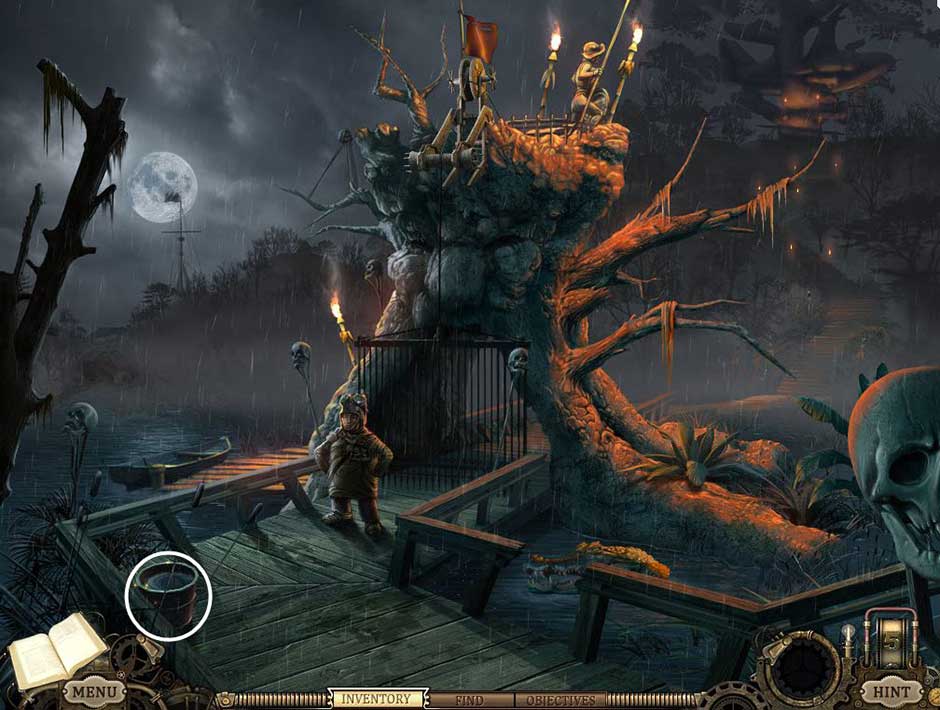
– Pick up the Bucket of Water.
Hidden Expedition – The Uncharted Islands – Chapter 1d
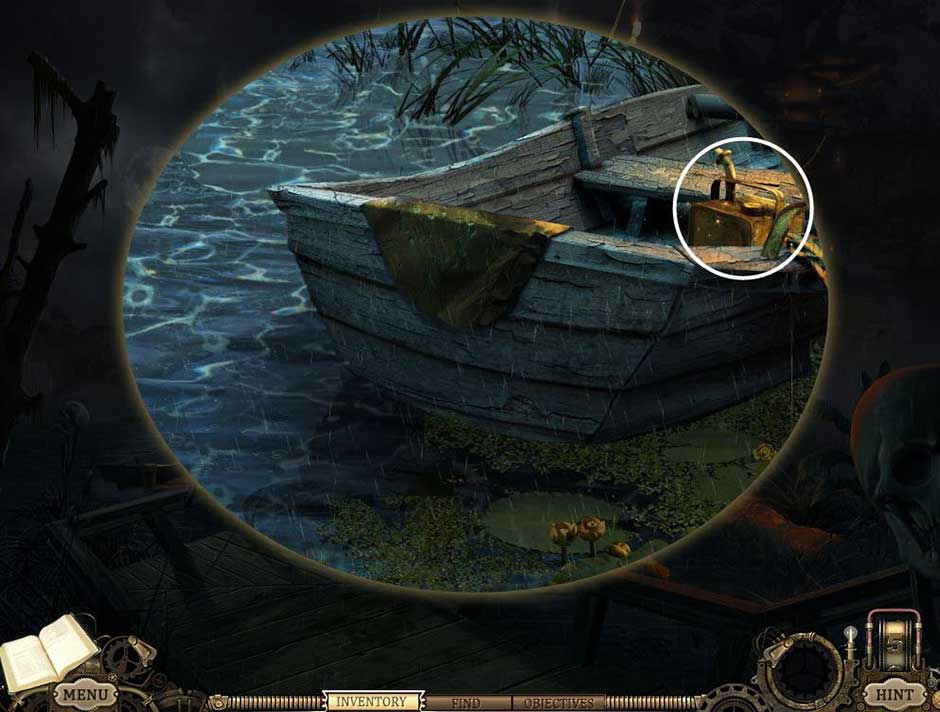
– Zoom in on the old boat.
– Pick up the Gas Can found on the boat.
Hidden Expedition – The Uncharted Islands – Chapter-1e
– Speak with Chet and then continue to move on.
– Pick up the Flashlight.
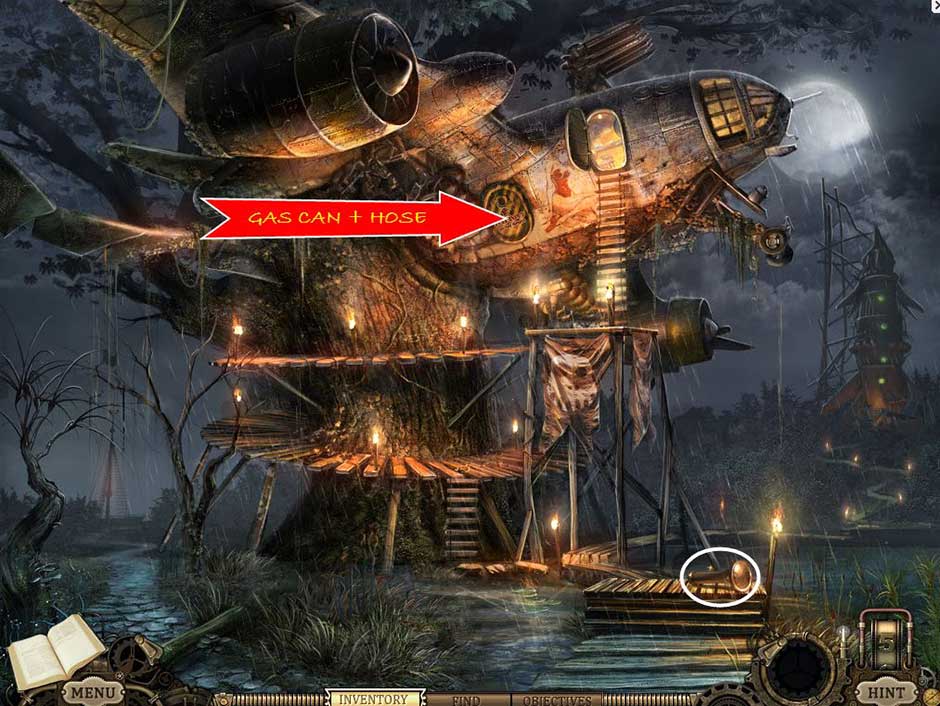
– Go to your inventory and put together the Gas Can and Rubber Hose. Now you can use this to fill the plane’s gas tank.
– Now you can go into the plane tree house.
Hidden Expedition – The Uncharted Islands – Chapter 1f
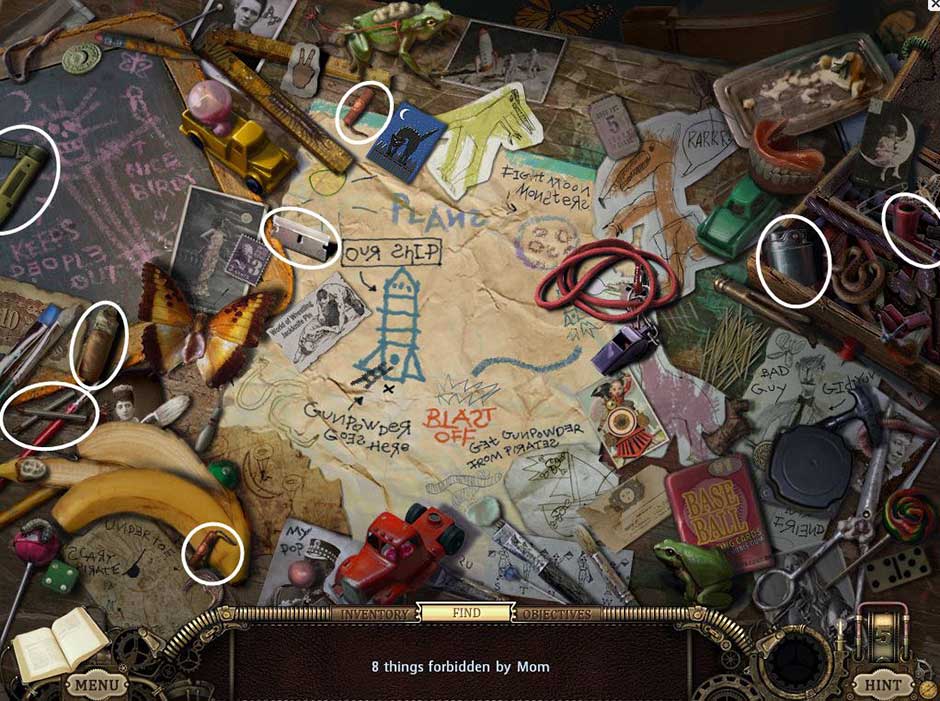
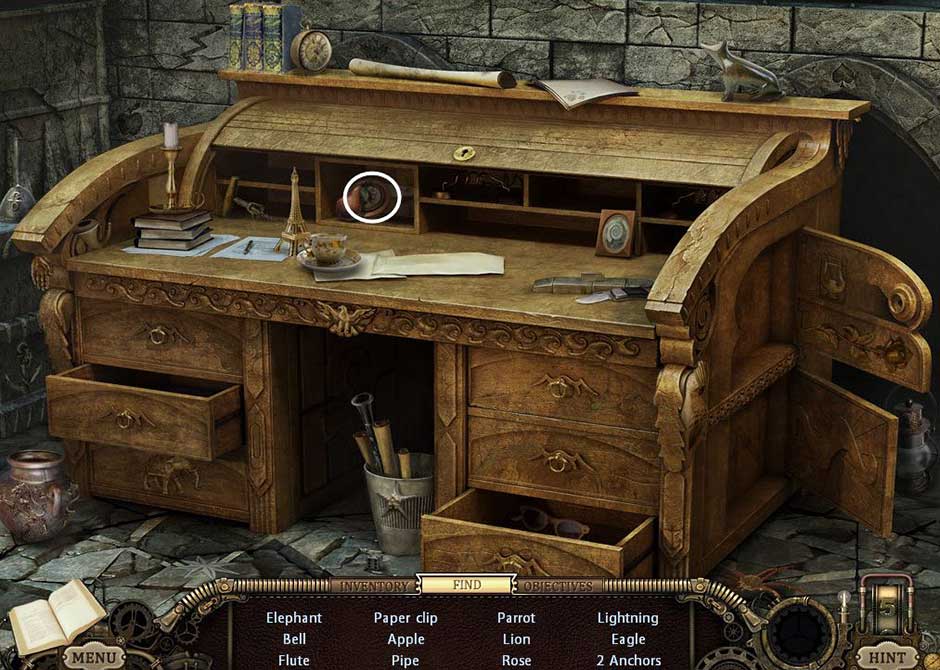
– Zoom in on the desk. This will trigger a puzzle and you will be given the task to find various objects. The puzzles are randomized.
Hidden Expedition – The Uncharted Islands – Chapter 1g
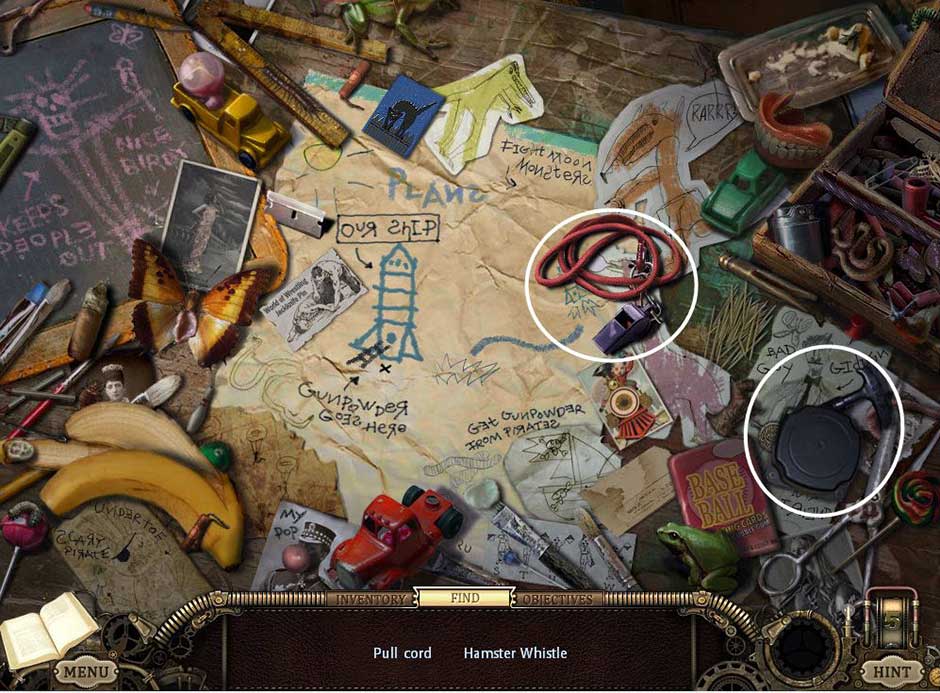
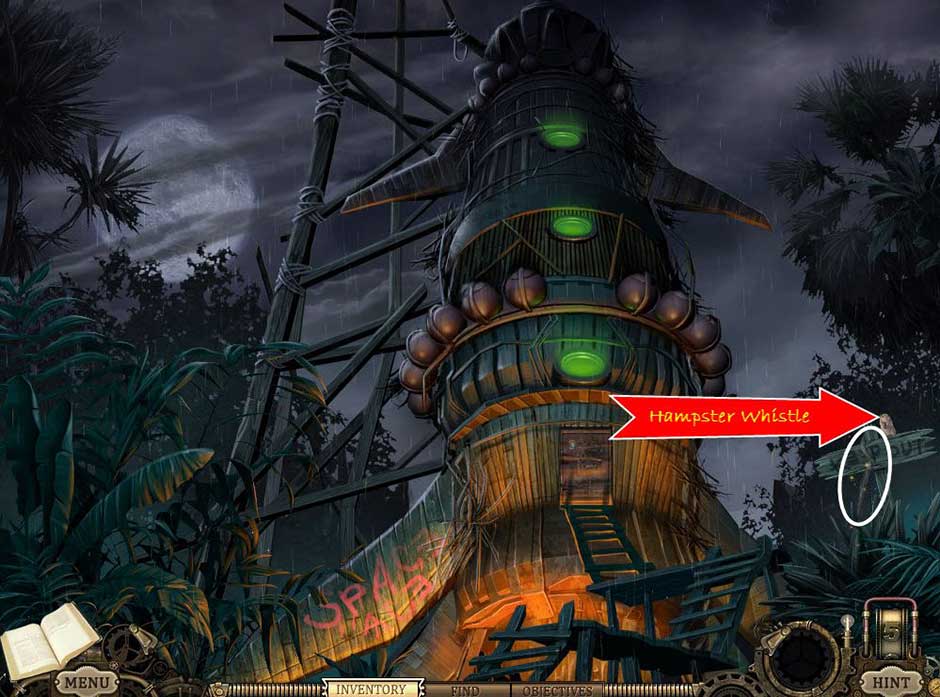
– Pick up the Hamster Whistle and Pull Cord.
Hidden Expedition – The Uncharted Islands – Chapter 1h
– On the left side of the desk there is a book. Zoom in on it.
– A puzzle will be activated when you click on the book. To solve this puzzle, you will have to take the pieces of the rocket on the right side and put the in their proper position on the left page. Get the C that is on the left page.
Hidden Expedition – The Uncharted Islands – Chapter 1i
– Leave the plane and continue to move forward.
– There is a hamster on the right side. Use the Hamster Whistle on it to have it added to your inventory.
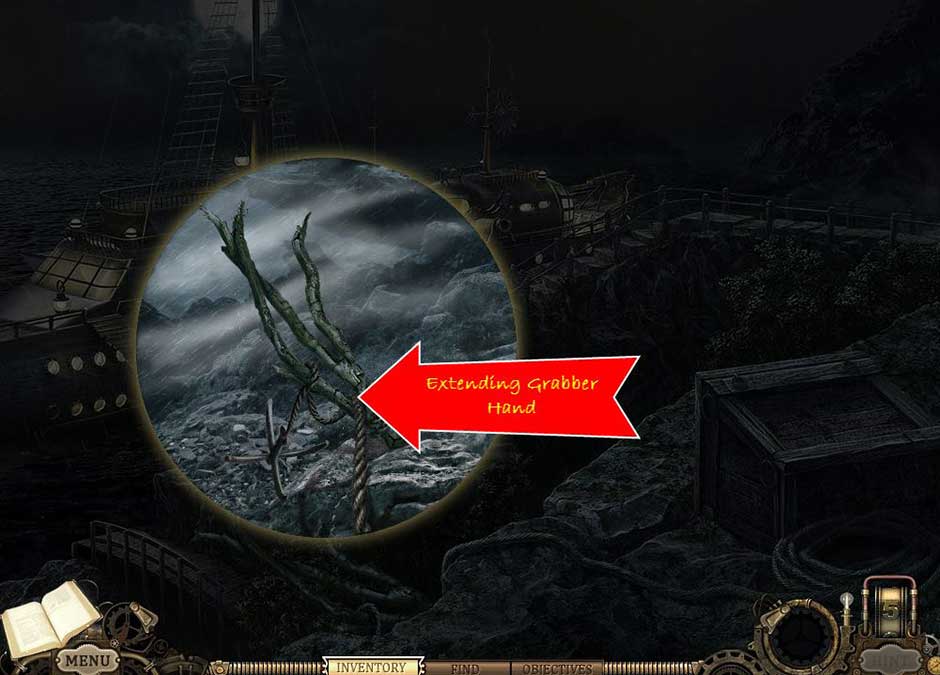
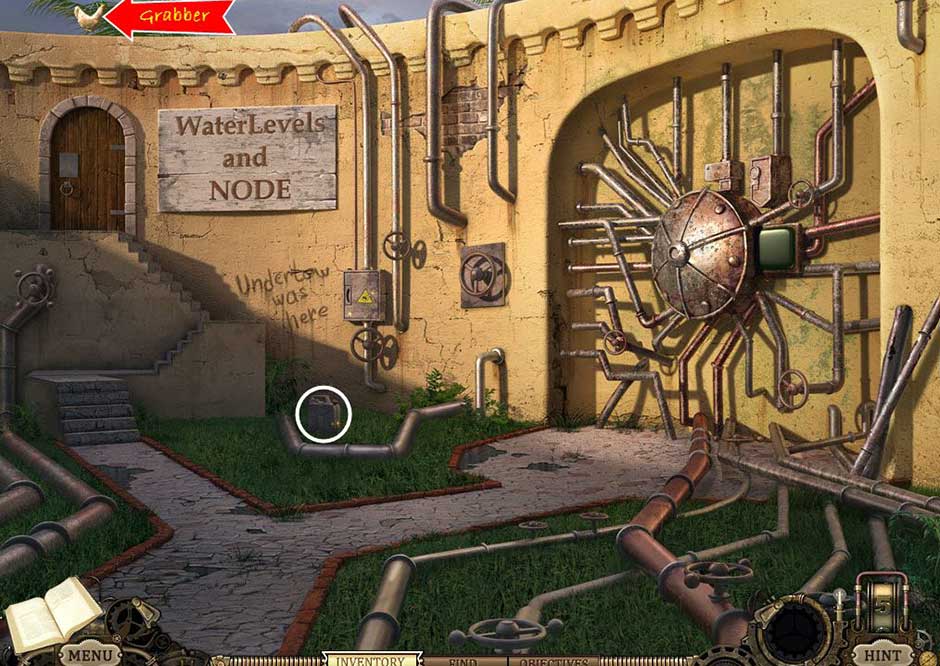
– Take the Extending Grabber Hand before continuing to move on.
Hidden Expedition – The Uncharted Islands – Chapter 1j
– Zoom in on the vines and get the Grappling Hook by using the Extending Grabber Hand.
Hidden Expedition – The Uncharted Islands – Chapter 1k
– Next, zoom in on the crate and open it. This will trigger a scene in which you have to find the items. You will first have to turn on the light by using the Crank.
Hidden Expedition – The Uncharted Islands – Chapter 1l
– Take the Matchbook and Match and use them together.
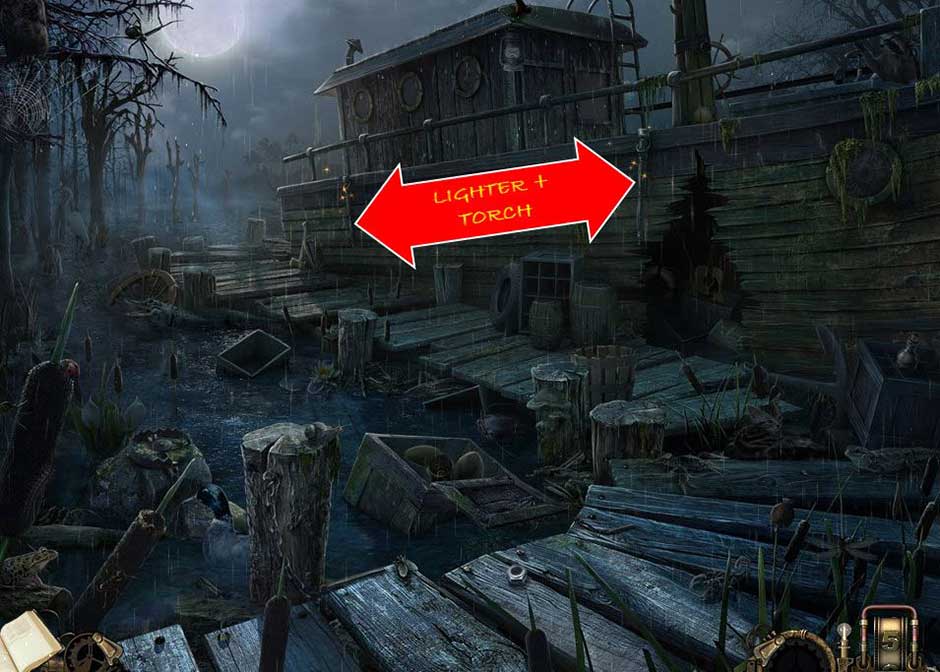
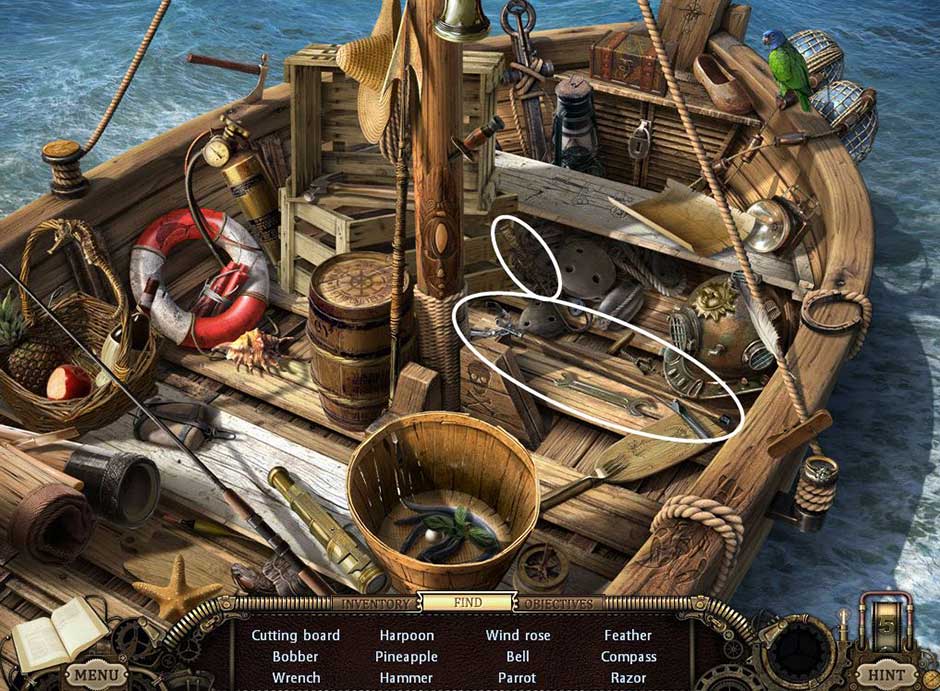
– Find the listed objects.
– The Tiny Rake has to be used on the dirt that is inside of the planter.

Hidden Expedition – The Uncharted Islands – Chapter 1m
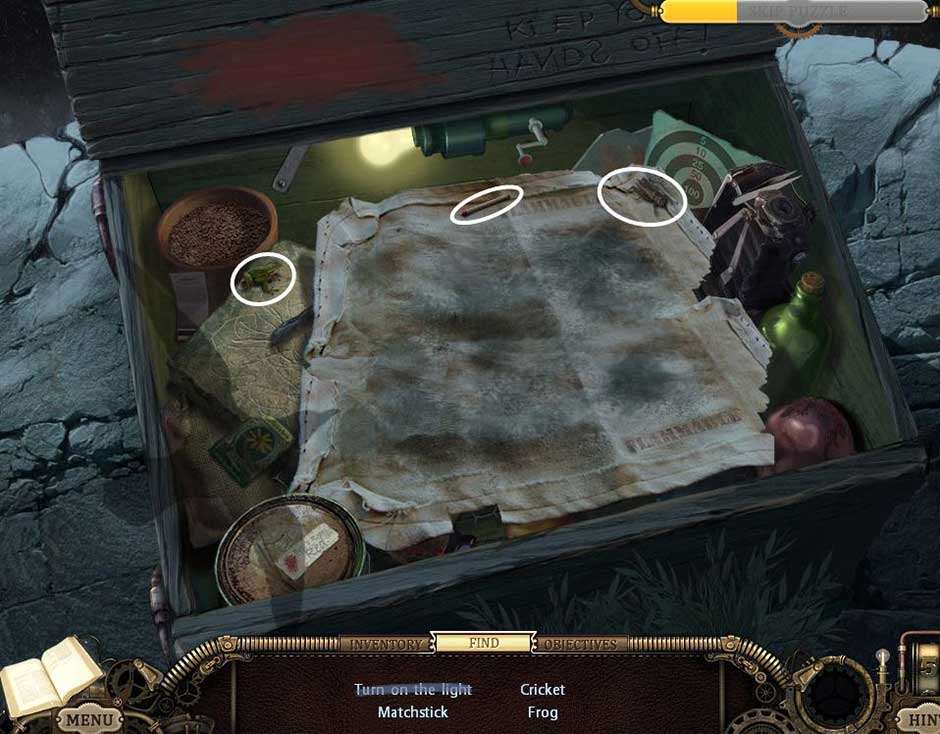
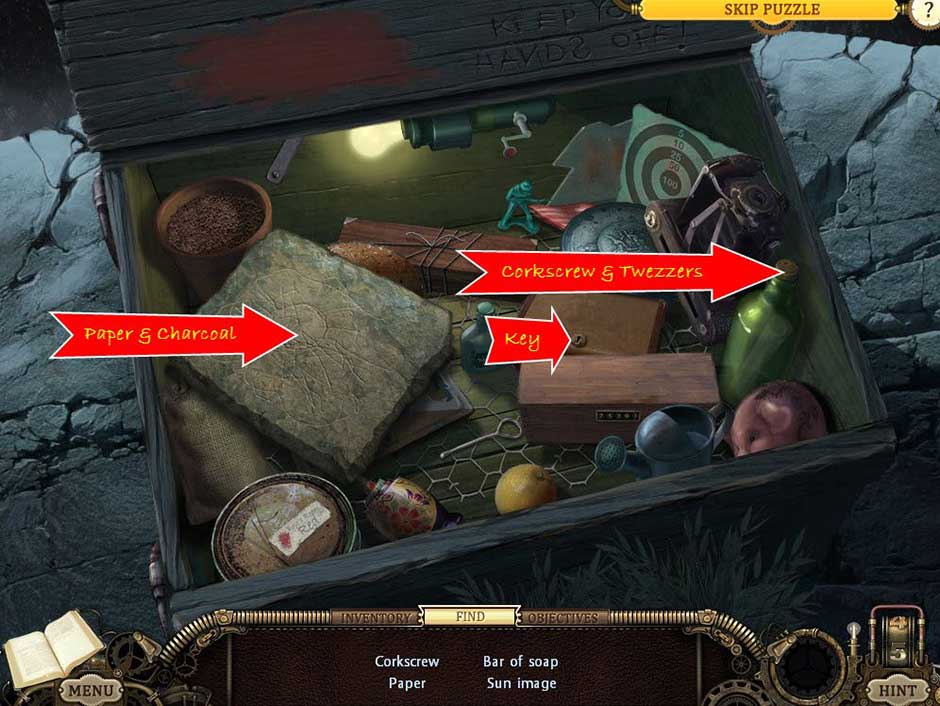
– Open the locked box with the Key and then pick up the Corkscrew.
– Open the wine bottle by using the Corkscrew on it.
– Get the Paper in the wine bottle by pulling it out with the Tweezers.
– The Charcoal and Paper have to be used together on the stone piece.
Hidden Expedition – The Uncharted Islands – Chapter 1n
– Find all of the listed objects.
Hidden Expedition – The Uncharted Islands – Chapter 1o
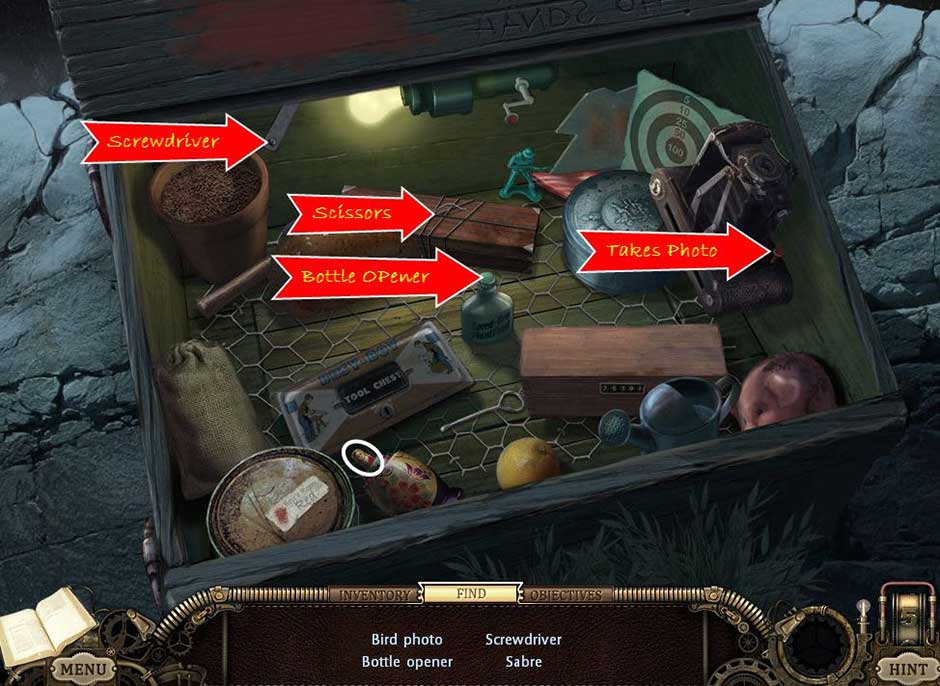
– The Bird Photo is obtained by taking a picture as a bird flies over the box.
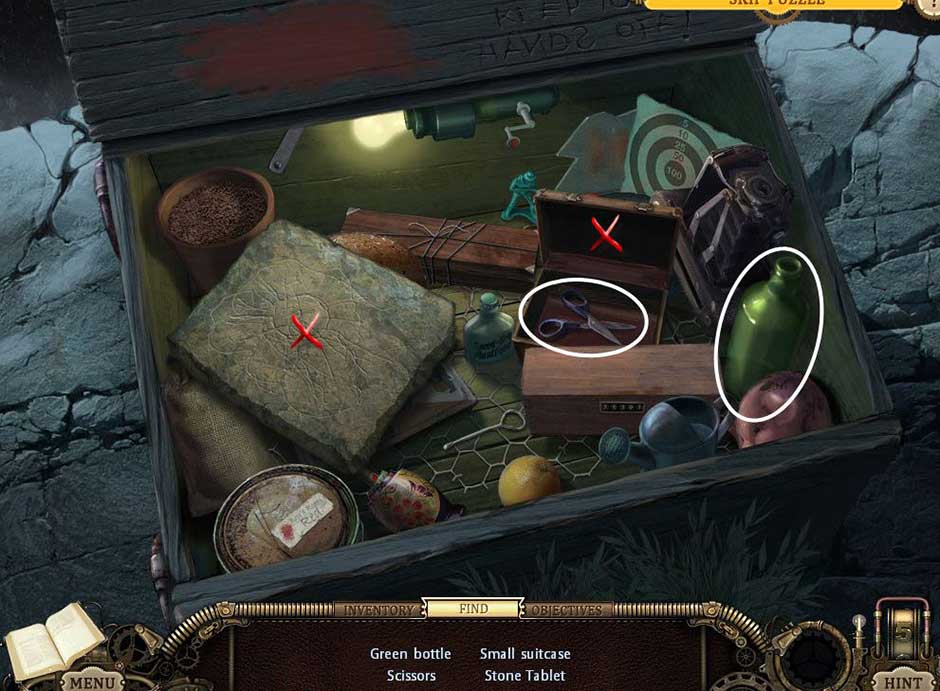
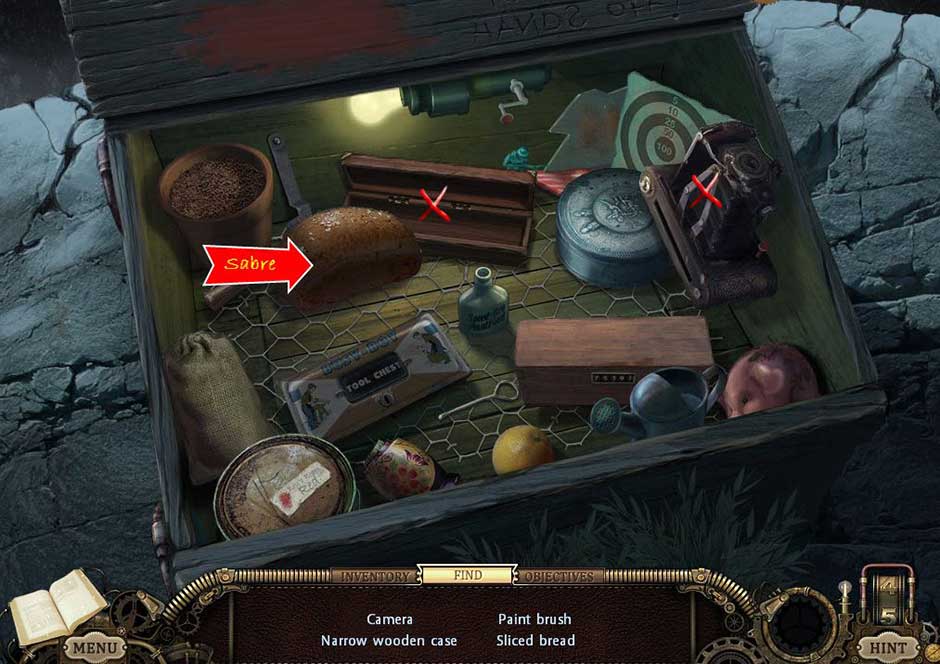
– Open the box by cutting the string with the Scissors. Once it is opened, pick up theScrewdriver and then use it to acquire the Sabre.
– Open the bottle of plant food with the Bottle Opener.
Hidden Expedition – The Uncharted Islands – Chapter 1p
– Find the listed objects once again.
– The Bread is cut with the Sabre. Pick up the Paintbrush found under the bread.
Hidden Expedition – The Uncharted Islands – Chapter 1q
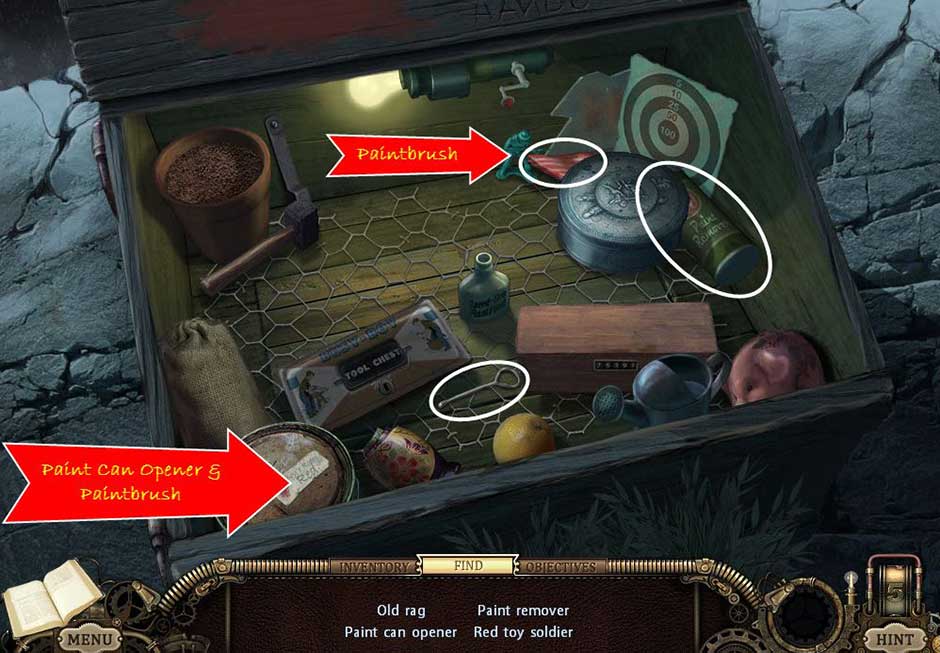
– Take the Paint Can Opener and the Paint Remover.
– Open up the round box and pick up the Old Rag.
– Open the can of paint by using the Paint Can Opener on the lid.
– Use the Paintbrush with the red paint and then on the toy soldier.
Hidden Expedition – The Uncharted Islands – Chapter 1r
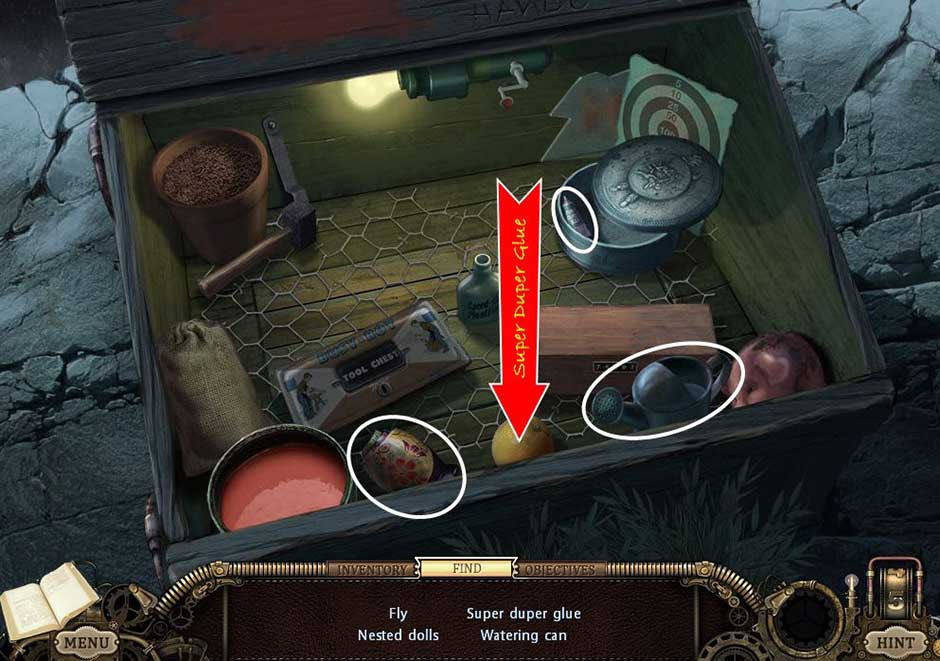
– Find all the listed objects.
– To catch the fly, use the Super Duper Glue on the orange.
Hidden Expedition – The Uncharted Islands – Chapter 1s
– Find all the listed objects.
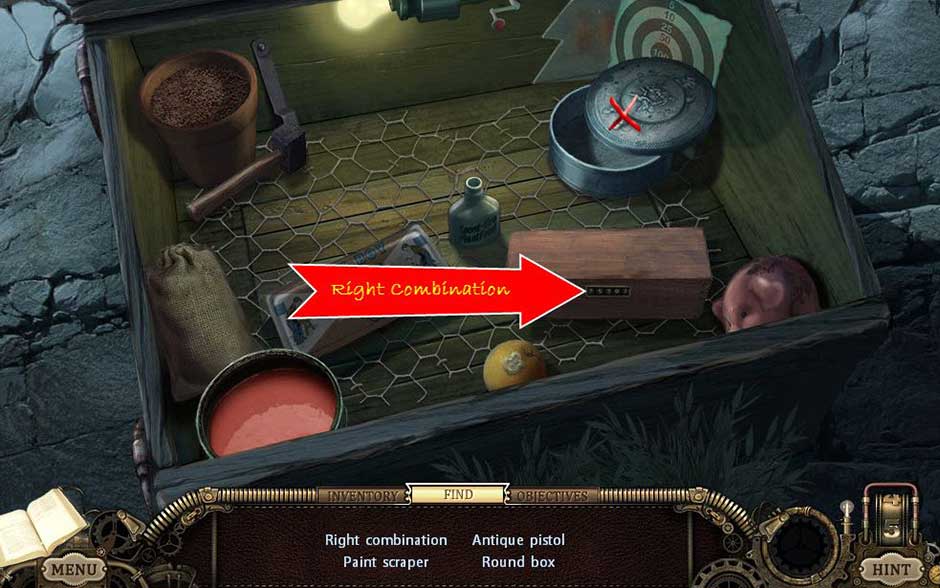
– First, find the Paint Scraper underneath the round box.
– Pour the Paint Remover onto the paint on the lid of the crate. Then use the Paint Scraper on it to remove it. A combination of numbers will be revealed.
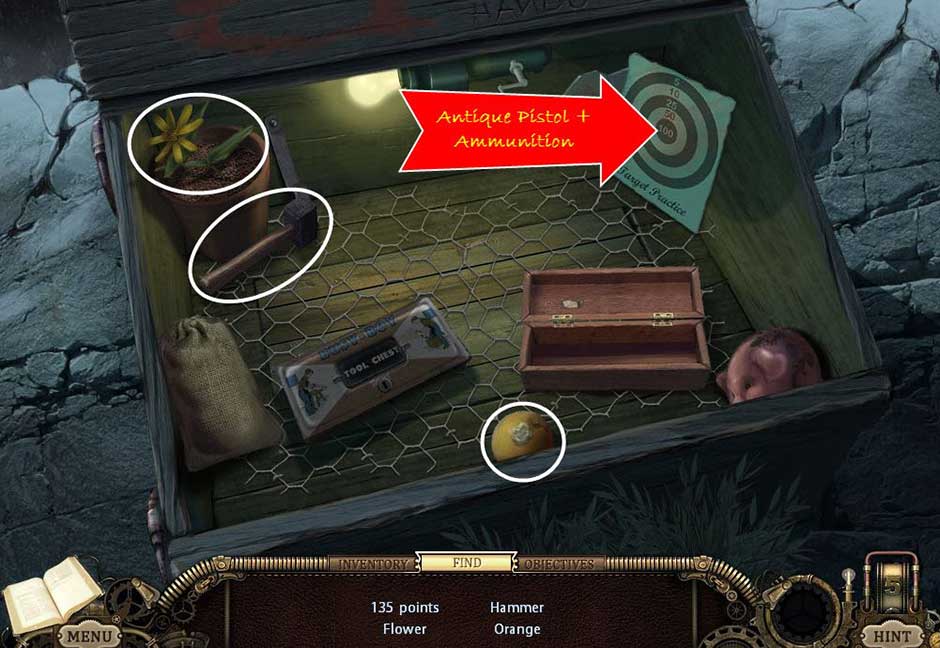
– Unlock the box using the combination found after removing the paint. Once the box is opened, get the Antique Pistol.
Hidden Expedition – The Uncharted Islands – Chapter 1t
– Find all the listed objects.
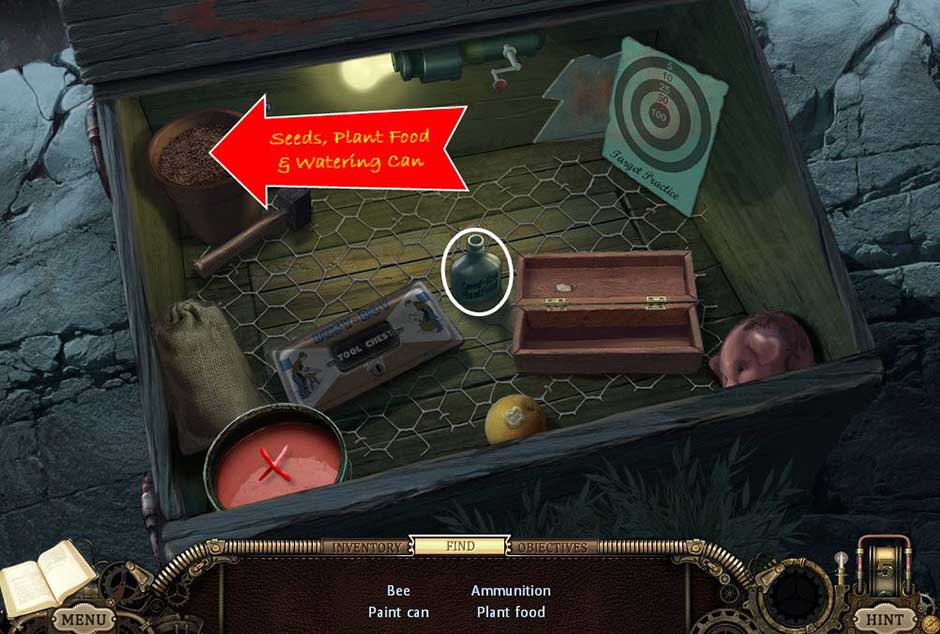
– Move the paint can and take the Ammunition.
– Add the Seeds and Plant Food to the dirt in the pot and then use the Watering Can on it. Once it appears, you will be able to get the Bee.
Hidden Expedition – The Uncharted Islands – Chapter 1u
– Find all the listed objects.
– Go to your inventory and use the Ammunition with the Antique Pistol.
– Once the Antique Pistol is loaded, shoot the target with it.
Hidden Expedition – The Uncharted Islands – Chapter 1v
– Find all the listed objects.
– Pick up the Utility Knife that is revealed by moving the planter.
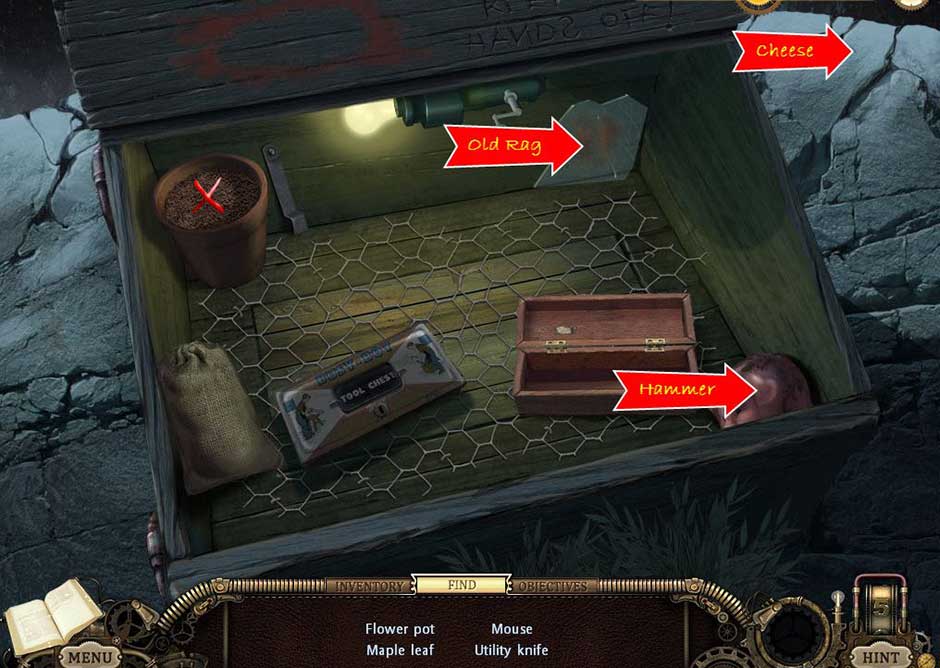
– Break open the piggy bank with the hammer. Pick up the Earring.
– Lure the Mouse by putting the Cheese on the right side of the crate.
– Wipe the glass shard with the Old Rag to get the Maple Leaf.
Hidden Expedition – The Uncharted Islands – Chapter 1w
– Find all the listed objects.
– Open the sack by using the Utility Knife on it.
– Make the Pirate Face by putting the Earring, Eye Patch and Cloth on the potato.

Hidden Expedition – The Uncharted Islands – Chapter 1x
– Find all the listed objects.
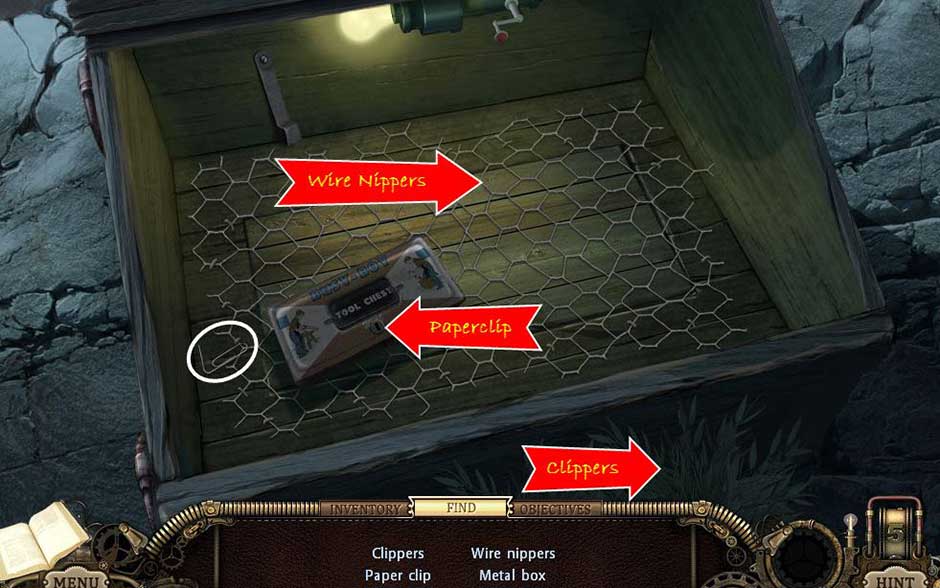
– Unlock the box with the Paper Clip. Open it and get the Clippers.
– Snip the grass found in front of the crate with the Clippers.
– Pick up the Wire Nippers and use them on the metal.
– Open the door that is revealed and pick up the Small Motor Body.
Hidden Expedition – The Uncharted Islands – Chapter 1y
– Go back four screens and then shine the Flashlight on the light sensitive plant. Pick up the Button of Power.
– Go and speak with Chet. Get the Quarter and then use it to get a newspaper out of the newspaper dispenser. Read the paper.
– Pick up the Slingshot and then move forward three times before turning to the left. Use the Slingshot to knock down the guard sitting in the crow’s nest.
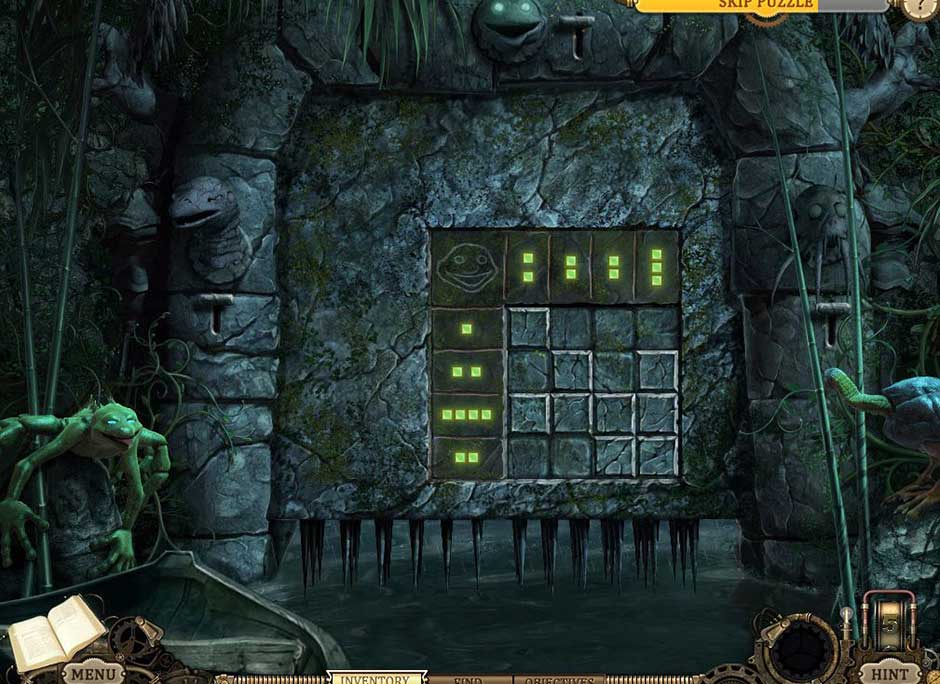
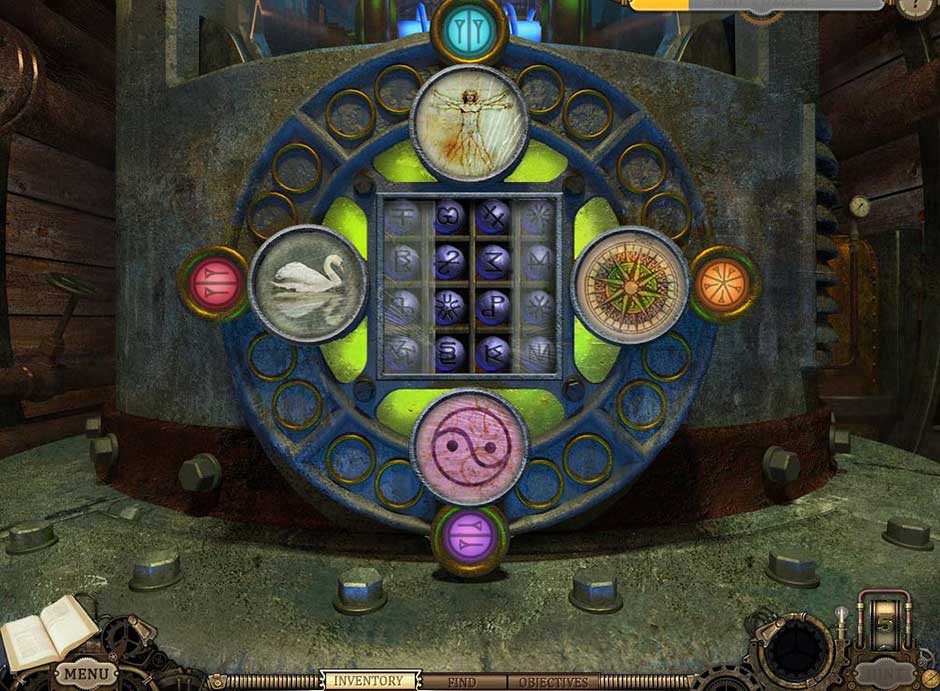
– Go back down two times and zoom in on the boat. Use the Rip Cord, Gas Tank, Small Motor Body and the Boat Prop on the boat. Zoom out and then click on the boat. This will activate a logic puzzle.
– To solve the puzzle, you will have to fill in the blanks. The dots serve as guides.
Hidden Expedition – The Uncharted Islands – Chapter 1z
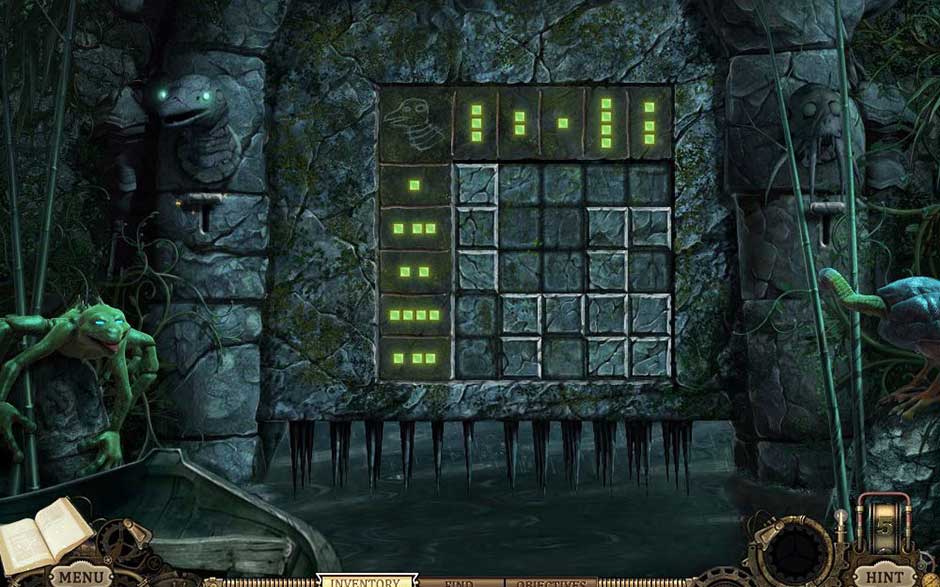
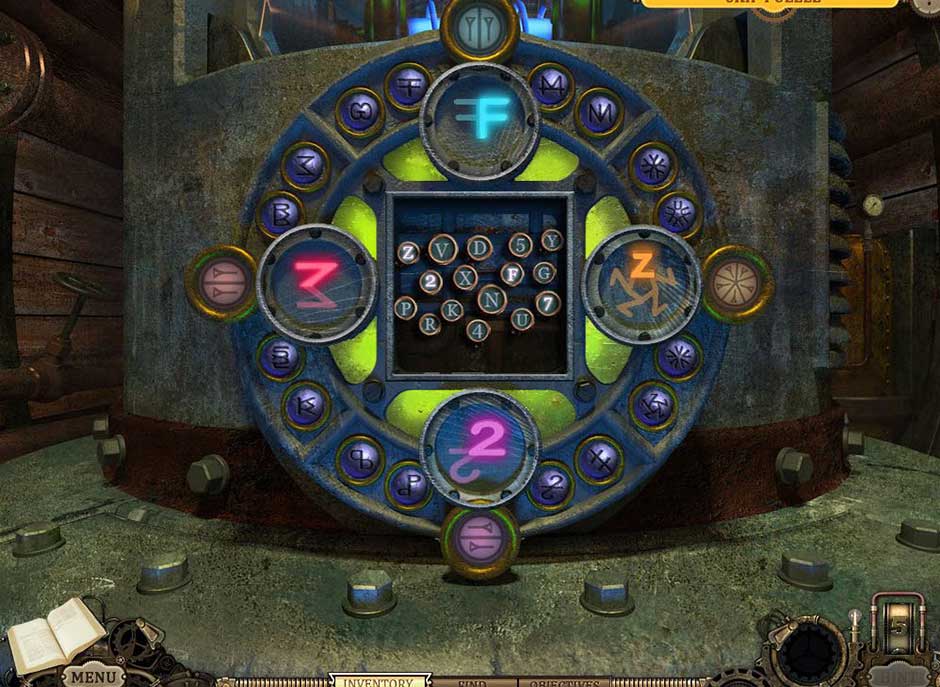
– Once the first puzzle is solved, pull the lever and go forward. Solve the next puzzle.
Hidden Expedition – The Uncharted Islands – Chapter 1z1
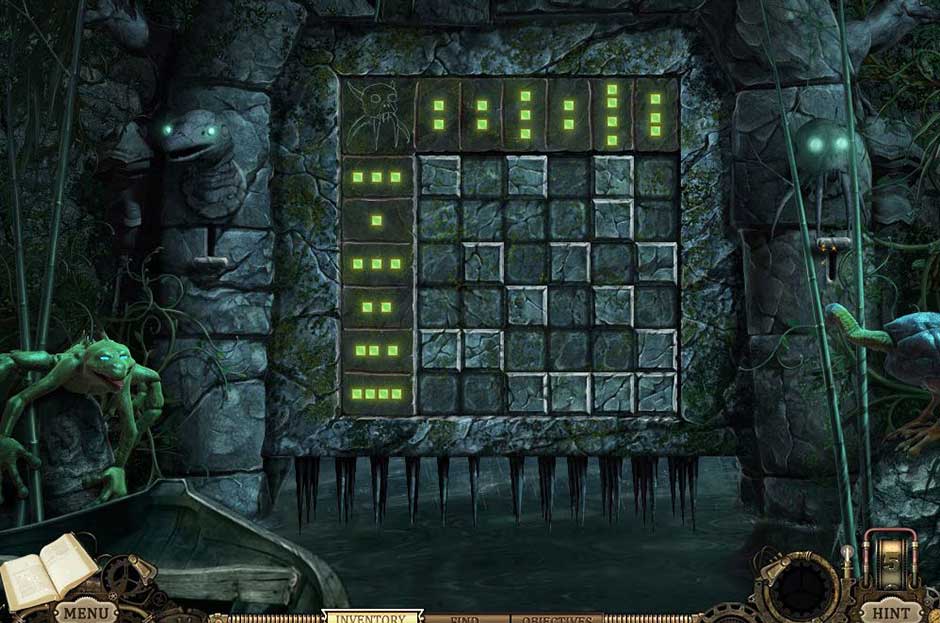
– Pull the lever and solve the third puzzle.
Hidden Expedition – The Uncharted Islands – Chapter 1z2
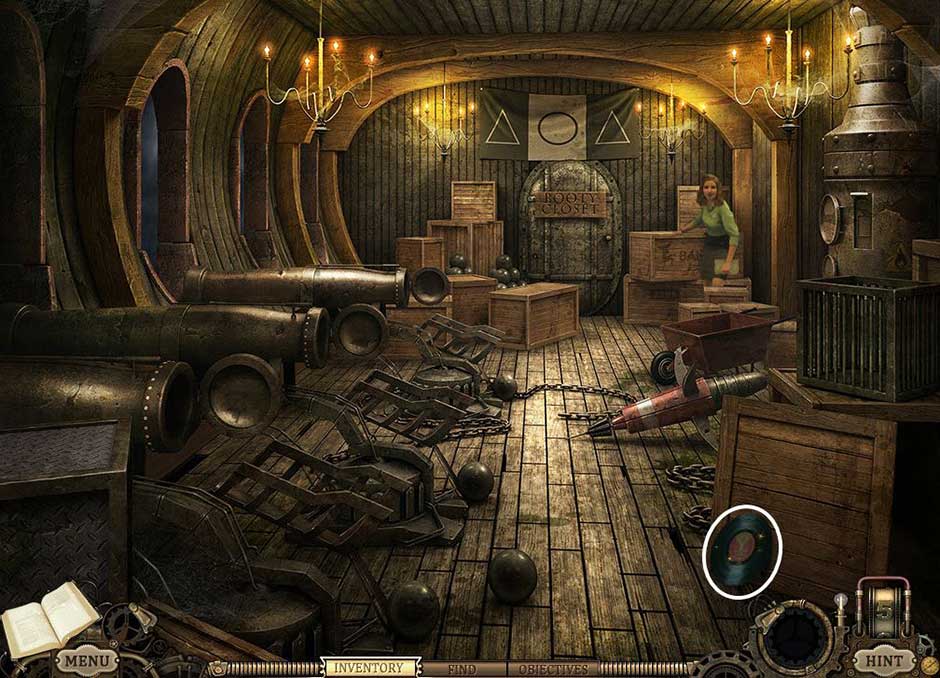
– Now you can move forward. Board the ship by using the Grappling Hook on it.
– Take the Gun Powder Keg and Crocodile Jack.
– Zoom in on the door to activate another puzzle.
– Solve the puzzle by connecting the green dot and the yellow dot. The connecting line has to be continuous.
Hidden Expedition – The Uncharted Islands – Chapter 1aa
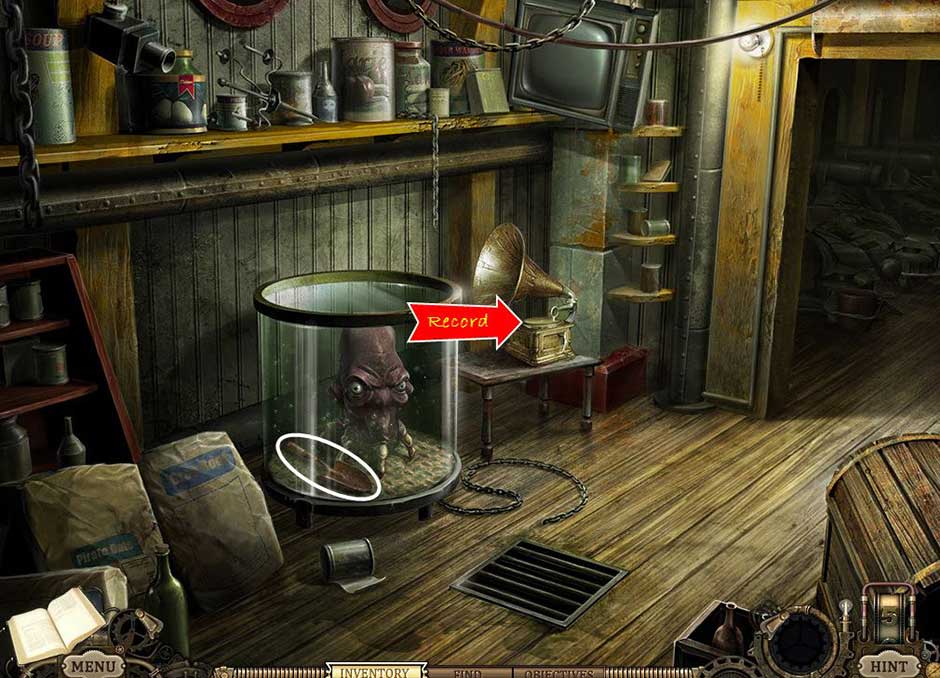
– Enter the ship and then turn to the right.
– Speak with Delia. Get the D from the note.
– Take the Record.
Hidden Expedition – The Uncharted Islands – Chapter 1bb
– Place the Record onto the gramophone.
– Pick up the Trowel.
Hidden Expedition – The Uncharted Islands – Chapter 1cc
– Continue down and use the Crocodile Jack on the mouth of the croc.
– Pick up Undertow’s Library Card.
– Get in the boat and go back to the ship. Board it again and turn right.
– Zoom in on the door and open it using the Library Card.
– Go inside and you will have to find 19 related pairs.

Hidden Expedition – The Uncharted Islands – Chapter 1dd
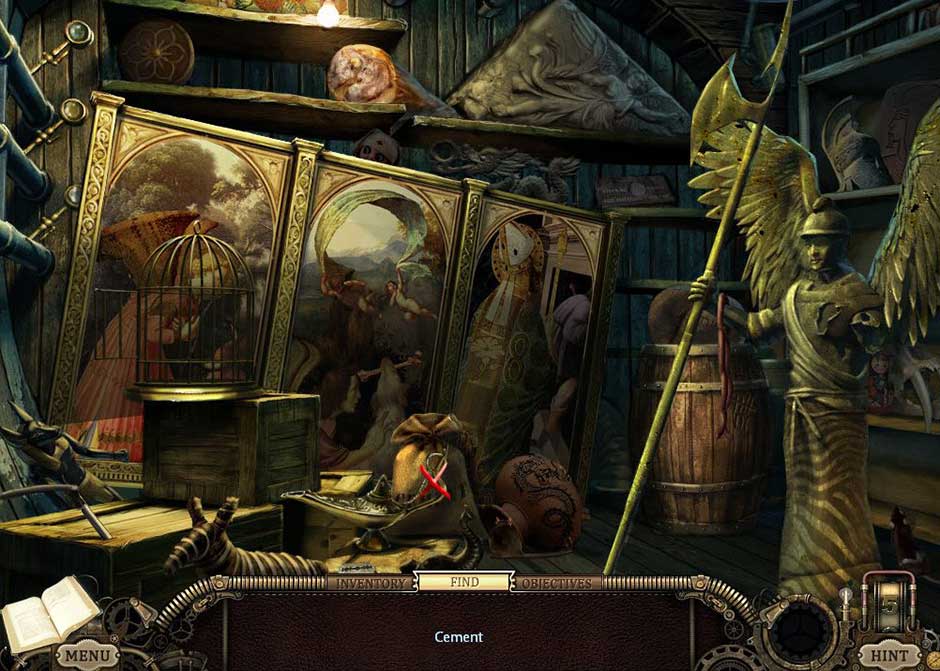
– Take the Cement.
Hidden Expedition – The Uncharted Islands – Chapter 1ee
– Use the Cement, Bucket of Water and Trowel together in the wheelbarrow. Once it is mixed, place the cement in each of the cannons.
– Go down five times and then up two times. Zoom in on the door and solve the puzzle.
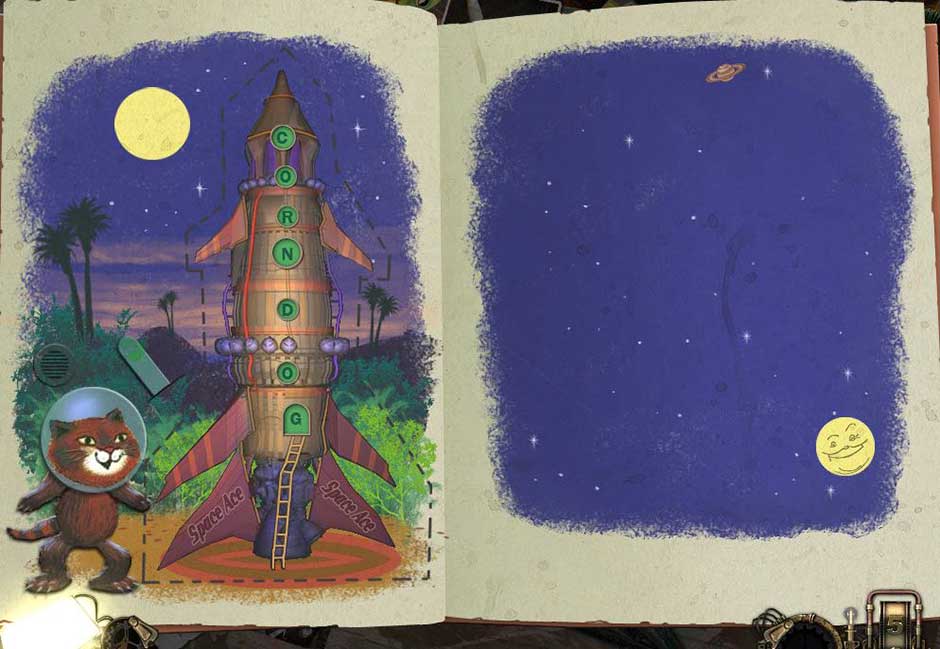
– To solve this puzzle, use the letters you have collected to spell Corn Dog. Go in the rocket.
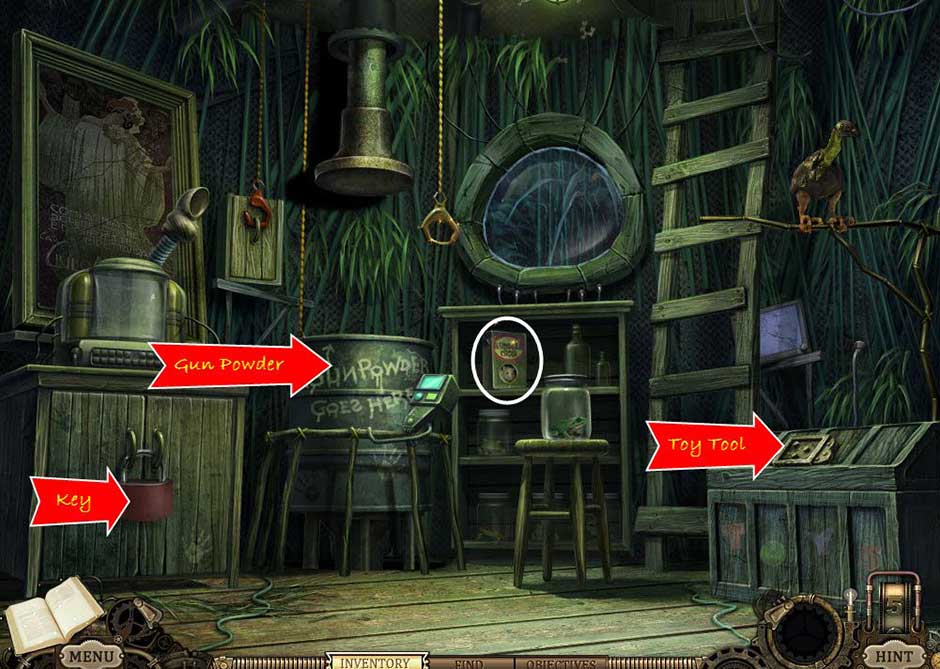
– Get the Hamster Food.
– Use the Gun Powder with the Keg. Take the Key and use it to unlock the red lock.
– Examine the cupboard and then take the Toy Tool from the bowl.
– Put the Hamster in the cupboard and then feed it by filling the bowl with the Hamster Food.
– Zoom in on the chest. Put the Toy Tool on the licks and the slide it to the right side.
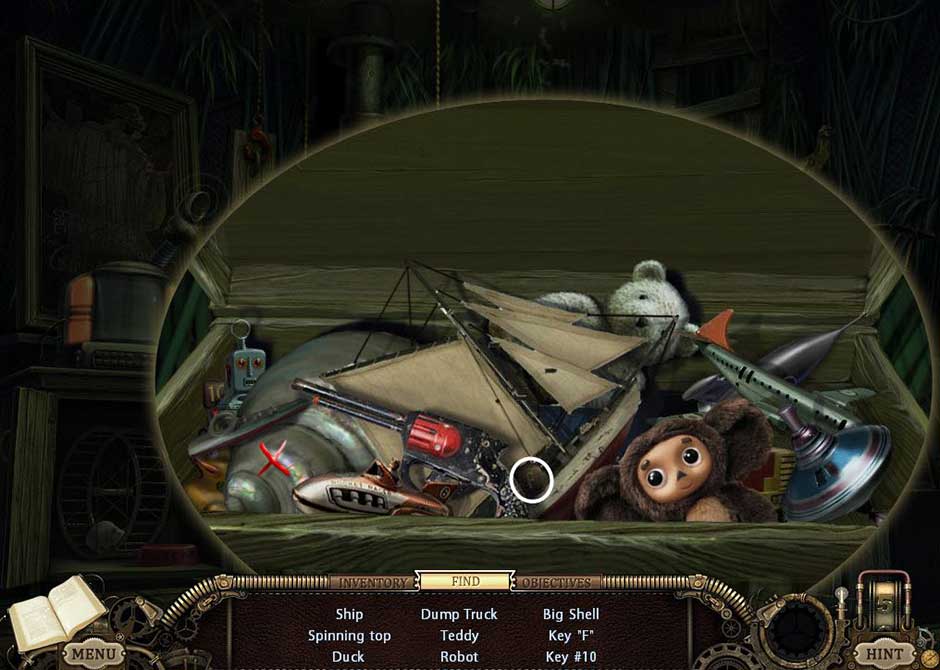
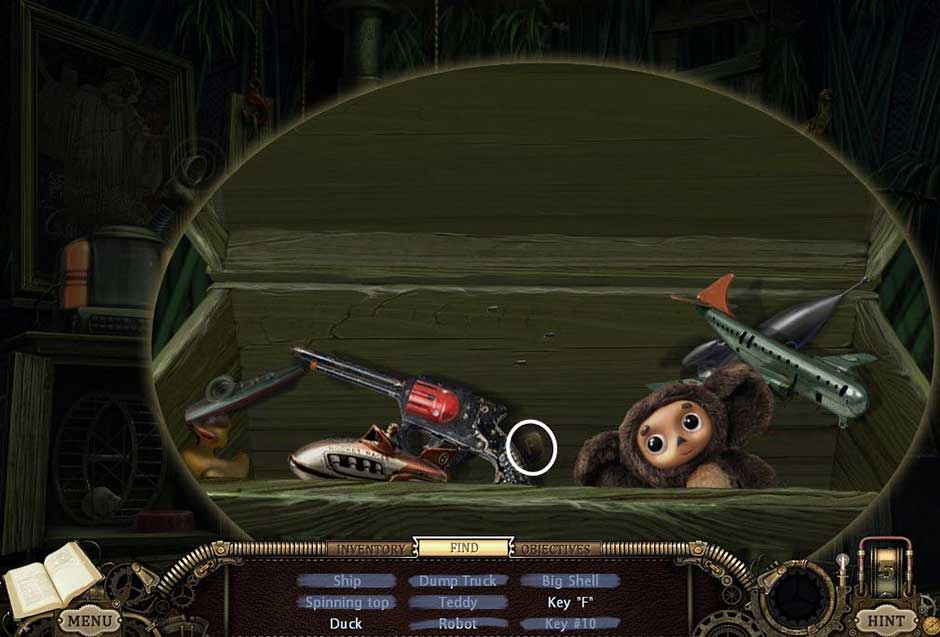
Hidden Expedition – The Uncharted Islands – Chapter 1ff
– Find all the listed objects.
– Get the F, 10 and Big Shell.
Hidden Expedition – The Uncharted Islands – Chapter 1gg
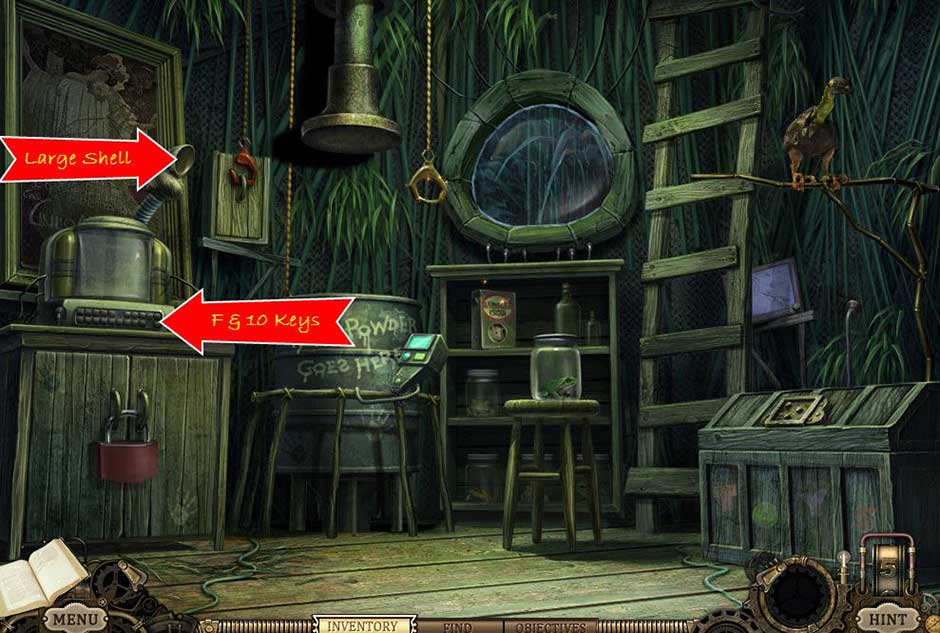
Hidden Expedition – The Uncharted Islands – Chapter 1hh
– Zoom in on the jukebox and place the F, 10 and Big Shell on it.
– Pull the lever and the bird cage will drop. Now you can climb the ladder.
– Zoom in on the Control Panel and set it on volcano. Finally, pull the launch lever.
Hidden Expedition – The Uncharted Islands – Chapter 1ii
Chapter 2 – The Forgotten City
– Take the Tire Iron.
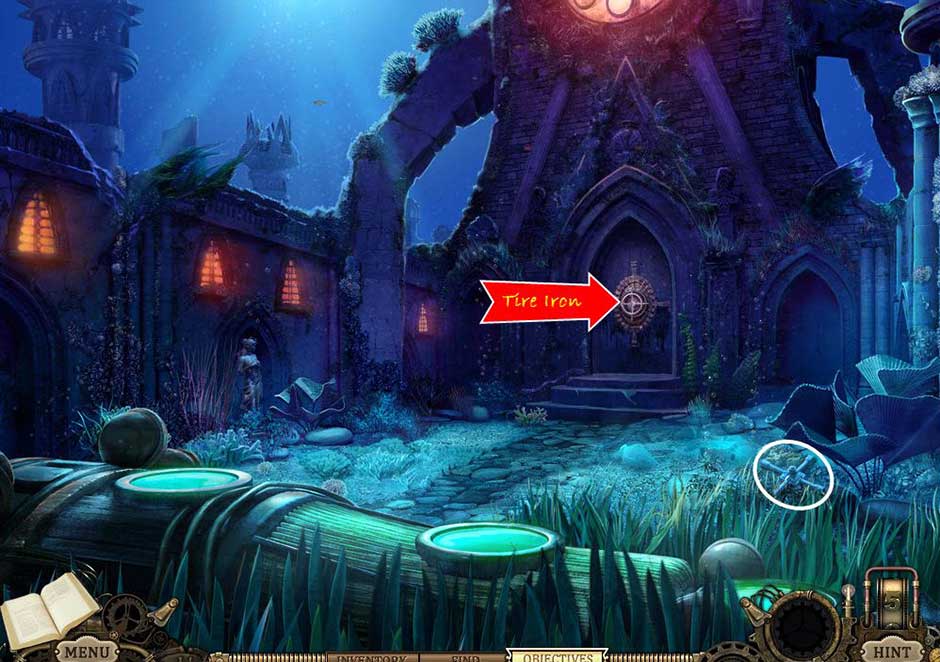
Hidden Expedition – The Uncharted Islands – Chapter 2a
– Zoom in on the door and use the Tire Iron on it.
– Go inside. Take the Hourglass.
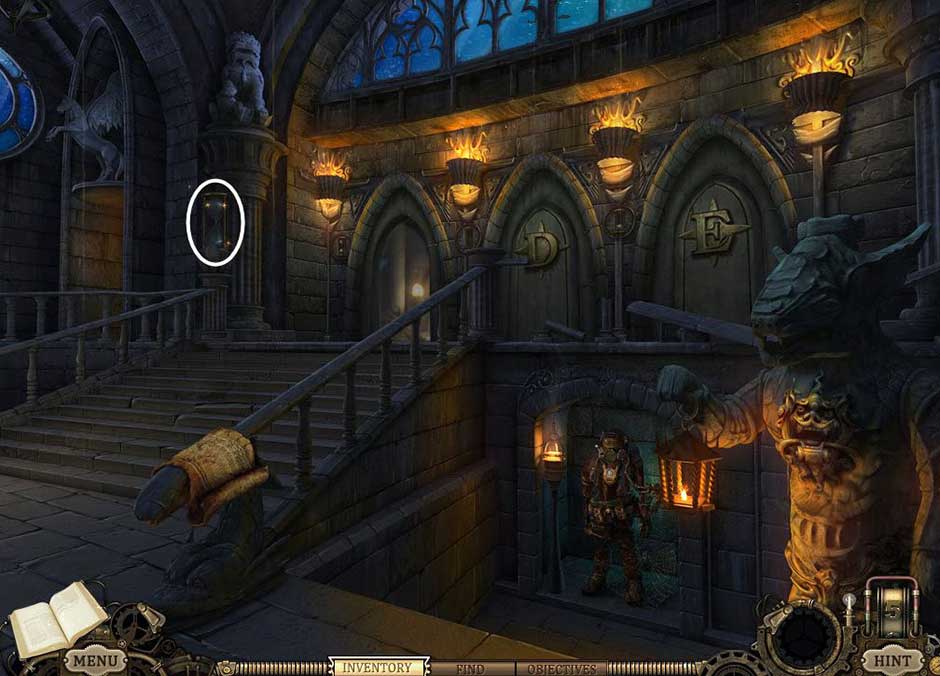
Hidden Expedition – The Uncharted Islands – Chapter 2b
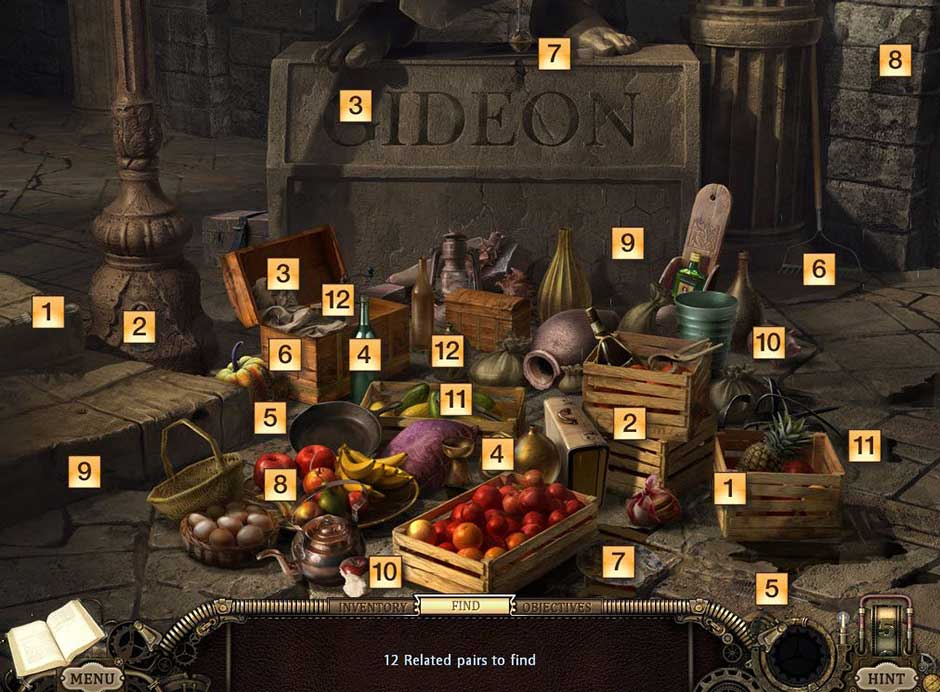
– Go to the left door and enter the room.
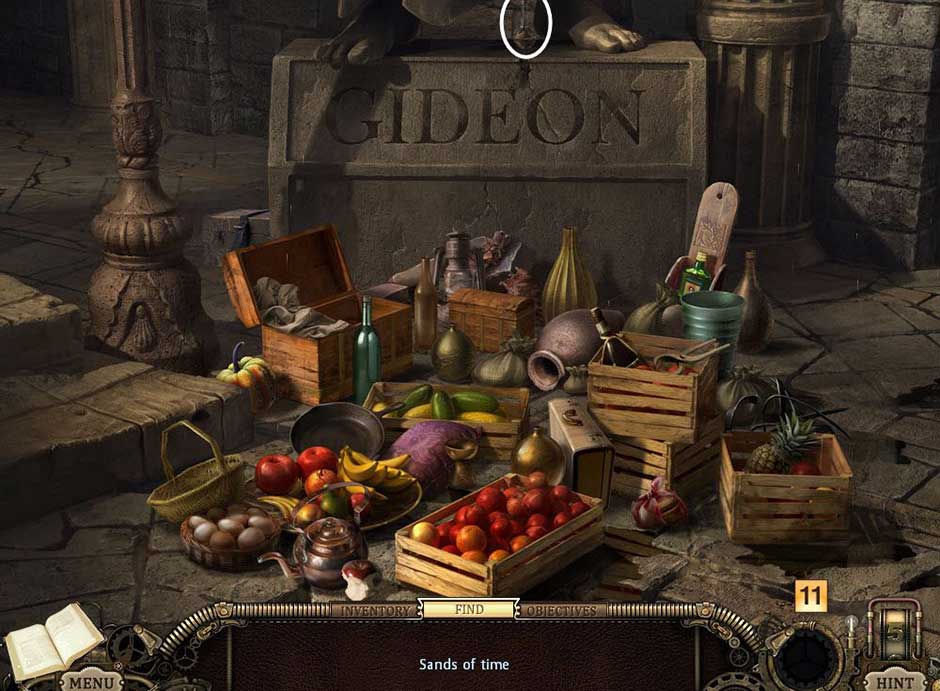
– Zoom in on the statue base. This triggers a puzzle. Find the 12 related pairs.
Hidden Expedition – The Uncharted Islands – Chapter 2c
– Get the Sands of Time.
Hidden Expedition – The Uncharted Islands – Chapter 2d
– Go up and then zoom in on the vending machine.
– Find the note from Undertow and read it.
– Get the Baseball Bat.
Hidden Expedition – The Uncharted Islands – Chapter 2e
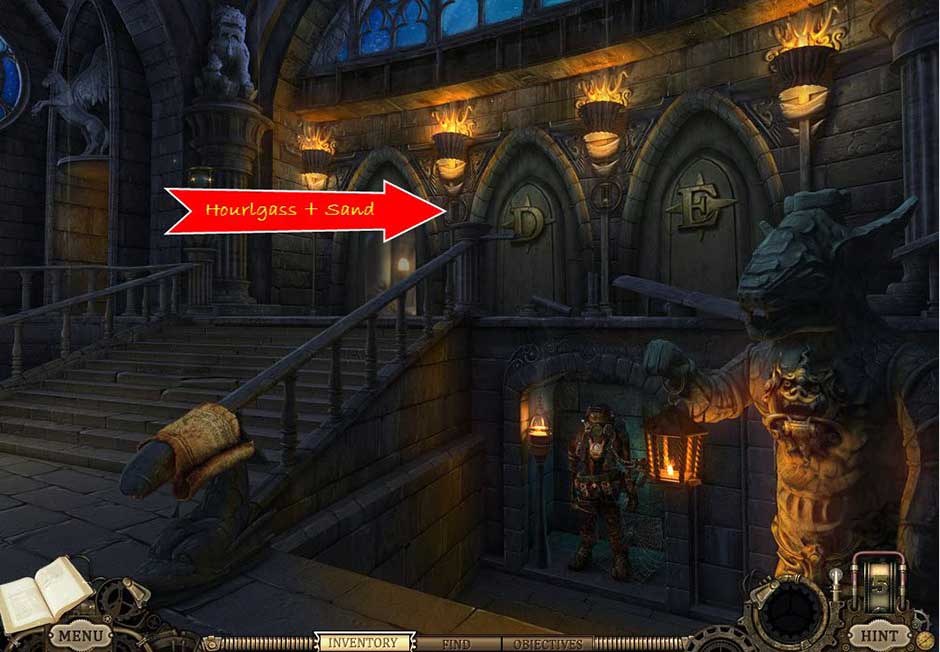
– Go back down two times.
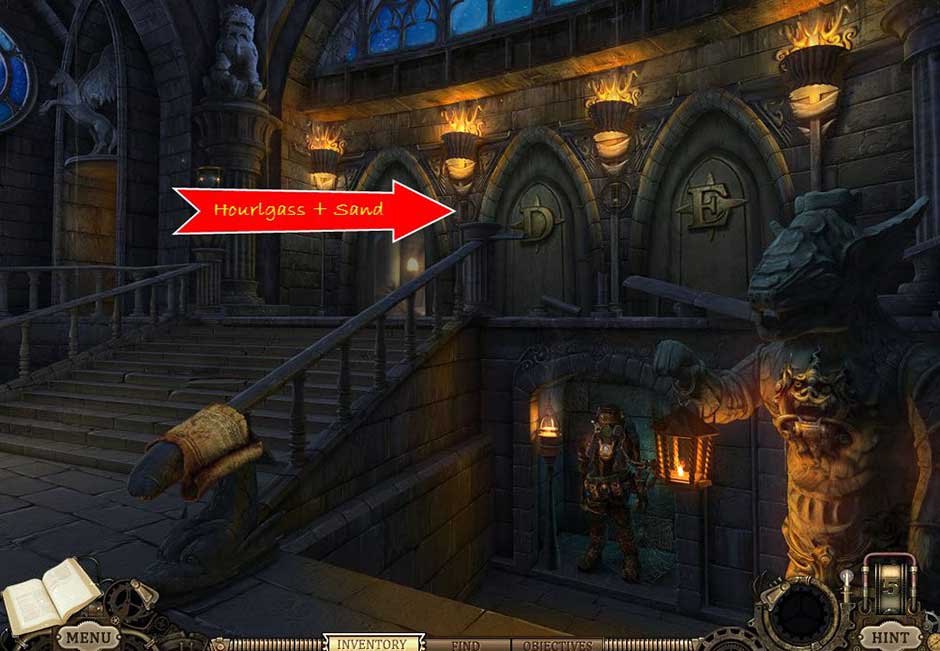
– Zoom in on the crevice by the middle door. Put the Hourglass and Sands of Timetogether and then place the combined item inside the hole.
– Go into the room.
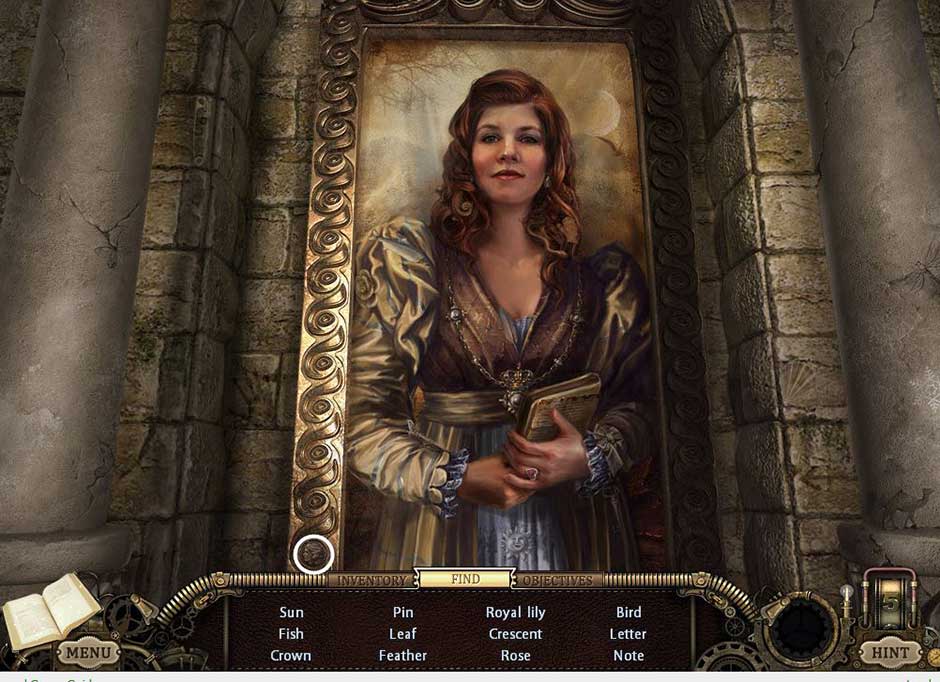
Hidden Expedition – The Uncharted Islands – Chapter 2f
– Zoom in on the portrait to activate a puzzle.
– Find all of the objects and get the Florin Coin.
Hidden Expedition – The Uncharted Islands – Chapter 2g
– Take the Crowbar.
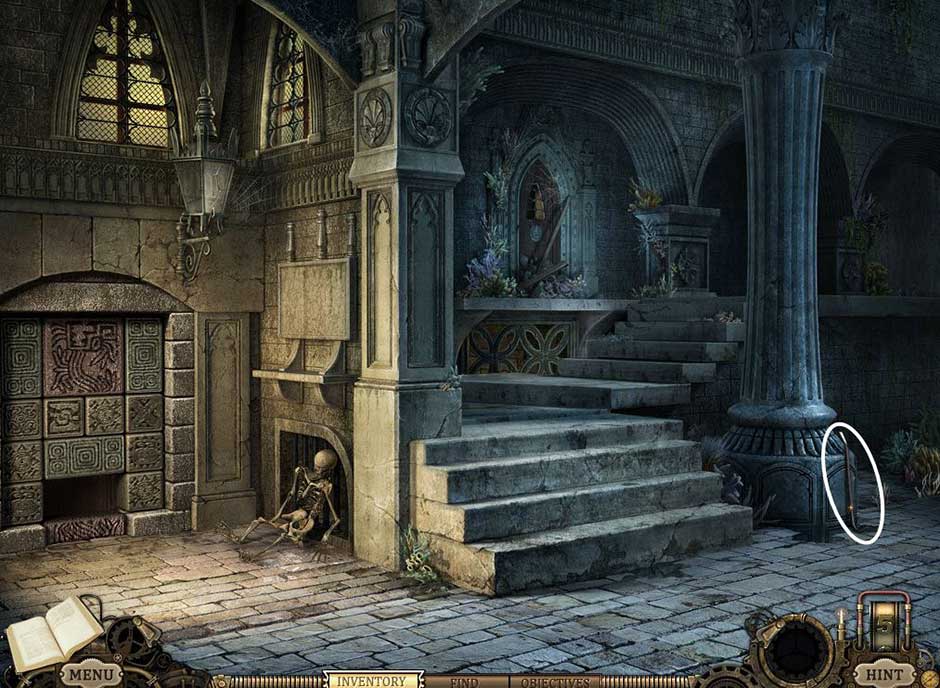
Hidden Expedition – The Uncharted Islands – Chapter 2h
– Zoom in on the skeleton and notice the drawings.
– Zoom in on the wall and activate the puzzle.
– Solve this puzzle by sliding the bricks around until the large square brick exits through the bottom.
– Take the Hammer.
Hidden Expedition – The Uncharted Islands – Chapter 2j
– Zoom in on the right diving suit and use the Crowbar on the left arm of it.
– Zoom in on the left diving suit. Use the Hammer on the left leg.
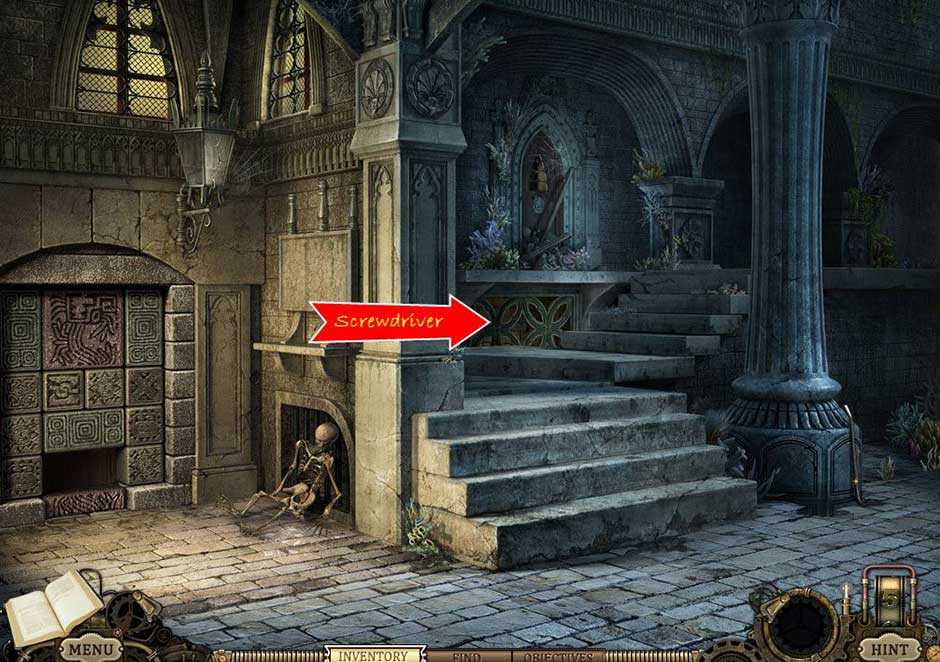
– Go to the left and activate the puzzle. Find all of the objects and get the Screwdriver.
Hidden Expedition – The Uncharted Islands – Chapter 2k
– Zoom in on the grate near the stairs. Remove the screws with the Screwdriver and then lift the grate.
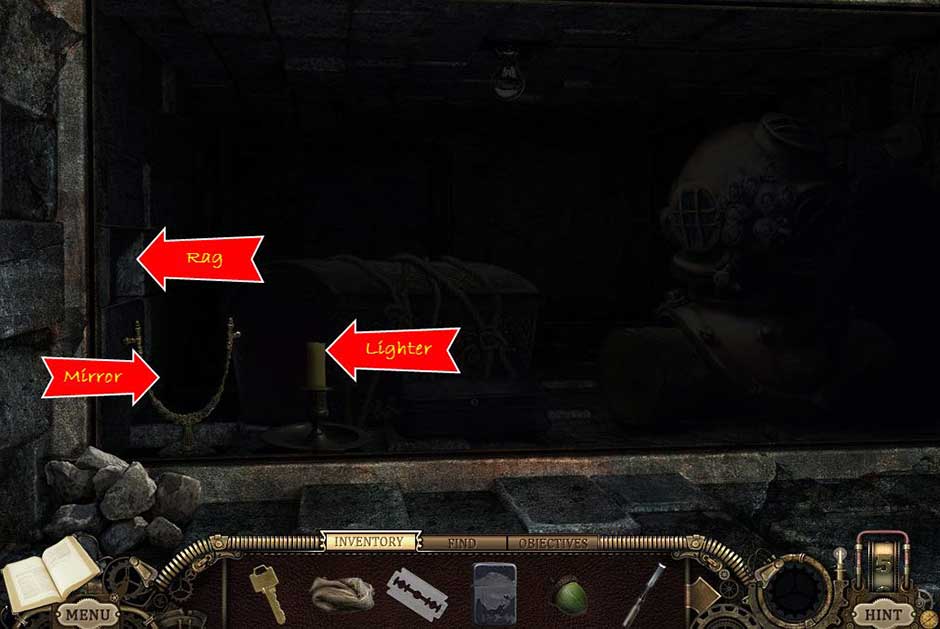
Hidden Expedition – The Uncharted Islands – Chapter 2l
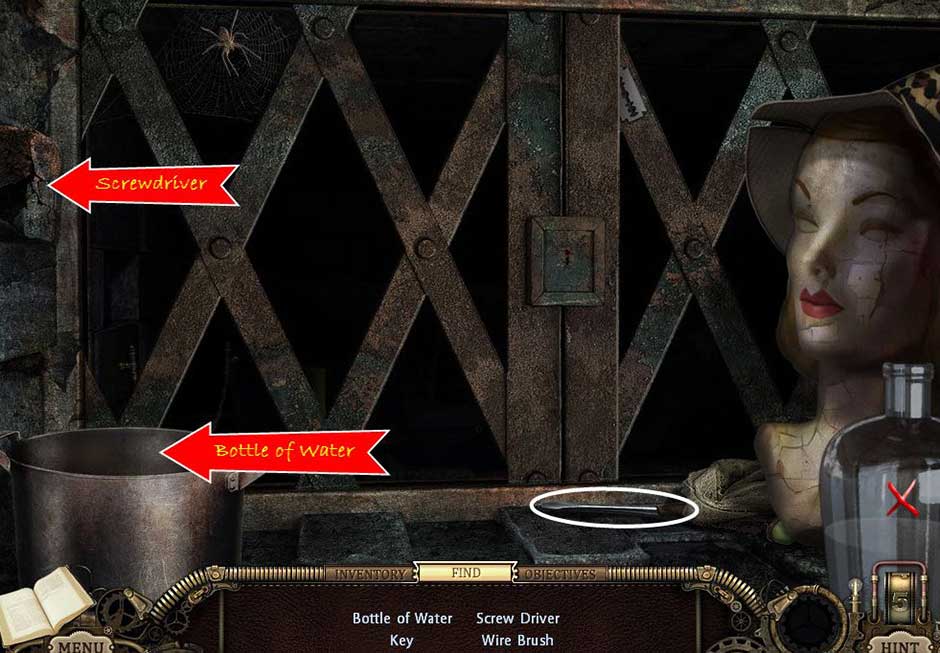
– Find all of the objects.
– Use the Bottle of Water with the bucket.
– Pick up the Key and the Wire Brush.
– Use the Screwdriver on the brick.
Hidden Expedition – The Uncharted Islands – Chapter 2m
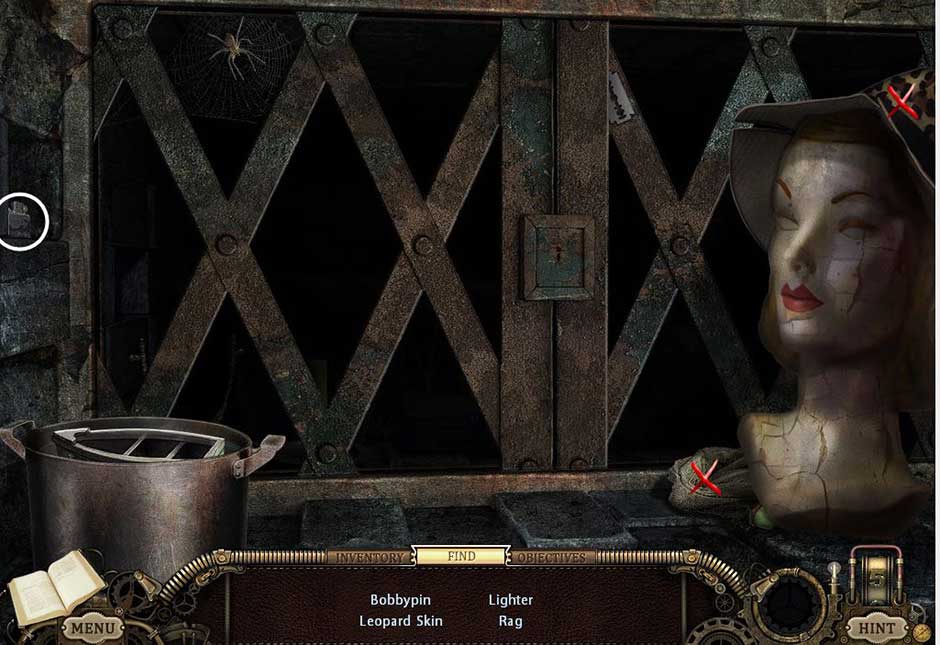
– Find all of the objects.
– Find the Bobby Pin underneath the hat.
Hidden Expedition – The Uncharted Islands – Chapter 2n
– Find all of the objects.
Hidden Expedition – The Uncharted Islands – Chapter 2o
– Find all of the objects.
– Turn on the light by flipping the switch.
Hidden Expedition – The Uncharted Islands – Chapter 2p
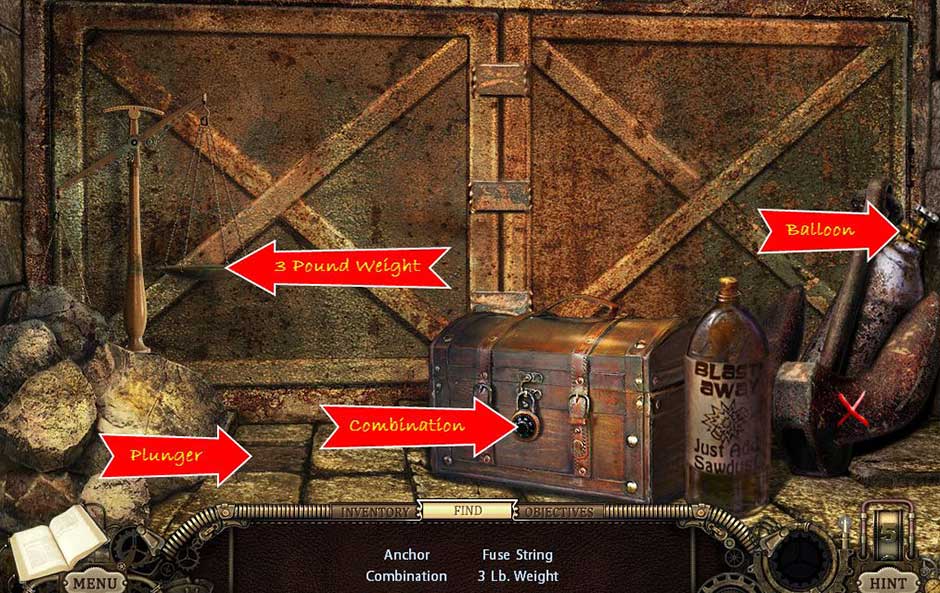
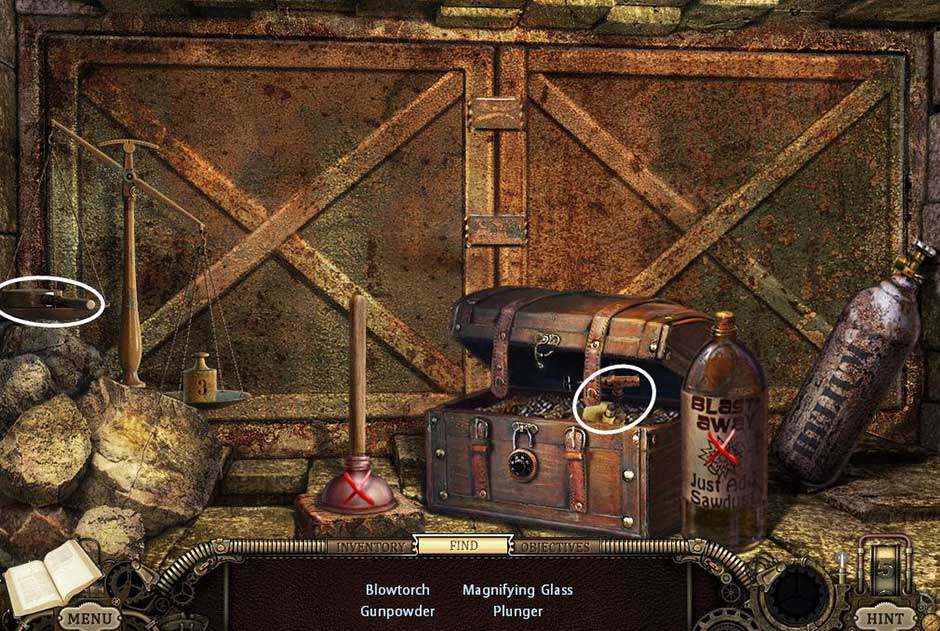
– Find all of the objects.
– Cut the ropes on the chest with the Razor Blade.
– Get the Plunger and Hammer. Combine the Hammer and Chisel. Use the combined item on the barnacles.

Hidden Expedition – The Uncharted Islands – Chapter 2q
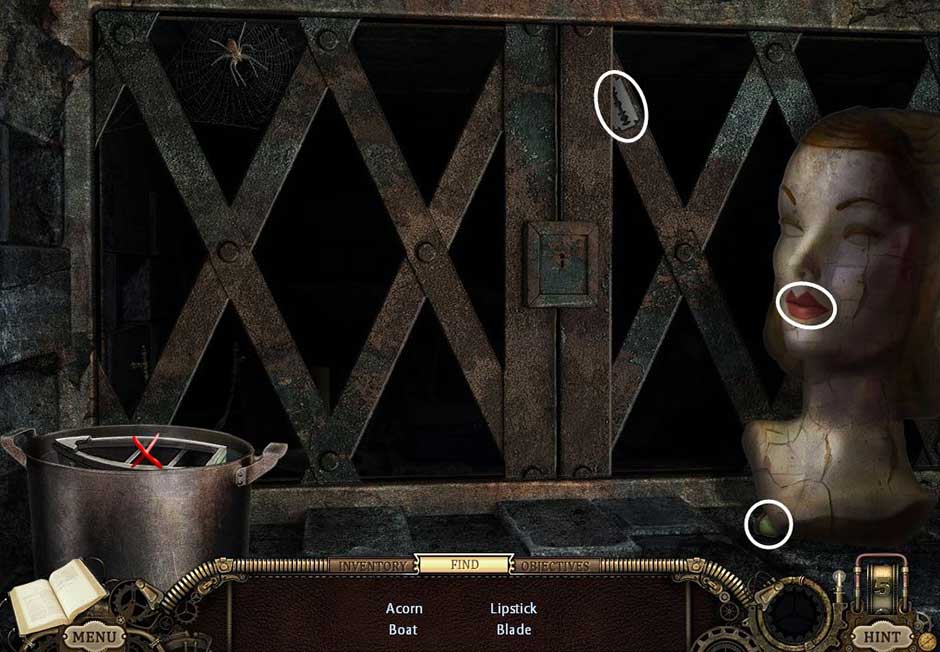
– Find all of the objects.
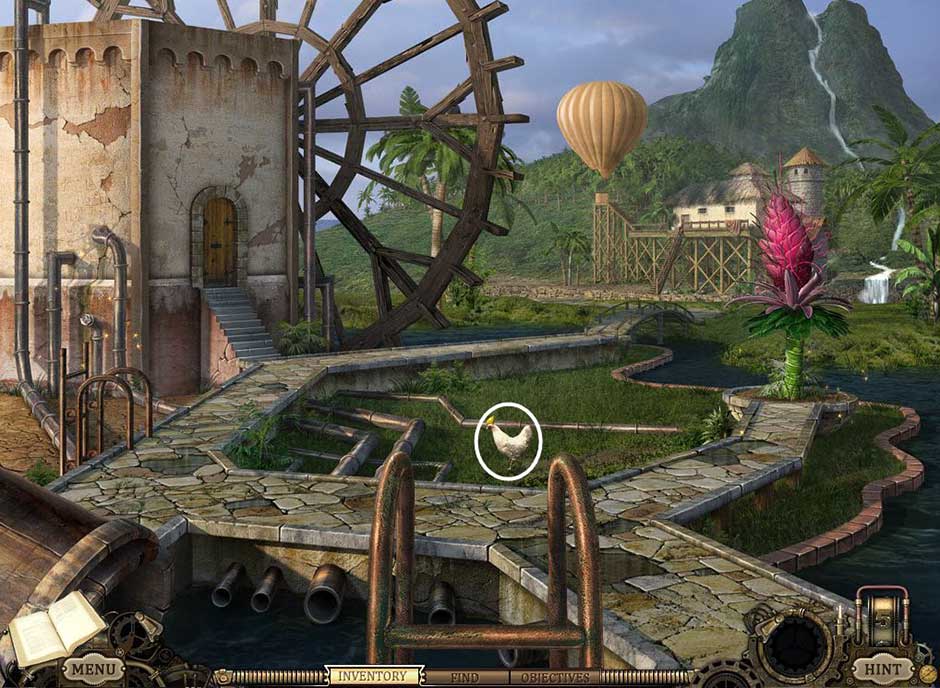
– Lure the chipmunk out with the Acorn.

Hidden Expedition – The Uncharted Islands – Chapter 2r
– Find all of the objects.
Hidden Expedition – The Uncharted Islands – Chapter 2s
– Find all of the objects.
– Pick up the Rope.
Hidden Expedition – The Uncharted Islands – Chapter 2t
– Zoom in on the door and open it.
– Go out the door on the left and then up two times. Zoom in on the vending machine and then put the Coin into it. Choose the Six.
– Retrieve the Raisins by using the Baseball Bat.
– Go back down two times and enter through the door on the right.
– Put the Trap and Raisins on the ground. Exit the room and then go back into it. Get theKey.
– Go up one time, turn left and then up two more times. Zoom in on the desk and then unlock it with the Key. This will activate a puzzle.
– Find all of the objects and get the Navigation Device.
Hidden Expedition – The Uncharted Islands – Chapter 2u
– Go back down two times and zoom in on the map. Put the Navigation Device on the middle of the map. This triggers a puzzle. The solution to the map puzzle is 1-8-0.
– Now zoom in on the diving suit to activate another puzzle. Change the bottom buttons so that they say A-4-3. Get the Helmet.
– Complete the Diving Suit and leave through the left door.
Hidden Expedition – The Uncharted Islands – Chapter 2v
Chapter 3 – Beware of the Undertow
– Click on the puffer fish.
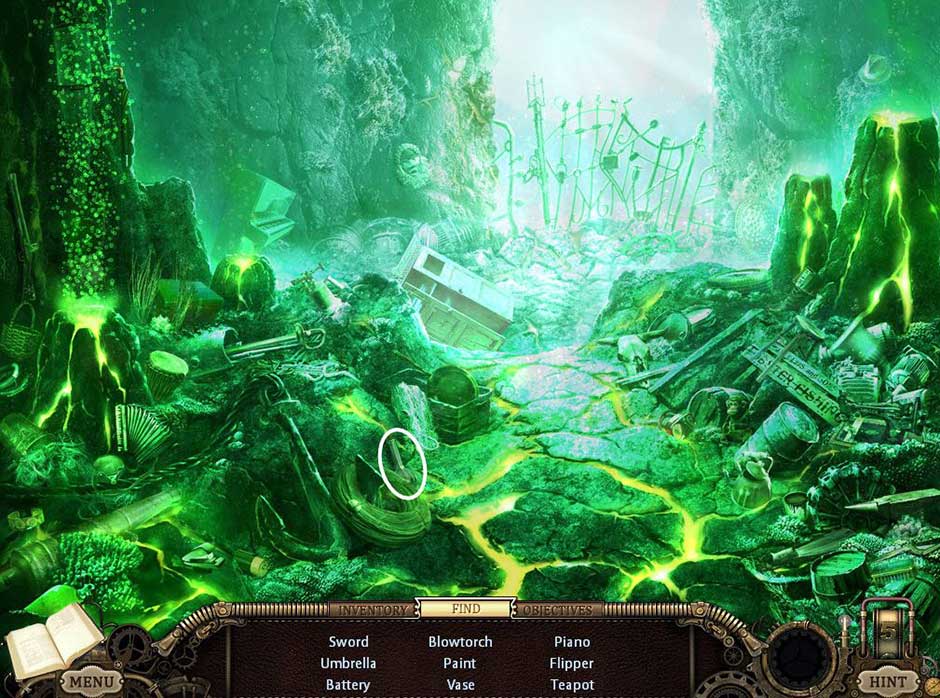
– Find all of the objects and get the Antidote.
Hidden Expedition – The Uncharted Islands – Chapter 3a
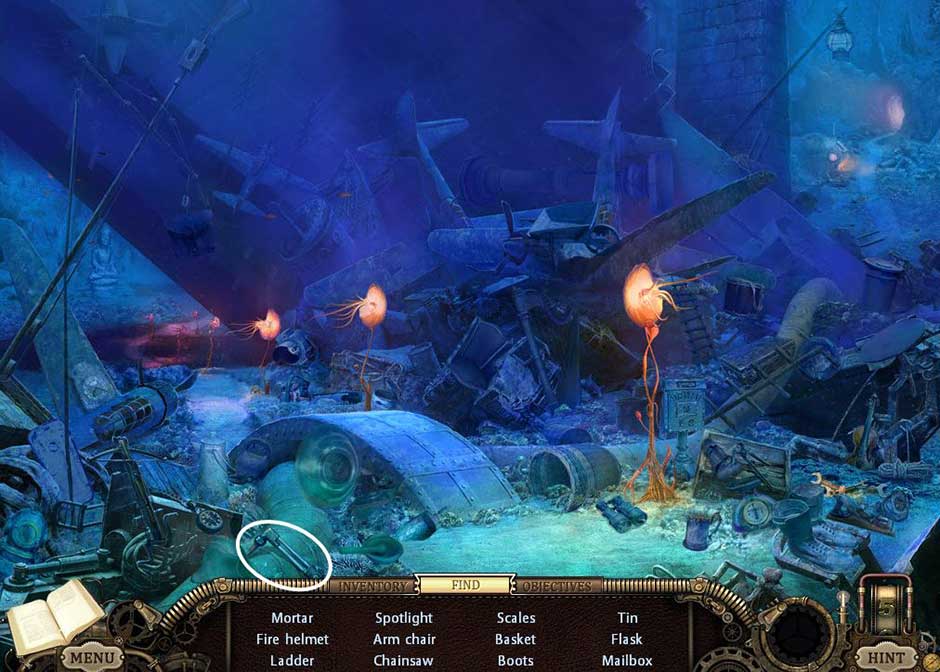
– Get the Chain Cutters.
Hidden Expedition – The Uncharted Islands – Chapter 3b
– Zoom in on the chained box and open it by using the Chain Cutters. Get the Keys.
– Read Undertow’s note.
– Go down and then up two times. Zoom in on the gate and unlock it with the Keys.
– A puzzle will be activated. Solve it by using two keys and sliding them so that there is a straight line of bars in the middle.
Hidden Expedition – The Uncharted Islands – Chapter 3c
– Speak with Sheldon.
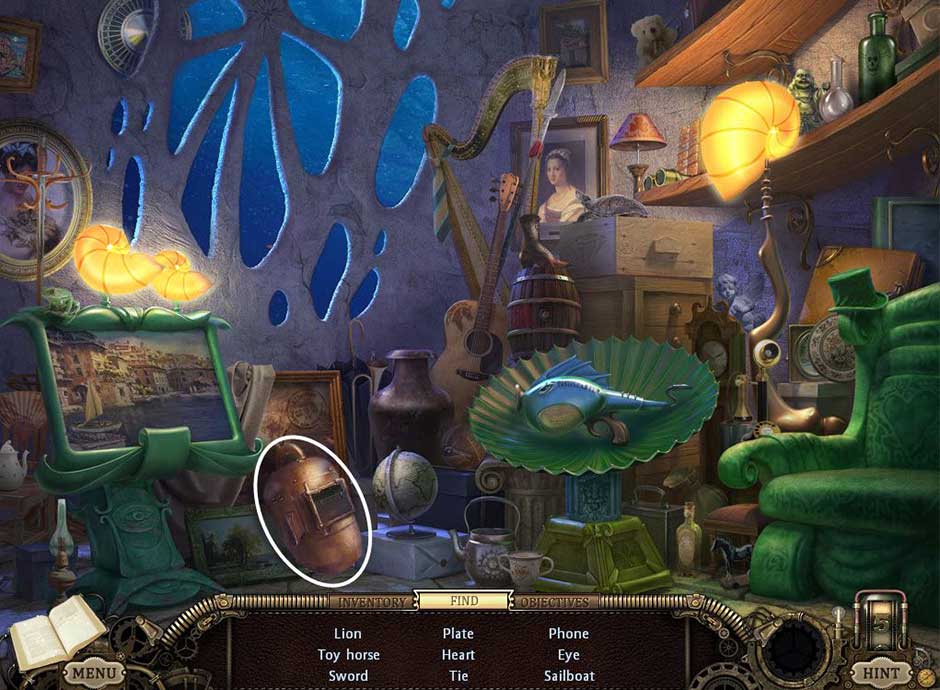
– Find all of the objects and get the Welder’s Mask.
Hidden Expedition – The Uncharted Islands – Chapter 3d
– Find all of the objects. Get the Cutting Torch.
Hidden Expedition – The Uncharted Islands – Chapter 3e
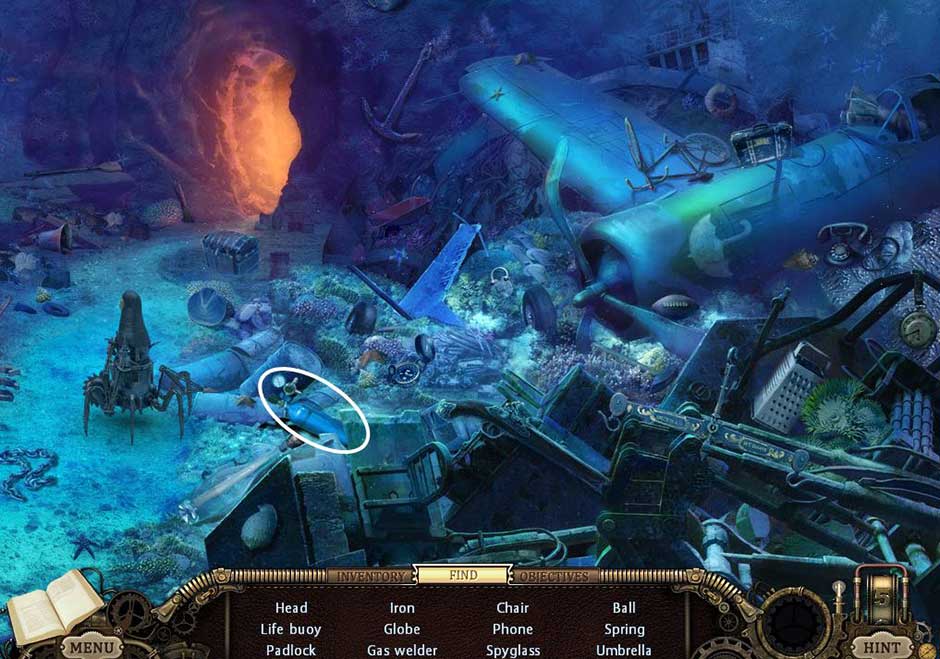
– Find all of the objects. Get the Oxygen Tank.
Hidden Expedition – The Uncharted Islands – Chapter 3f
– Zoom in on the door of the submarine. In your inventory, combine the Oxygen Tank andCutting Torch.
– Use the Welder’s Mask on the door and the Welder to cut it open. Go inside.
– Take the Hat and Pirate Cloak.
– Read the newspaper before climbing the ladder.
– Speak with Undertow.
– Find all of the objects. Get the Grater.
Hidden Expedition – The Uncharted Islands – Chapter 3g
– Find all of the objects. Get the Lantern.
Hidden Expedition – The Uncharted Islands – Chapter 3h
– Go down once and then up two times.
– Find all of the objects and get the Hub Cap.
Hidden Expedition – The Uncharted Islands – Chapter 3i
– Go back inside the submarine and go upstairs to speak with Undertow.
– Go forward once and get the Drill.
– Zoom in on the drawing and then the control panel.
– Activate the puzzle. Solve it by winning three tic tac toe games.
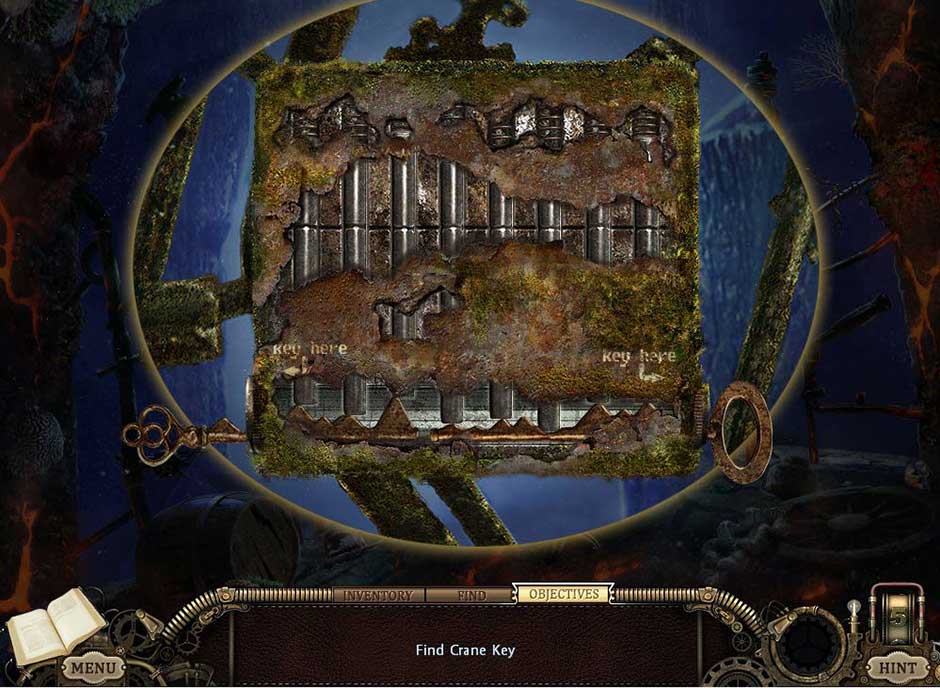
– Find all of the objects. Get the Crane Key.
Hidden Expedition – The Uncharted Islands – Chapter 3j
– Replace the Crane Key. Pull the right lever to the left, pull the left one down and then up, pull the right lever to the middle and then the left one down. Go down two times and turn left.
– Get the Parrot Food.

Hidden Expedition – The Uncharted Islands – Chapter 3k
– Go back to the submarine and give the Parrot Food to the parrot.
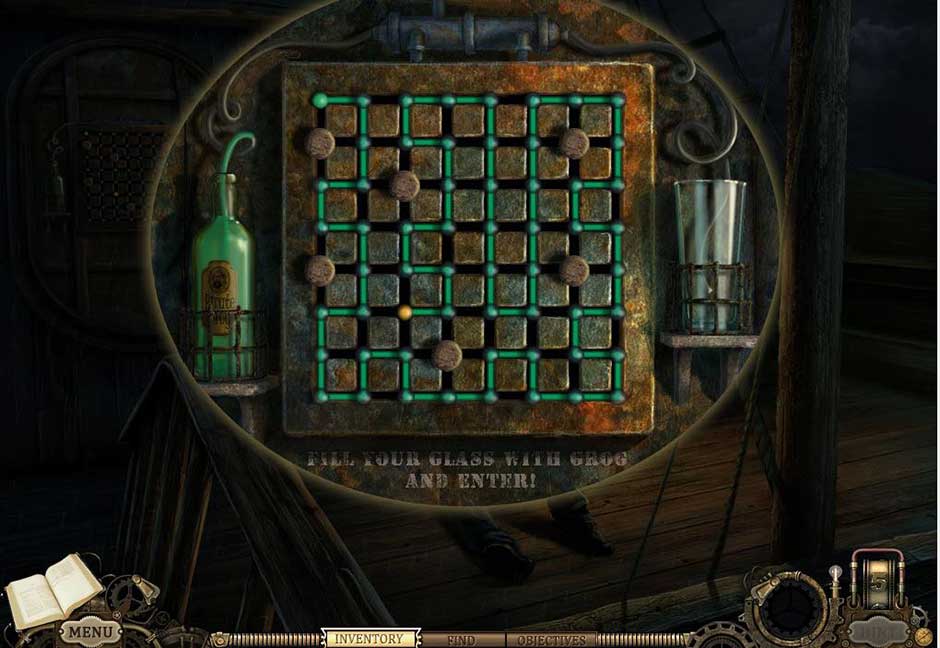
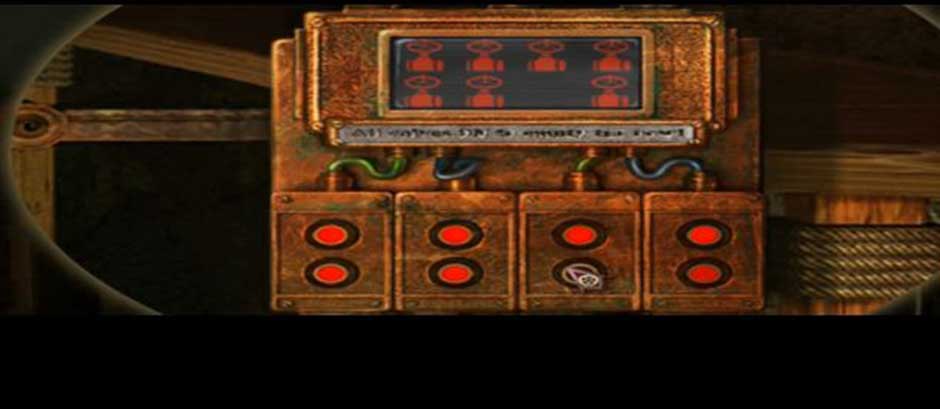
– Zoom in on the machine and activate the puzzle. Solve it by placing the large circles in a symmetrical pattern with the small ones. The code is F-Z-2-7.
– Pick up the Drill Bit and combine it with the Drill in your inventory.
– Speak with Sheldon.
– Get the Fishmaster. Go down two times, turn left and then right before going up. Get the Hook.
Hidden Expedition – The Uncharted Islands – Chapter 3l
Hidden Expedition – The Uncharted Islands – Chapter 3l2
Chapter 4 – The Reunion
– First, speak with Ralph.
– Go through the door on the right.
– Pick up the Chicken, Fishing Pole and Shovel.

Hidden Expedition – The Uncharted Islands – Chapter 4a
– Zoom in on the clock and trigger the puzzle. Solve it by giving the man the fishing pole, winding up the clock and then clicking on the man so that he drops the fishing pole when the fish is in front. Pick up the Chain.
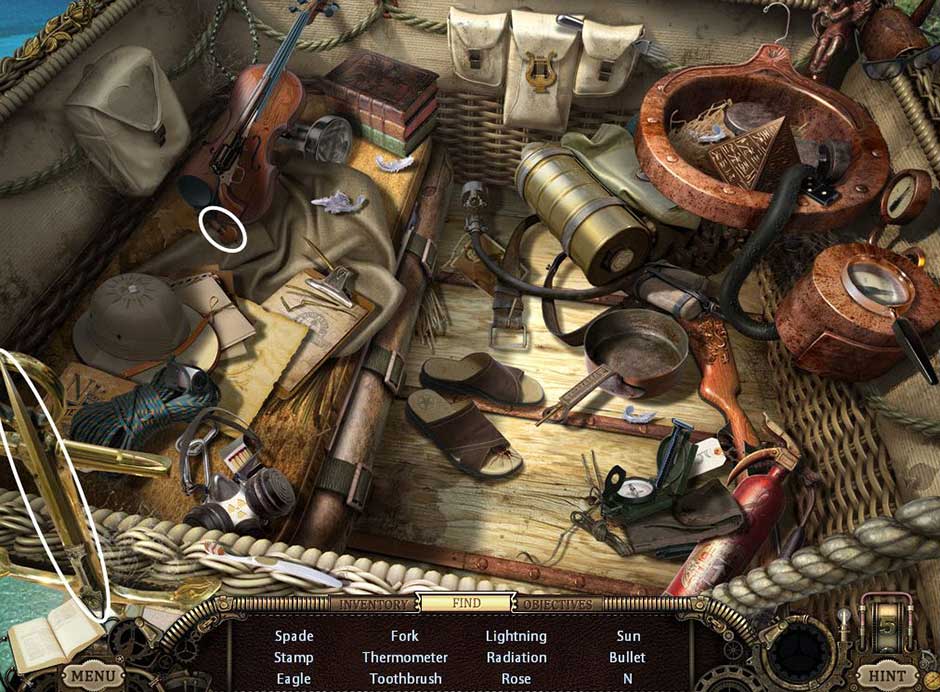
– Find all of the objects.
– Get the Grabber and the Hook.
Hidden Expedition – The Uncharted Islands – Chapter 4b
– Replace the Chain and then get the Ladder.
– Place the Ladder under the shorter one and then climb up it. Get the Chicken.
Hidden Expedition – The Uncharted Islands – Chapter 4c
– Dig up the plant on the left with the Shovel.
– Clear the manhole cover and use the Hook on it. Pick up the Baseball.
– Zoom in on the left door and enter.
– Get the Chicken with the Grabber.
– Take the Paint Remover and Fumigator.
Hidden Expedition – The Uncharted Islands – Chapter 4d
– Throw the Baseball at the dog.
Hidden Expedition – The Uncharted Islands – Chapter 4e
– Remove the cap with the Wrench.
– Find all of the objects and get the Key.
Hidden Expedition – The Uncharted Islands – Chapter 4f
– Find all of the objects. Get the Scissors and Chicken.
Hidden Expedition – The Uncharted Islands – Chapter 4g
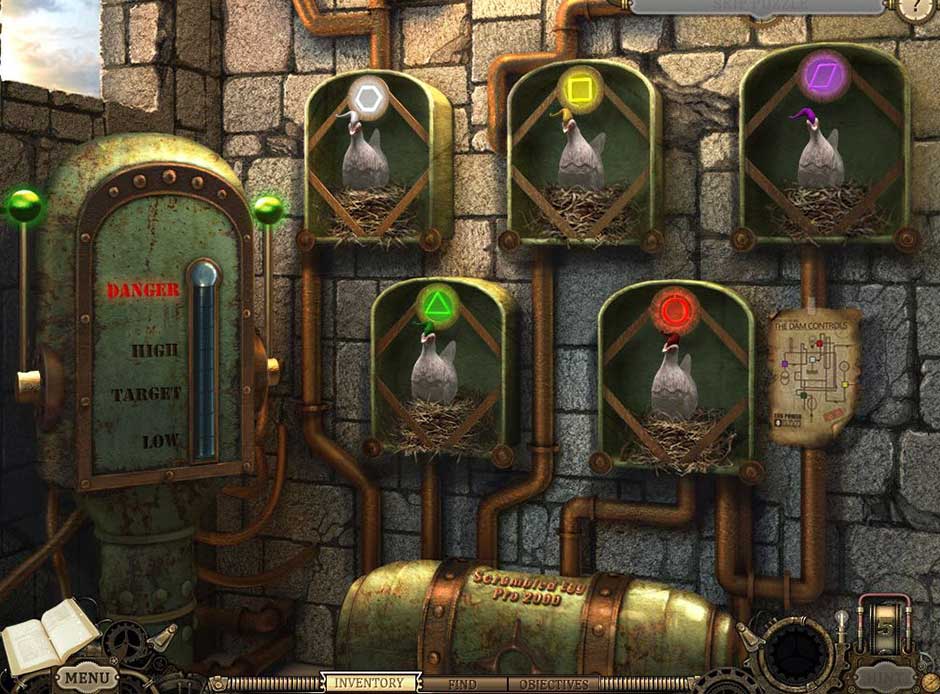
– Zoom in on the nests and activate the puzzle. The solution is right, left, right, right, left.
Hidden Expedition – The Uncharted Islands – Chapter 4h
– Find all of the objects. Get the Knife and Tuning Peg.
Hidden Expedition – The Uncharted Islands – Chapter 4i
– Go down once and zoom in on the door. Replace the Tuning Key. This triggers a puzzle. Solve it as shown.

Hidden Expedition – The Uncharted Islands – Chapter 4j
– Zoom in on the panel and solve the puzzle.
– Cut it all down with the Knife.
– Speak with Delia and Gideon.
– Get the Amplifier.
– In your inventory, combine the Amplifier and Fishmaster. Use the combined item on Undertow.
Hidden Expedition – The Uncharted Islands – Chapter 4k
Great job! You have reached the end of the Hidden Expedition – The Uncharted Islands Walkthrough.
For more great tips and tricks, visit our blog!
The Hidden Expedition – The Uncharted Islands Walkthrough is meant as a guide and does not contain cheats, hacks or serials.