Mystery Mosaics riddle the land with promises of a mysterious power hidden away. Solve the puzzles and discover the secret images hidden within each puzzle. Our Mystery Mosaics walkthrough will guide you through all the tips and tricks you need to start on your fantastical journey through a mystical land of the unknown.
Contents
How to Play
Mystery Mosaics is a puzzle game comprised of two game types: Pic-a-Pix, and Fill-a-Pix. The goal of both these puzzle types is to fill in the picture hidden within the board. Each type has a unique set of rules, which are outlined here:
Pic-a-Pix
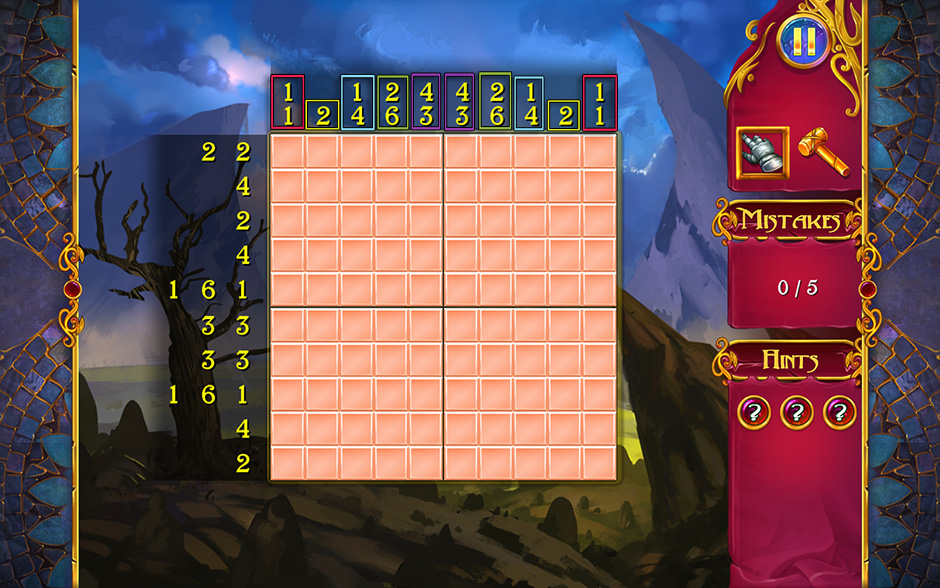
Pic-a-Pix is the first of the two gameplay types you can choose from. You will be given a grid with numbers next to each row and column.
- Numbers next to each row and column indicate how many filled squares will be in that line.
- Numbers will appear red if you are currently hovering your cursor over their row or column.
- Once the correct tiles have been selected on the board, the number displayed will automatically be crossed off.
- Any mistakes you make will be kept track of on the right. Once you make more than 5 mistakes, you will fail the puzzle and need to try again.
- Left-click to fill a square and right-click to cross off a square that won’t be filled. You can also select the gauntlet and hammer icons toward the upper right to toggle these modes if you’re unable to left and right click.
- You do not need to cross off all the squares that aren’t filled, only fill all the squares that need to be filled. Complete the secret image in the board to complete the puzzle!

Mystery Mosaics Pic-a-Pix
Fill-a-Pix
In this game type, the goal is to fill in the board correctly according to the numbers displayed within the squares on the board.
- Each number is a clue and indicates how many of the surrounding squares, including the numbered square itself, must be filled with the corresponding color.
- 9’s and 0’s are easy- these indicate that either all or none of the surrounding squares respectively need to be filled.
- 4’s in corners, or 6’s on a puzzle’s edge are just as easy, as there’s only one correct solution.
- Once the requirements of a displayed number have been properly filled in, a small dot will appear in the upper right corner next to that number.
- Left-click to fill a square with a color, and right-click to cross it off. You can select additional colors as needed via the palette on the right side of the screen.
- When playing with multiple colors, a check mark over a color will indicate that numbers of that particular color on the puzzle are already solved. When you switch colors, numbers and tiles of other colors will automatically fade out.

Mystery Mosaics Fill-a-Pix Colors
Tips & Tricks
If you’re in need of a few extra tips and tricks, not to worry. This section outlines extra helpful tips and tricks divided per game type.
General Tips and Tricks
These tips and tricks apply to both Pic-a-Pix and Fill-a-Pix gameplay types:
- Each puzzle will create a finished picture or pixel artwork at the end. If you recognize what the picture is of, you can often anticipate where a filled square should be, even if you’re not sure of the numbers.
- Puzzles are often symmetrical. If you notice a number pattern that is the same at both the top and bottom, or both the left and right, this is often an indication that the same squares on each side will need to be filled and crossed off the same way. Use this to your advantage when completing puzzles.
Mystery Mosaics Puzzle Symmetry
- Hints are limited in quantity, however for every correct tile you fill, you will put a charge toward being able to use it again. Hints will appear green when they can be used. Hints may reveal the locations of squares that need to be filled, or remove squares as needed on the board for you.
- Puzzles will increase in size and difficulty as you unlock new locations. Use these tips and tricks to solve them all!
Pic-a-Pix
These tips and tricks are unique to the Pic-a-Pix gameplay type:
- Click and hold to select large sections of squares at a time. You can both fill and cross off tiles this way.
- If you click and hold, you can right-click to cancel an action if you realize part way through that you’re making a mistake.
- Always start by filling in the columns and/or rows that either have all squares filled, or no squares filled. This will oftentimes give you a solid basis on which to start solving a puzzle.
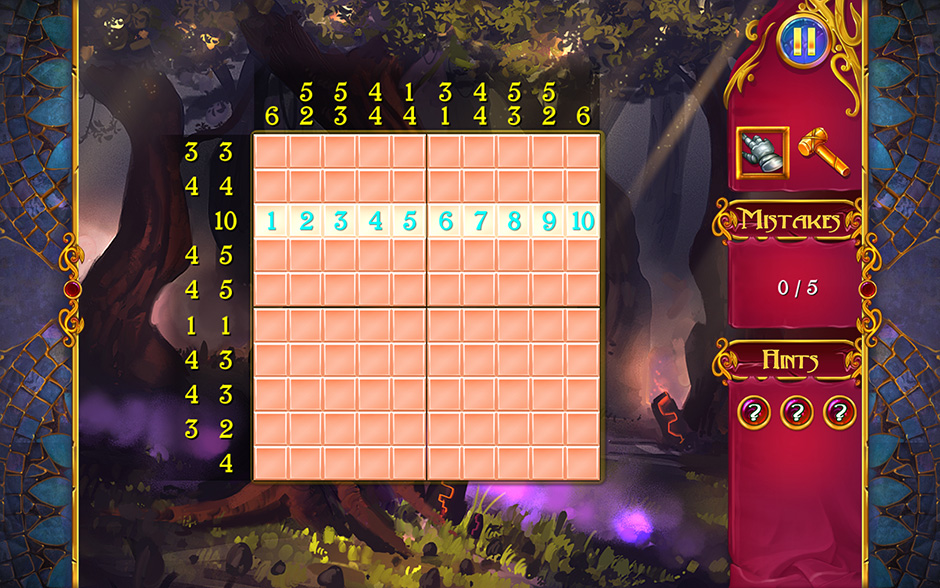
Mystery Mosaics Full Puzzle Row
- Always cross off any excess squares remaining when a row or column has been completed. This will visually make things easier for you when solving the rest of the puzzle.
- If a tile has been filled and there are additional tiles left to be filled in that row, but that square is located on an edge, then it means that the squares that do need to be filled will be directly connected to it. Use this tactic to “work across” boards.

Mystery Mosaics Puzzle Fill Tactic
- If you encounter a section of say, 5 tiles, and 3 of them need to be filled, you may not know which tiles they are at first. However, in these scenarios, there is 1 common tile that would be filled no matter where the others are. Fill these squares and use this tactic to work your way around. It may just help you with another row or column you may be struggling with.
Fill-a-Pix
These tips and tricks are specific to the Fill-a-Pix gameplay type:
- Always start by filling in any numbers that require all boxes around them to be filled, such as 9’s, 6’s on edges, or 4’s in corners.
- Cross off any boxes that do not require a square to be filled. This will help you keep track and solve puzzles easier.
- Use hints as needed. When using a hint, select the specific square you need help with.
- Start with the colored numbers that are the simplest to solve, then work your way to the harder ones.
Mystery Mosaics Walkthrough
Mystery Mosaics riddle the land and hold the key to an ancient power. But as with any mythical artifact, evidence is scarce and not easily found. Embark on a quest to discover the hidden secrets of the Mystery Mosaics! Our walkthrough will guide you through the solutions of the first handful of locations in the Pic-a-Pix gameplay mode.
Forest of Relics
The southern forests are riddled with evidence of an ancient civilization. Their artifacts hold the promise of great power, but no one has yet unlocked their secrets. It was here that the first Mosaics were discovered; perhaps they hold the key to these ancient relics?
Puzzle 1
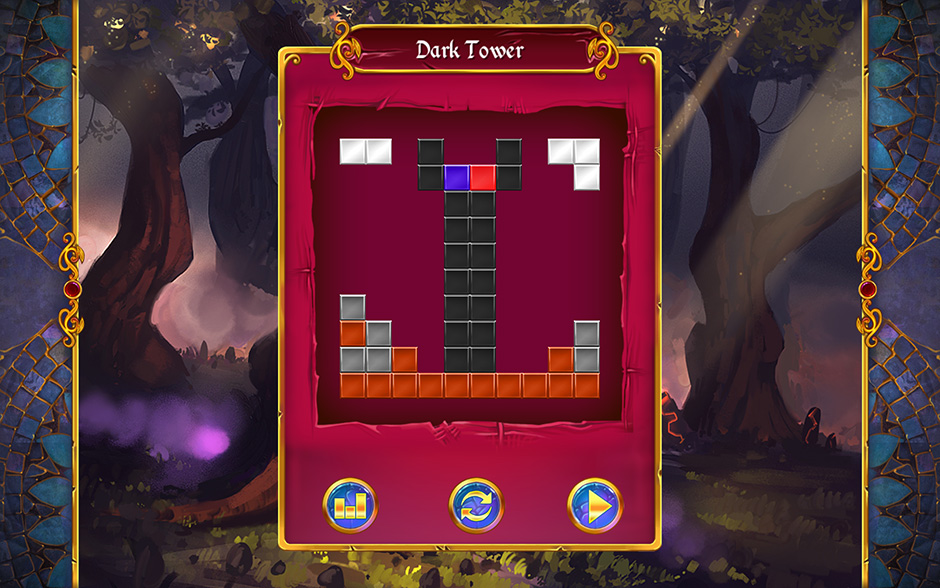
- Start by filling in the bottom row of 10, then fill the middle columns of 9 by working up from the bottom filled row. Cross off the remaining squares in the columns of 9, then work your way around.
- The solution is a Dark Tower, pictured below.
Mystery Mosaics Forest of Relics Puzzle 1
Puzzle 2
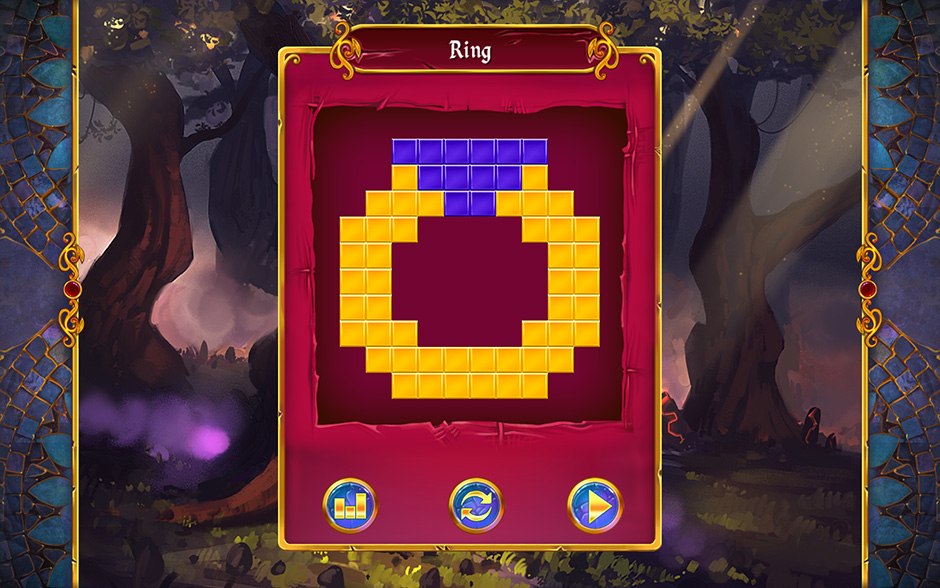
- Fill in rows of 8, crossing off the 1st and 10th square of these rows. Use this as a basis to work your way around the puzzle board.
- The solution is a Ring, shown below.
Mystery Mosaics Forest of Relics Puzzle 2
Puzzle 3
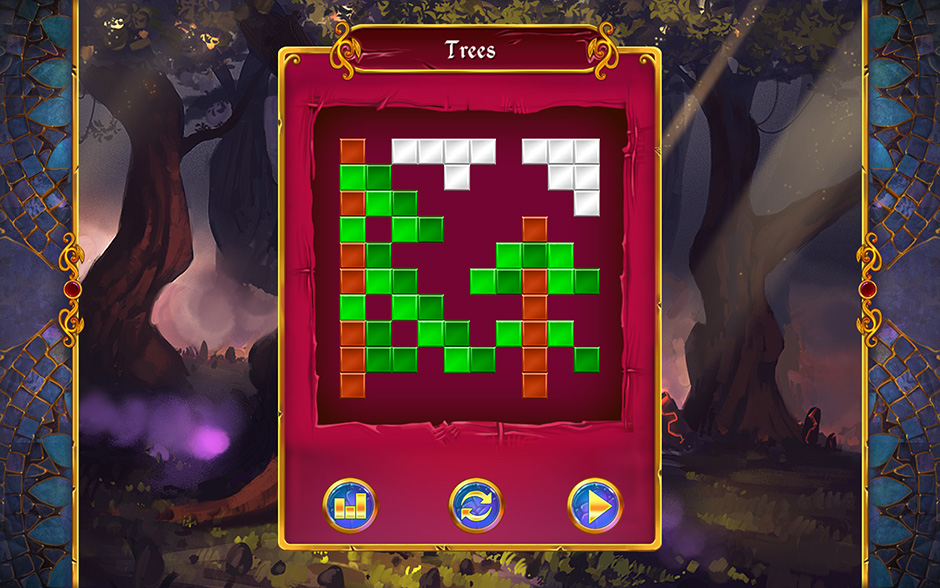
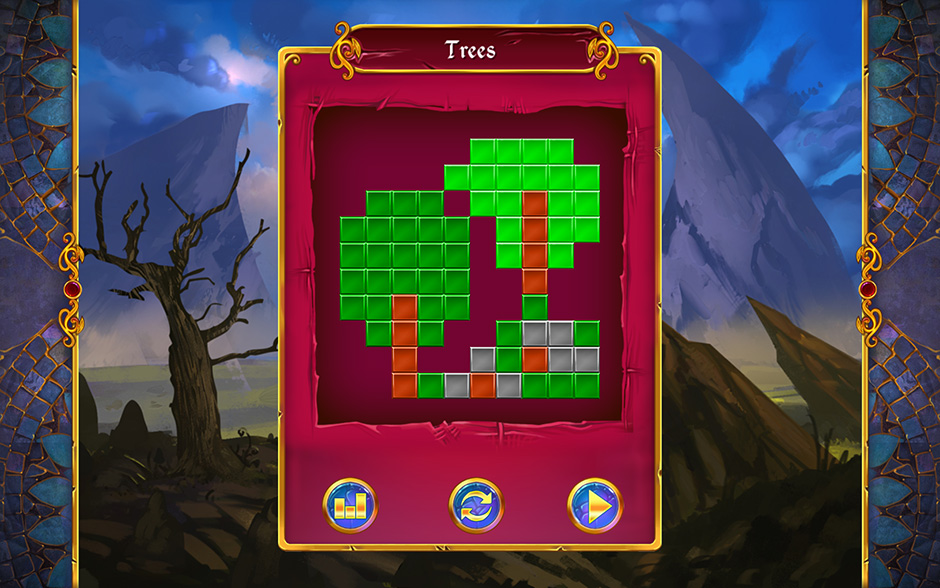
- Fill in the column of 10 first and foremost. This will give you a solid basis for the start of every row on the left.
- The solution is Trees, which is shown below.
Mystery Mosaics Forest of Relics Puzzle 3
Puzzle 4
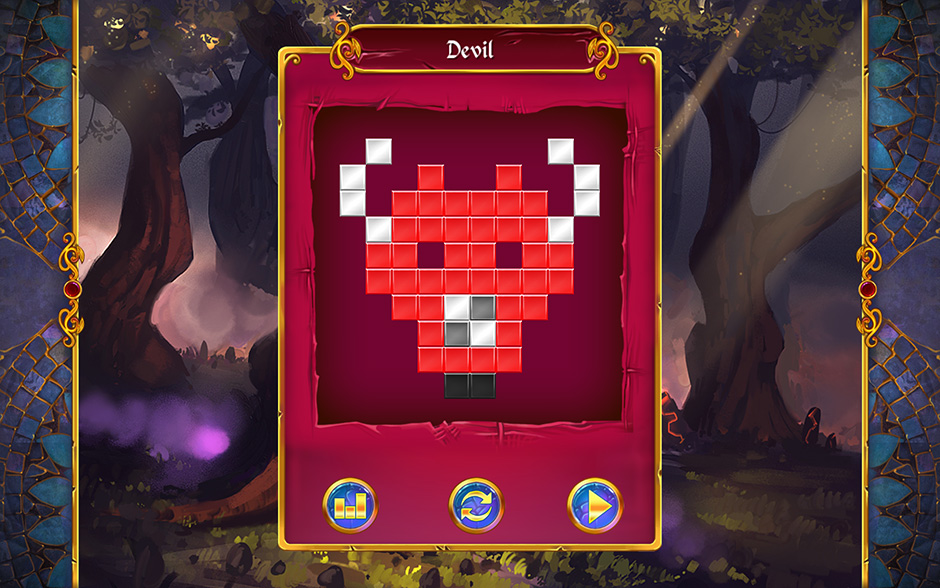
- Fill in the columns of 8 starting from the bottom of the board. This will allow you to cross off all the remaining squares for the row of 2 at the bottom of the board. Work your way around from here, keeping in mind this is a symmetrical puzzle: The left and right portions of the board are balanced, so you can use this to your advantage to solve it quickly.
- The solution is a Devil, and is shown below.
Mystery Mosaics Forest of Relics Puzzle 4
Puzzle 5
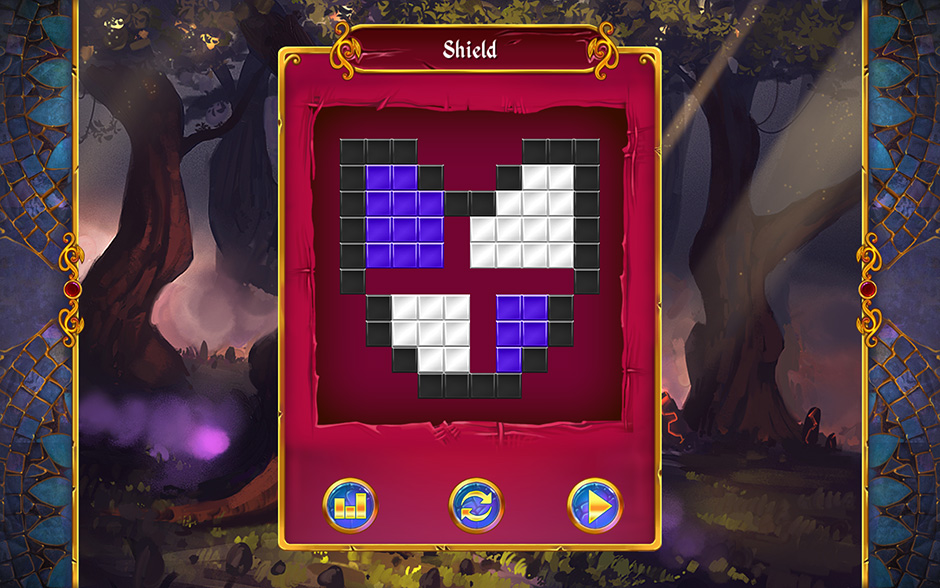
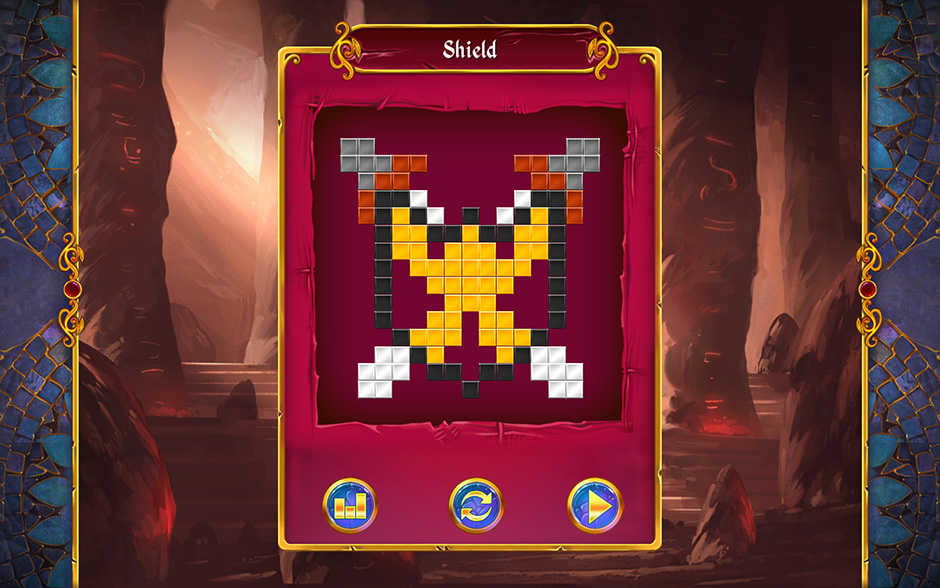
- Fill in the row of 10 first and foremost, then fill the columns of 6 starting from the top on either side of the puzzle. Cross off the remaining squares in the columns of 6 to build a basis for the rest of the board.
- The solution is a Shield, shown below.
Mystery Mosaics Forest of Relics Puzzle 5
Puzzle 6
- This is a symmetrical puzzle: the left and right sides of the board reflect each other.
- The solution is a Magic Wand and is shown below.

Mystery Mosaics Forest of Relics Puzzle 6
Puzzle 7
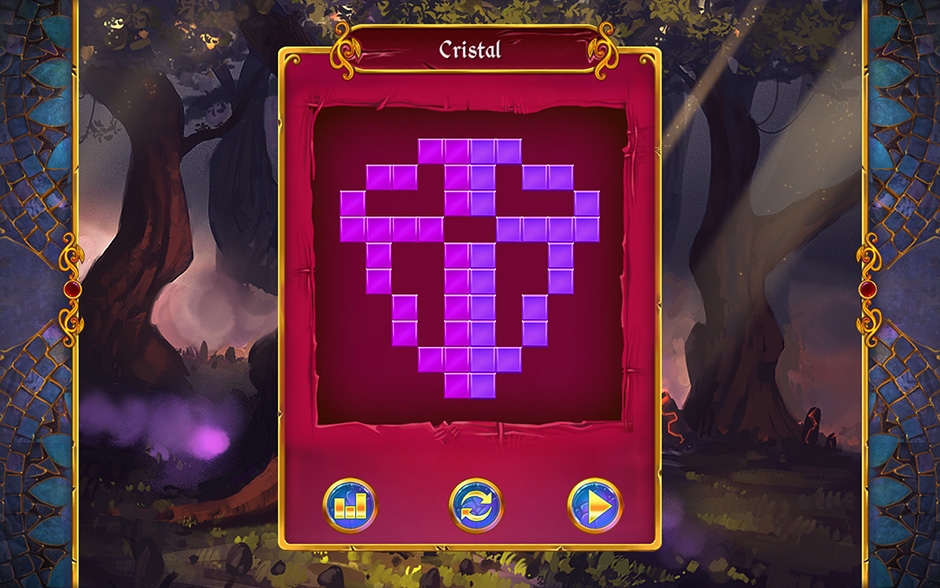
- Fill in the center columns of 3 and 6, leaving the space in the only spot available. This is a symmetrical puzzle, so the left and right sides reflect each other and require the same actions.
- The solution is a Crystal, shown below.
Mystery Mosaics Forest of Relics Puzzle 7
Puzzle 8
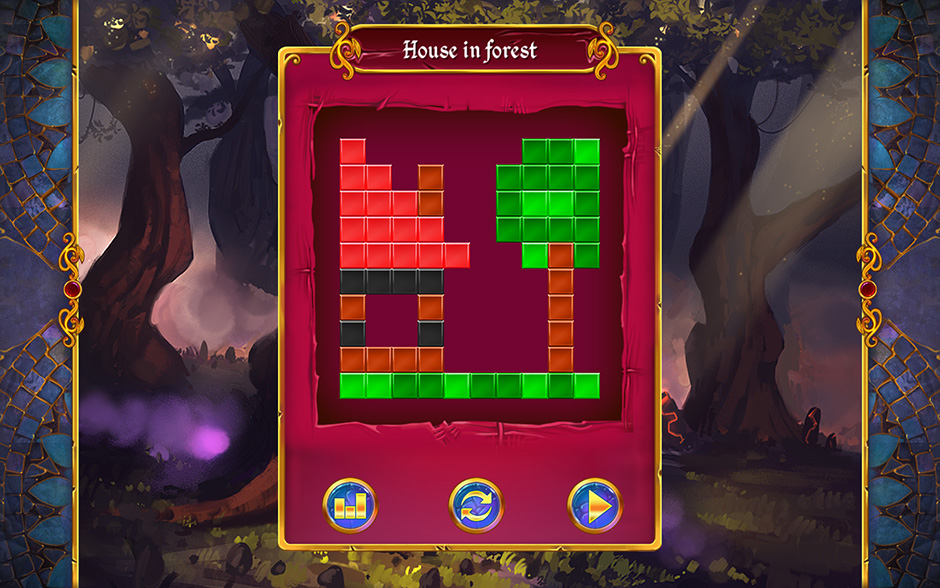
- Fill in the bottom row and both columns of 10, using this as your basis to solve the puzzle.
- The solution is a House in forest, shown below.
Mystery Mosaics Forest of Relics Puzzle 8
Puzzle 9
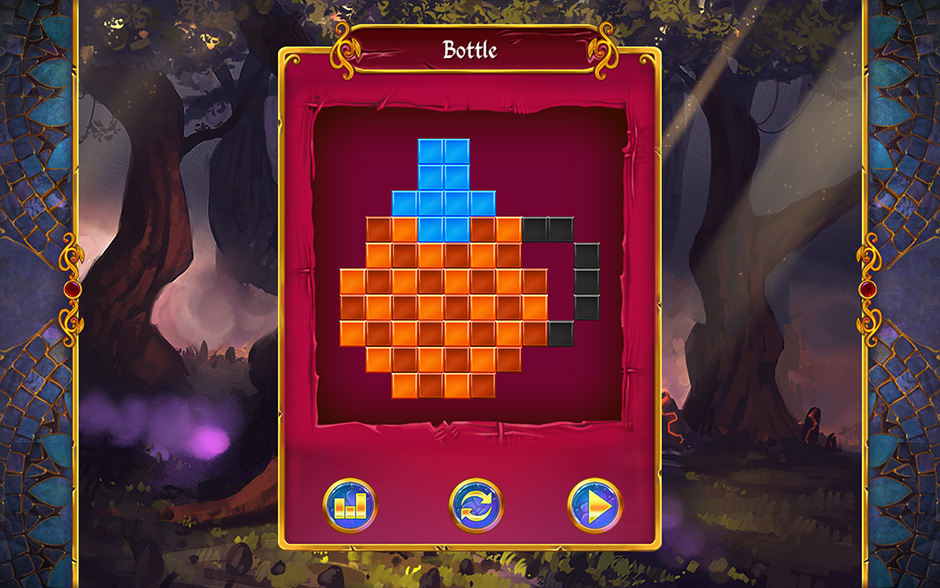
- Fill in both columns of 10, using this as a basis to start your puzzle.
- The solution is a Bottle and is pictured below.
Mystery Mosaics Forest of Relics Puzzle 9
Puzzle 10
- Fill in the column of 9 starting from the bottom of the board to establish a foundation for starting this puzzle.
- The solution is a Candle, and is pictured below.

Mystery Mosaics Forest of Relics Puzzle 10
Spines of Dordarak
Throughout the Great Plains of the east rise sharp, hooked peaks of granite. In the lore of the Plains’ nomadic tribes, these are the dorsal spines of the Great Dragon Dordarak. The tribesmen oppose those who would solve the Mosaics, fearing that they will awaken the Dragon.
Puzzle 1
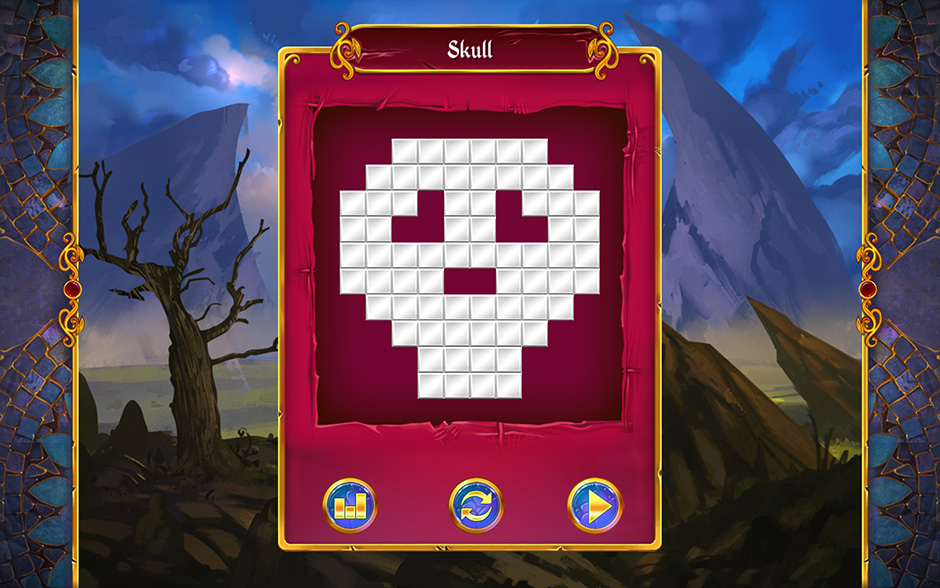
- Fill in the row of 10 to establish the base of solving this puzzle. The puzzle is symmetrical, so the left and right sides reflect each other.
- The solution is a Skull, shown below.
Mystery Mosaics Spines of Dordarak Puzzle 1
Puzzle 2
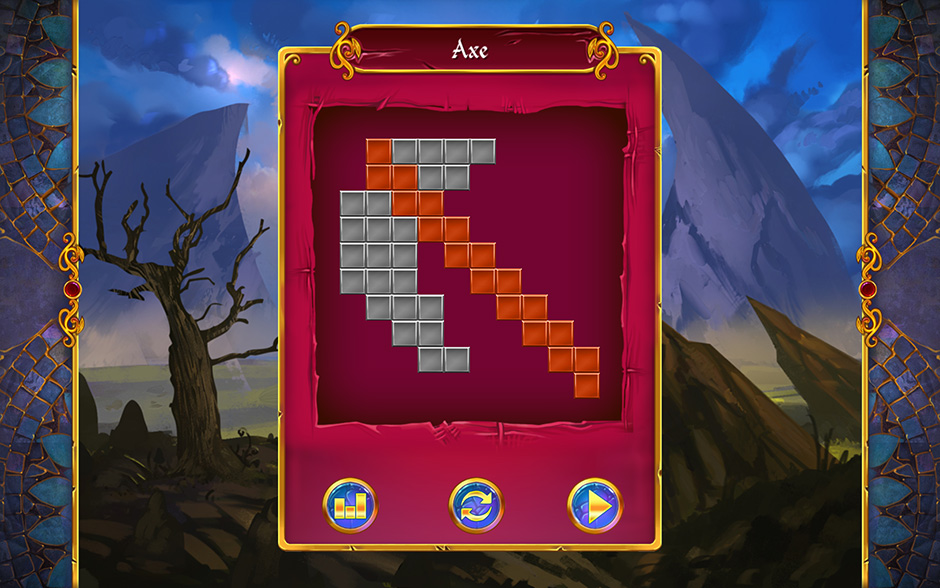
- Start by filling in the columns of 7 and 8 from the top of the board. Cross off the remaining 3 and 2 squares respectively to establish the basis of solving this puzzle.
- The solution is an Axe and is pictured below.
Mystery Mosaics Spines of Dordarak Puzzle 2
Puzzle 3
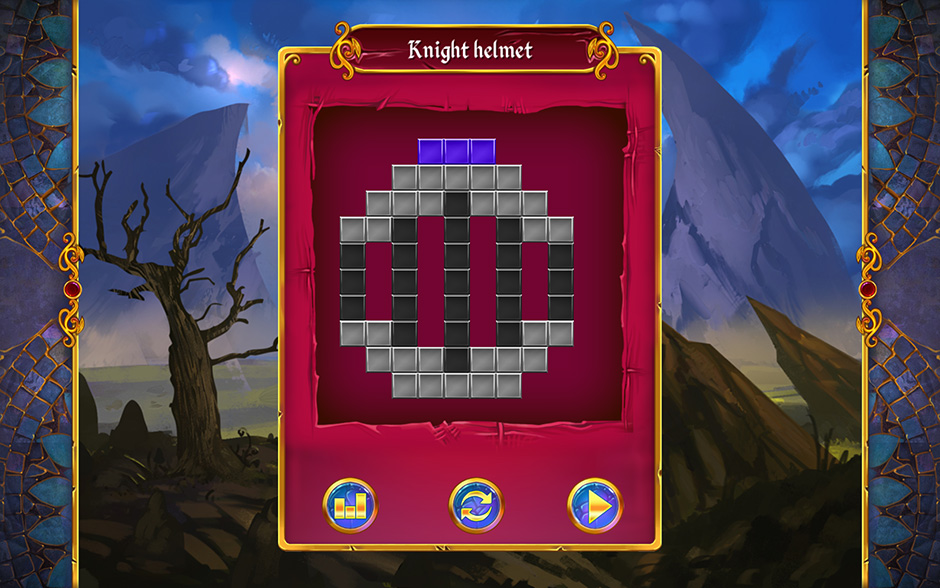
- Fill in the column of 10 and cross off the column of 0 first and foremost. This puzzle is aligned one square to the left, but is otherwise symmetrical.
- The solution is a Knight helmet and is shown below.
Mystery Mosaics Spines of Dordarak Puzzle 3
Puzzle 4
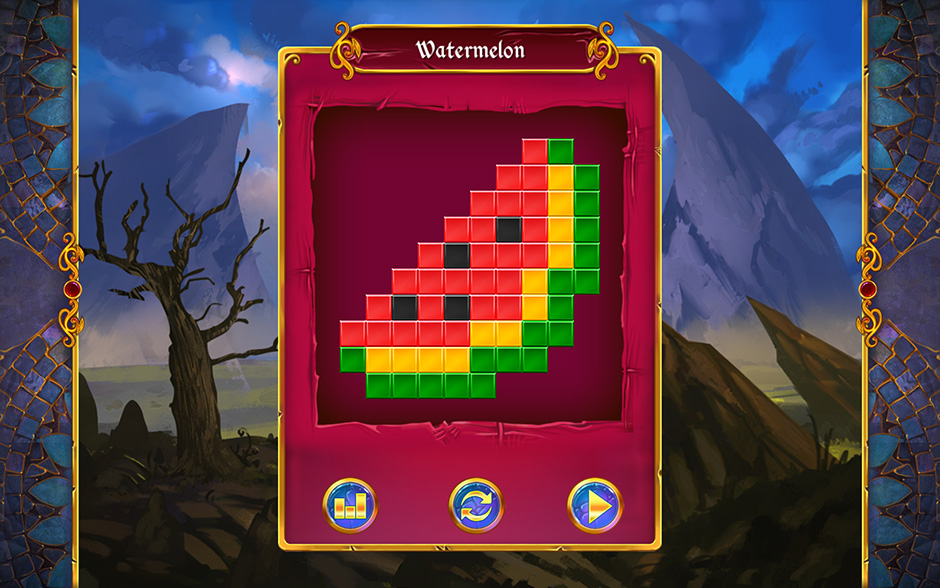
- Fill in the columns of 9 and the 8 furthest to the right. Cross of the remaining squares in these columns to establish the basis of solving this puzzle.
- The solution is a Watermelon and is pictured below.
Mystery Mosaics Spines of Dordarak Puzzle 4
Puzzle 5
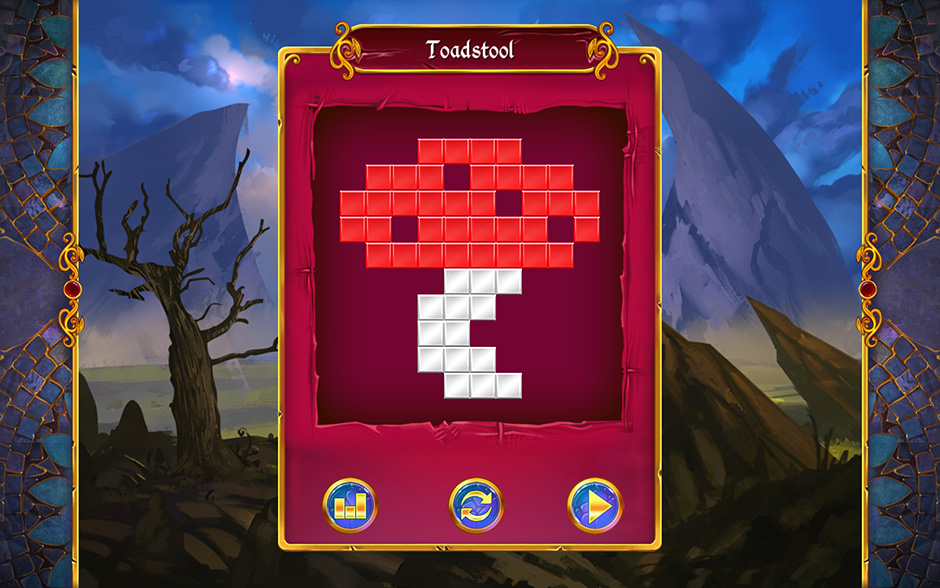
- Start by filling in the column of 1 and 8: there is only one solution.
- The completed image is a Toadstool and is shown below.
Mystery Mosaics Spines of Dordarak Puzzle 5
Puzzle 6
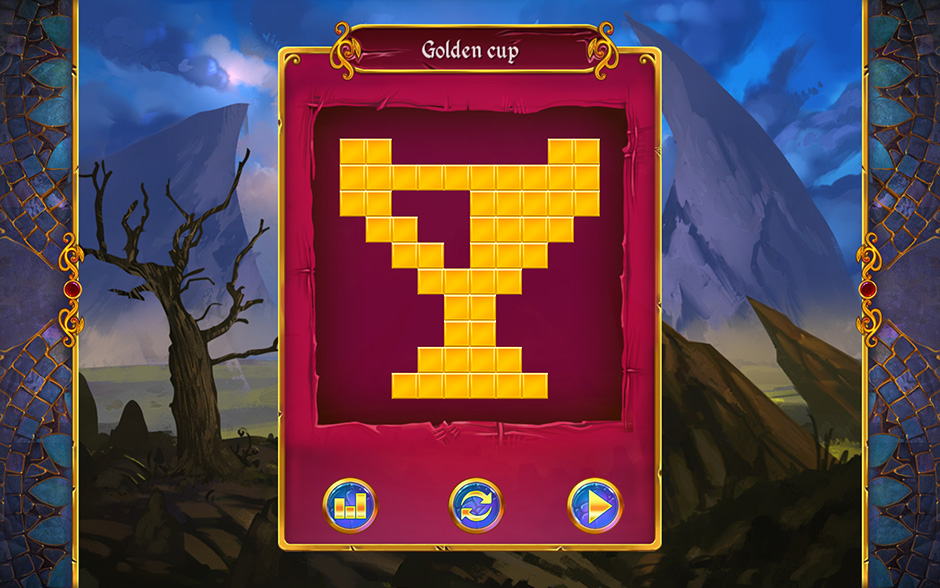
- Fill in the row of 10, then the column of 9 starting from the bottom.
- The completed solution is a Golden cup and is pictured below.
Mystery Mosaics Spines of Dordarak Puzzle 6
Puzzle 7
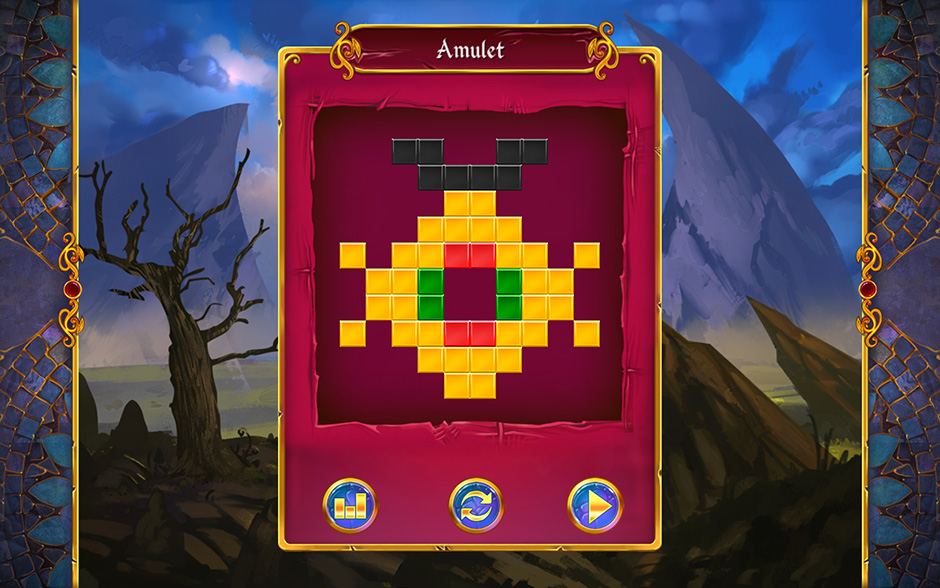
- Start by filling in the row of 1, 6, and 1. There is only one possible solution. This is a symmetrical puzzle, so you can mirror all actions on the left and right halves.
- The completed solution is an Amulet, shown below.
Mystery Mosaics Spines of Dordarak Puzzle 7
Puzzle 8
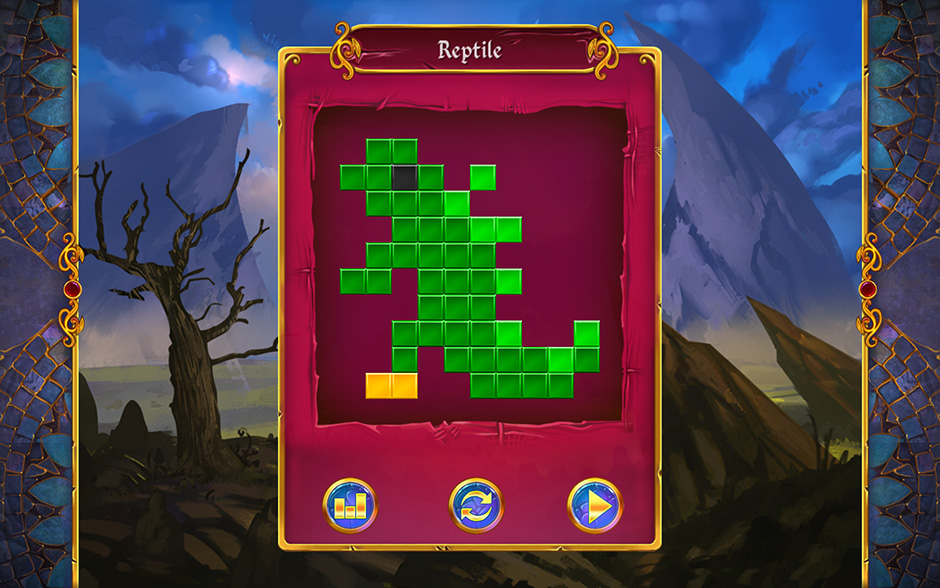
- Start by filling in the column of 1 and 7, beginning at the bottom of the board.
- The solution is a Reptile, pictured below.
Mystery Mosaics Spines of Dordarak Puzzle 8
Puzzle 9
- Begin by filling in the column of 10, and the row of 8 starting from the bottom right corner.
- The solution is Trees, and is shown below.
Mystery Mosaics Spines of Dordarak Puzzle 9
Puzzle 10
- Start by filling in the row of 8, crossing off the 1st and 10th space.
- The solution is a Heart, shown below.
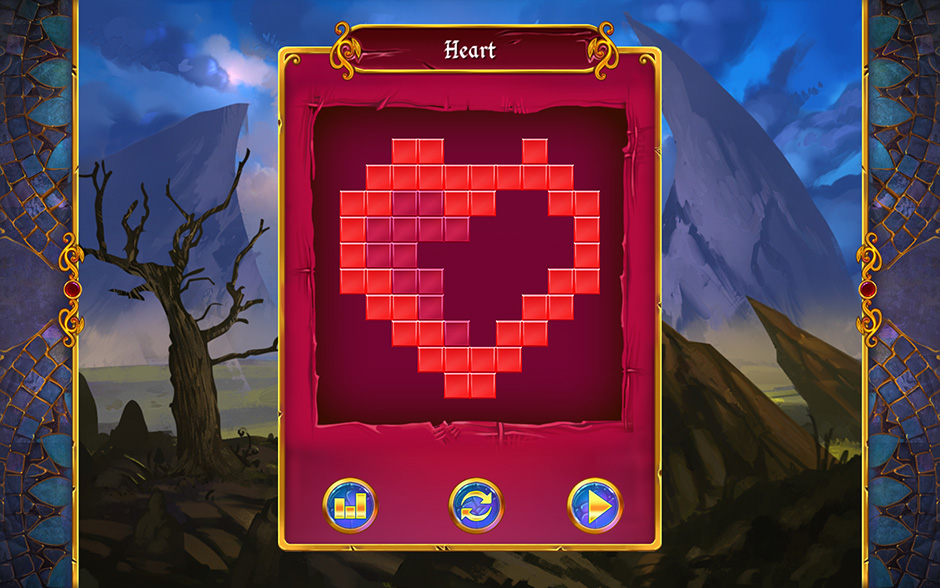
Mystery Mosaics Spines of Dordarak Puzzle 10
Tomb of Myrra Sar
The sorceress Myrra Sar lived over three centuries ago and was buried in a grand tomb beneath the volcano, Mt. Forge. She took most of her secrets to the grave with her, but the inscriptions in her tomb bear a strong resemblance to those in the Forest of Relics. Had she solved the Mosaics, or been trying to?
Puzzle 1
- Fill in the columns of 13, crossing off the 1st and 15th spaces. The puzzle is symmetrical, so you can mirror actions for the left and right sides.
- The solution is a Castle and is pictured below.
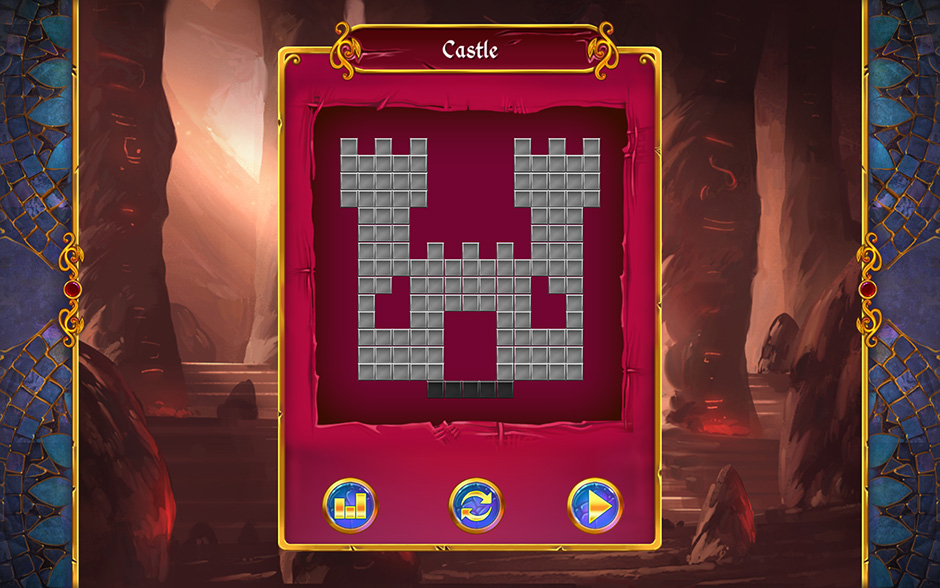
Mystery Mosaics Tomb of Myrra Sar Puzzle 1
Puzzle 2
- Begin by filling in the column of 15.
- The solution is A glass of wine, shown below.
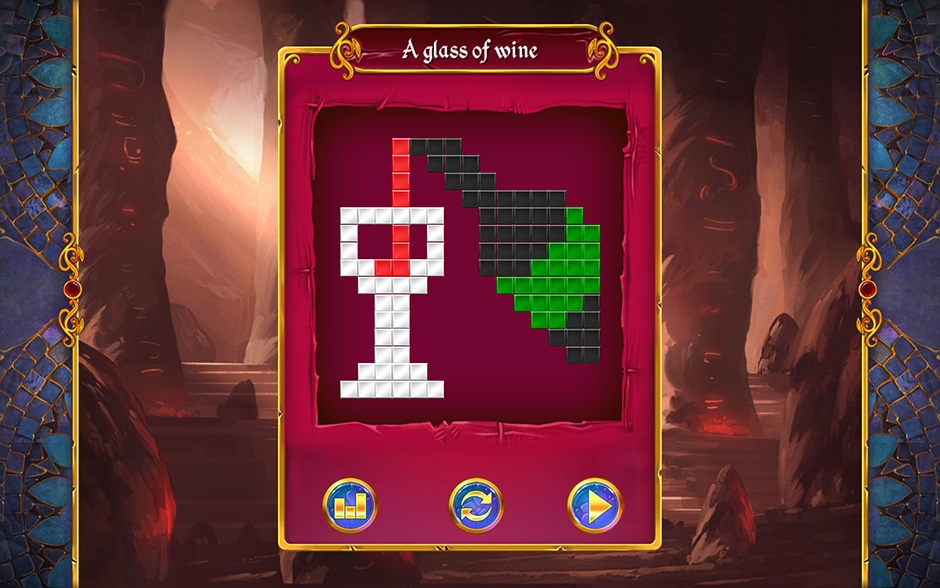
Mystery Mosaics Tomb of Myrra Sar Puzzle 2
Puzzle 3
- Start by filling in the row of 7 and 2 starting from the left edge, with two spaces after the 7 before the 2 is filled in.
- The finished puzzle depicts a Magic wand and is displayed below.
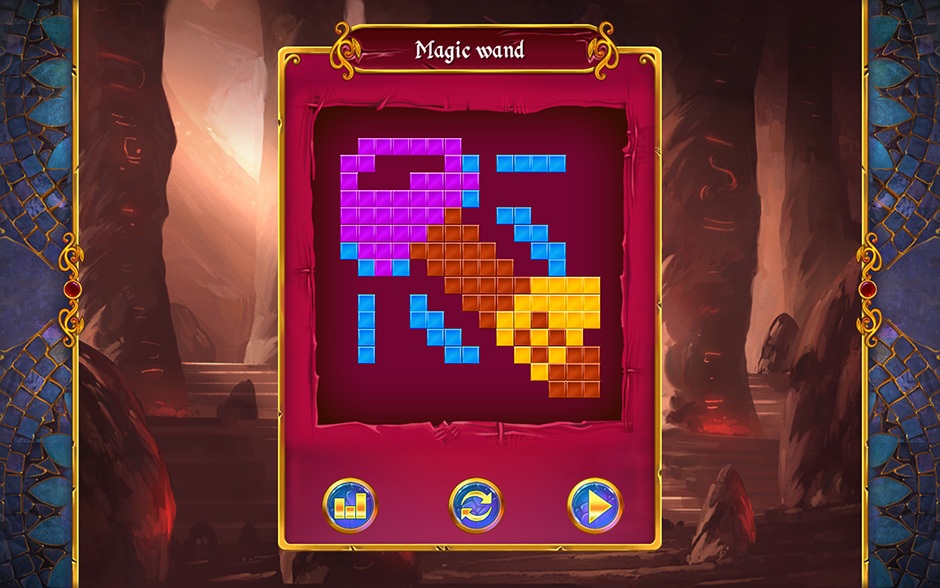
Mystery Mosaics Tomb of Myrra Sar Puzzle 3
Puzzle 4
- Fill in the bottom row of 15. This means you can cross out all the remaining squares for the first and last columns of 1.
- The solution is A tree, shown below.
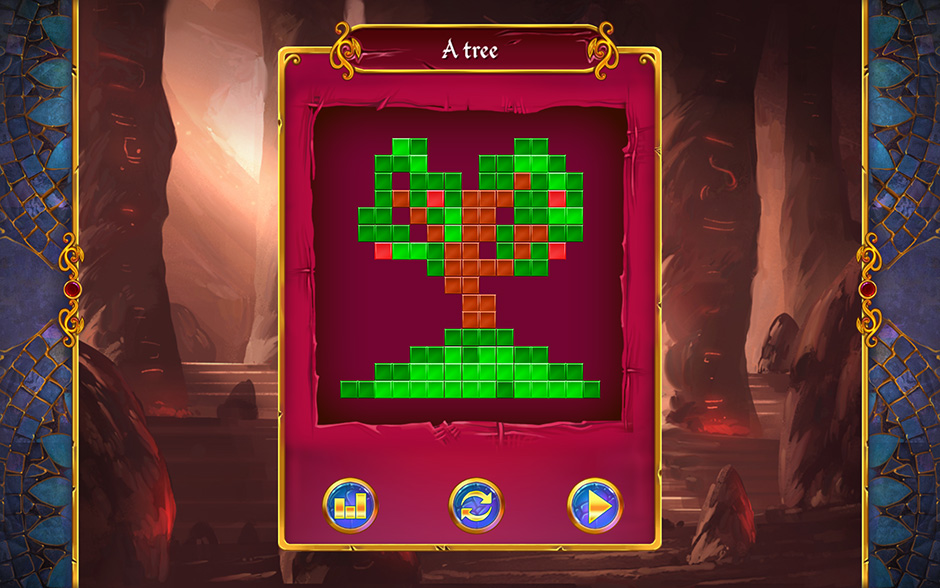
Mystery Mosaics Tomb of Myrra Sar Puzzle 4
Puzzle 5
- Cross out both columns of 0 first and foremost. This puzzle is symmetrical, so you can mirror actions for both the left and right sides.
- The finished puzzle displays a Helmet, pictured below.
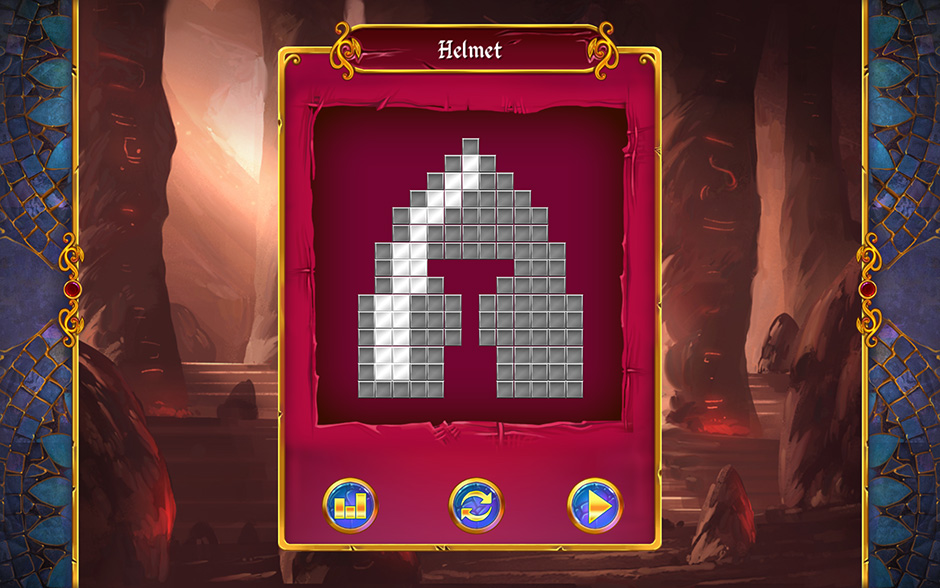
Mystery Mosaics Tomb of Myrra Sar Puzzle 5
Puzzle 6
- Start by filling in the rows of 14 starting from the right side of the puzzle.
- The finished puzzle shows an Anvil, which is pictured below.

Mystery Mosaics Tomb of Myrra Sar Puzzle 6
Puzzle 7
- Begin with the row of 12 at the bottom of the puzzle, then work up from the bottom edge to start filling in the other squares.
- The solution is a Bag of coins, shown below.
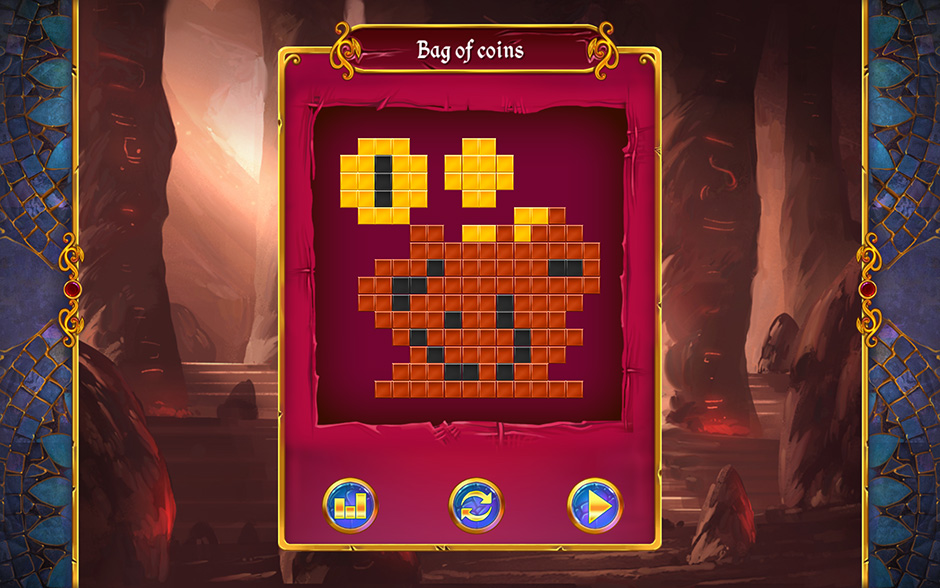
Mystery Mosaics Tomb of Myrra Sar Puzzle 7
Puzzle 8
- Begin with the top corners and work your way around. This puzzle is symmetrical, so the left and right sides are mirrored.
- The solution is a Shield, which is pictured below.
Mystery Mosaics Tomb of Myrra Sar Puzzle 8
Puzzle 9
- Begin this puzzle by filling in the squares for the column of 11, starting at the top border of the puzzle. This is a symmetrical puzzle, so the left and right sides are mirrored.
- The complete puzzle depicts Scales, which are also shown below.
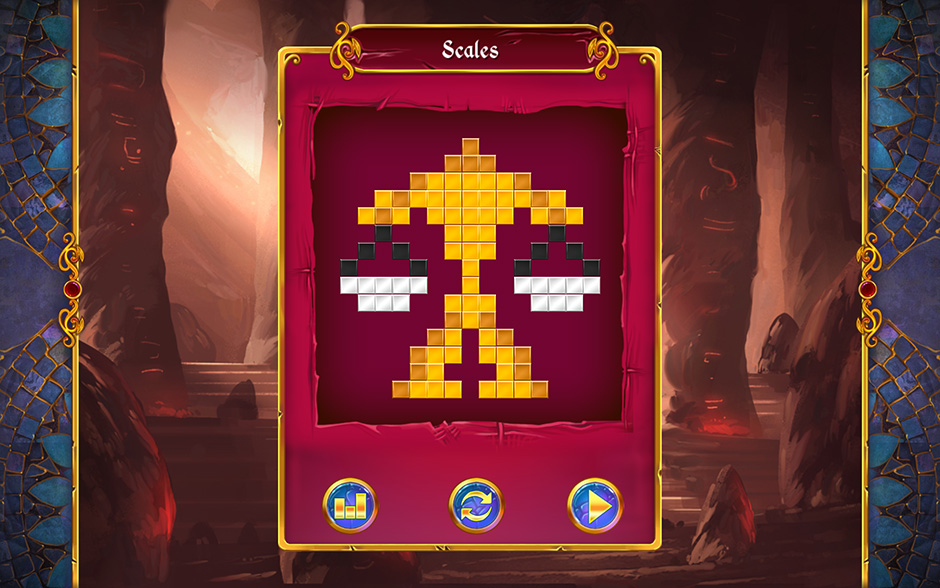
Mystery Mosaics Tomb of Myrra Sar Puzzle 9
Puzzle 10
- Start with the upper corners and work your way around. This puzzle is largely symmetrical, so use this to your advantage.
- The completed image is a Magic sphere and is shown below.
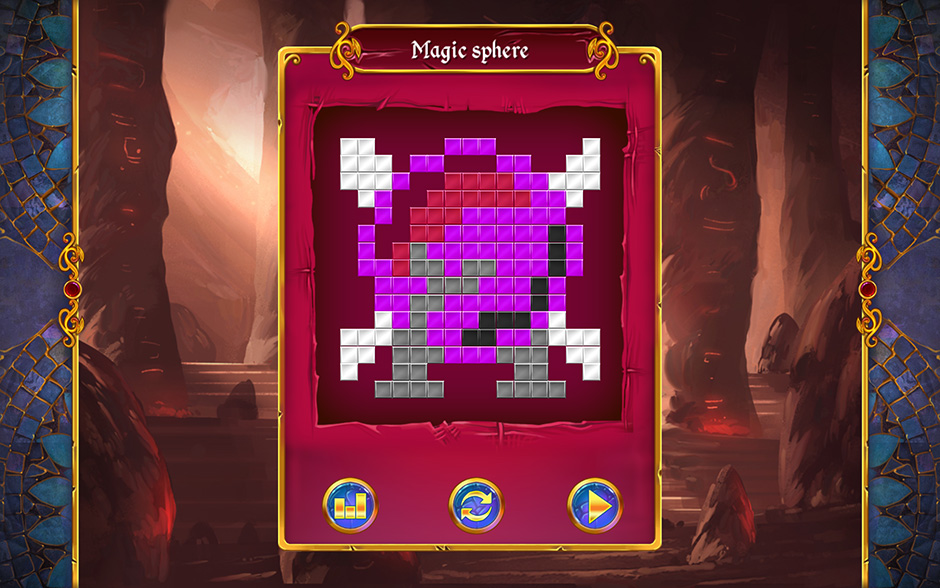
Mystery Mosaics Tomb of Myrra Sar Puzzle 10
Sporewood
Little is known about the sprites who tend to Sporewood, as the air within is deadly to humans and most animals. Legend has it that they have dwelled there since the time of the ancients. Their lore could hold the key to solving the Mosaics… if one could find a way to talk to them and live to tell the tale.
Puzzle 1
- Begin by filling in the top and bottom center 5 squares.
- The completed puzzle is a Horseshoe and is shown below.
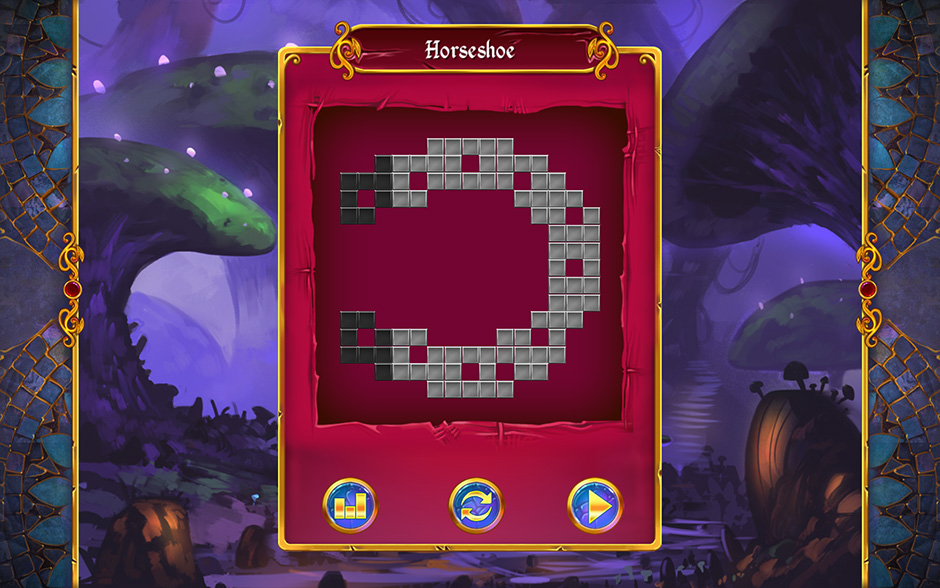
Mystery Mosaics Sporewood Puzzle 1
Puzzle 2
- Start by filling in the row of 15 to form a basis for the puzzle.
- The solution is a Bell and is pictured below.

Mystery Mosaics Sporewood Puzzle 2
Puzzle 3
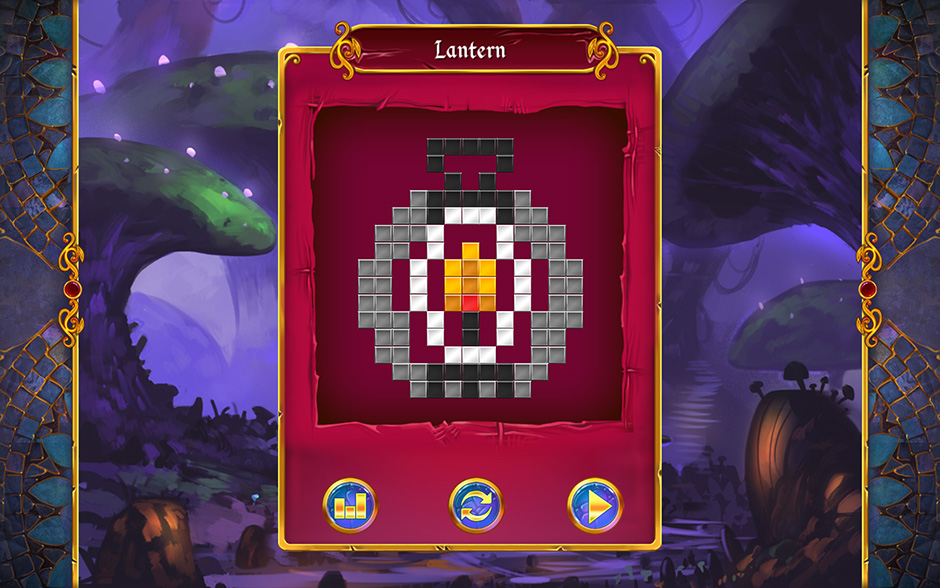
- Start by crossing out all the spaces in the columns of 0.
- The solution is a Lantern and is shown below.
Mystery Mosaics Sporewood Puzzle 3
Puzzle 4
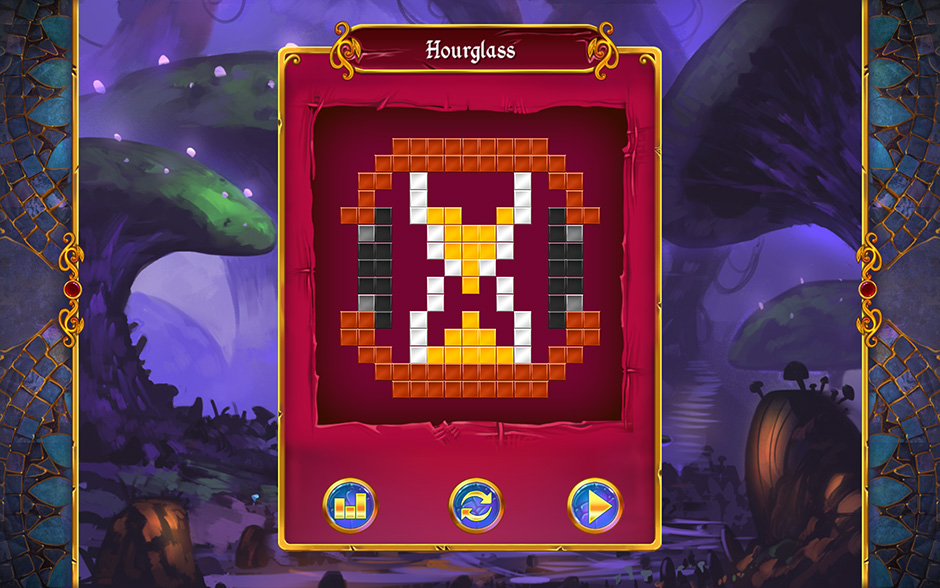
- Begin by filling in the top and bottom rows of 9 and 11 centered in the puzzle.
- The completed puzzle shows an Hourglass, which is also shown below.
Mystery Mosaics Sporewood Puzzle 4
Puzzle 5
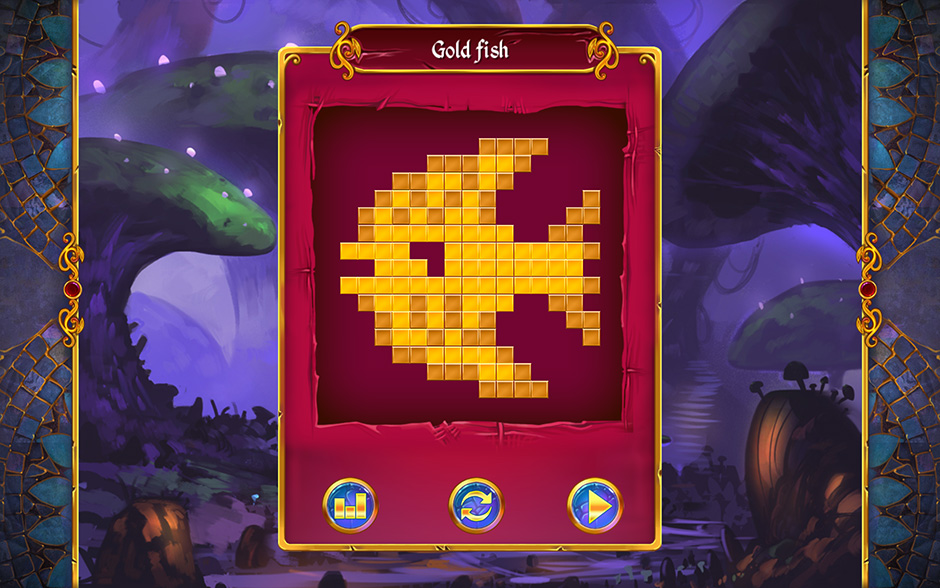
- This puzzle is largely symmetrical on the upper and lower halves, so use this to your advantage when completing it.
- The solution is a Gold fish and is shown below.
Mystery Mosaics Sporewood Puzzle 5
Puzzle 6
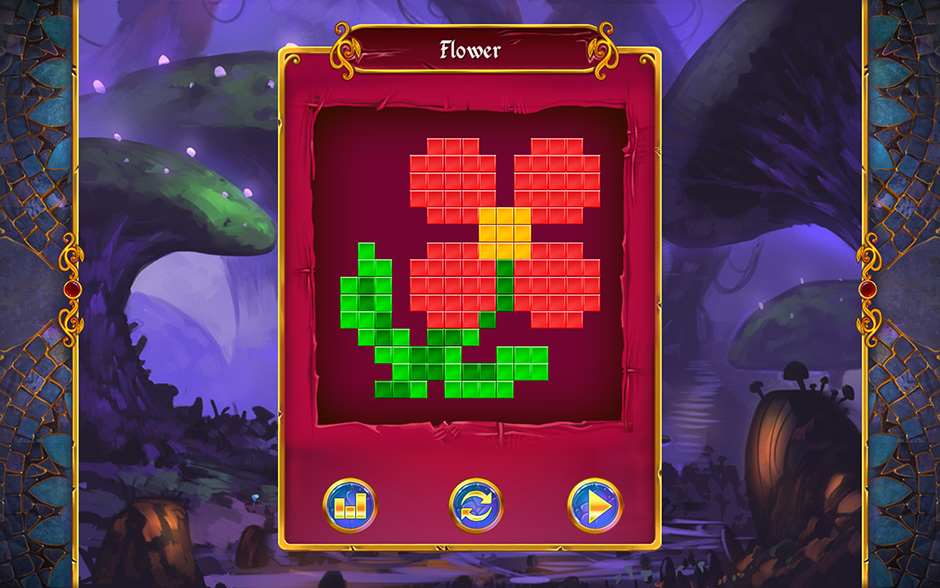
- Start by filling in the rows of 3 and 11. There is only one possible way to do this correctly.
- The finished puzzle shows a Flower, which is also shown below.
Mystery Mosaics Sporewood Puzzle 6
Puzzle 7
- This puzzle is a bit more difficult, as nothing is symmetrical. However, the solution is a Sailboat and is shown below.
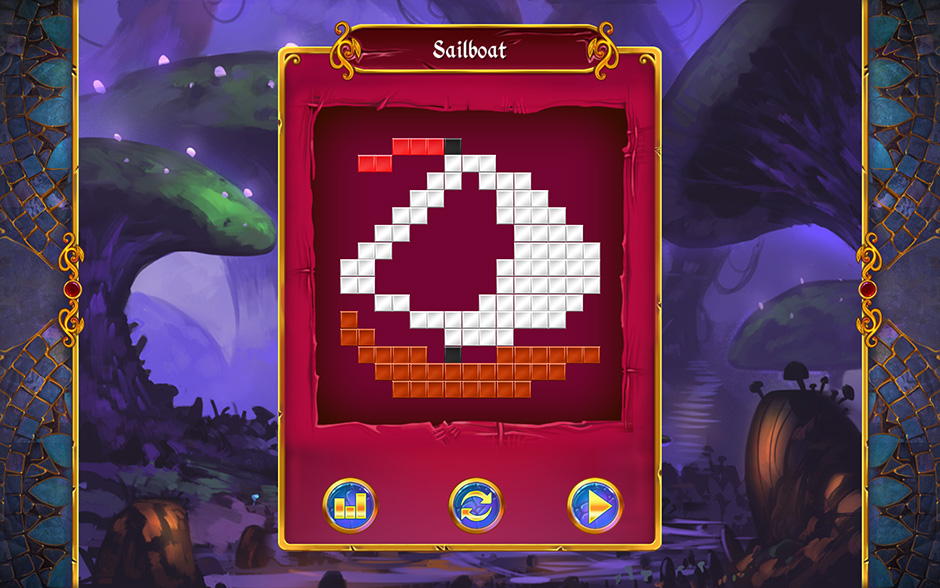
Mystery Mosaics Sporewood Puzzle 7
Puzzle 8
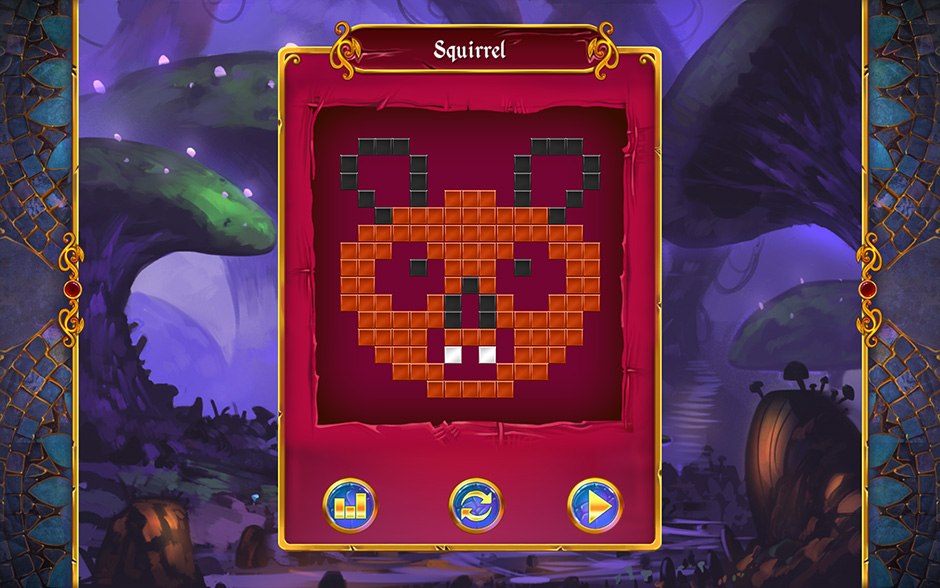
- Begin by filling in the bottom row of 5, which is centered.
- The completed puzzle depicts a Squirrel and is shown below.
Mystery Mosaics Sporewood Puzzle 8
Puzzle 9
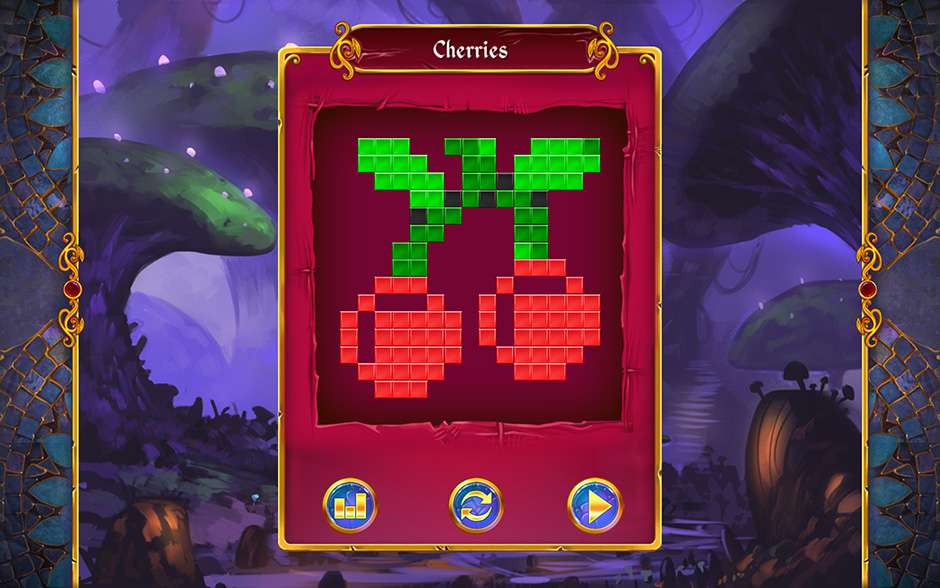
- Start by filling in the grid for the two rows of 1, 5, 1, and 5. There is only one possible solution.
- The completed puzzle shows Cherries, which are also shown below.
Mystery Mosaics Sporewood Puzzle 9
Puzzle 10
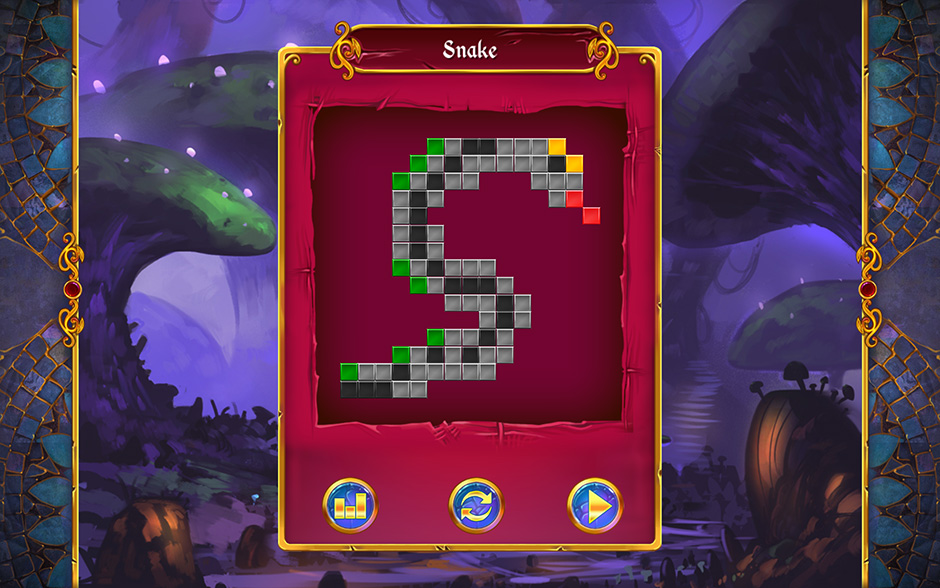
- Begin by filling in the bottom rows of 5 and 9 starting from the left border of the grid. Cross off the remaining spaces spanning to the right.
- The solution is a Snake, shown below.
Mystery Mosaics Sporewood Puzzle 10
Congratulations! You’ve completed the Mystery Mosaics Walkthrough! Were you able to traverse the locations following and solve the mystery of the Mosaics? Let us know in the comments!
For more great tips and tricks, visit our blog!
The Mystery Mosaics walkthrough is meant as a guide and does not contain cheats, hacks, or serials.