Beauty is a fleeting thing that everyone knows will eventually give way to the physical signs and effects of aging. But imagine being in the prime of your life and having your beauty stolen away by a devious witch from your grandmother’s past! It is now up to you to travel to your grandmother’s old boarding school to reclaim your youthful looks and free the other women before your time runs out! You can imagine yourself as Angelica, as you head off on your quest to retrieving your looks through a series of puzzles, hidden object games, and other brain twizzlers. This Witch Hunters – Stolen Beauty Walkthrough will aid you on your quest with advice on locations, visual cues, and helpful advice.
Contents
General Tips & Tricks
Game Overview
The object of the game is to return to your grandmother’s childhood boarding school to rescue the captured young women that are under the spell of the evil Madame Flemet while on your own quest to restore your stolen youthful beauty. Power your way through eight levels of brain busting puzzles, hidden object games, and a host of other puzzling situations. Use the on-screen hint button or simply refer to this Witch Hunters – Stolen Beauty walkthrough for ideas, instruction, or guidance when you feel that you are lost or unsure of where to make your next move.
Gameplay Controls
There is no special skill needed to successfully bring the evil head mistress Madame Flemet to justice. All moves can be done with the click of your mouse and the drop-and-drag feature. There are on-screen hints that you can quickly utilize such as:
- Hint Button-This helpful element can be found in the beginning of the game and is useful when you can not find an object or you do not know where to look next. When you use the hint button, it will turn the young woman on the icon into an old woman. As your hint meter refills, so does the youthfulness of the hint icon.
- Curser Changes to Hand-When this happens during your investigation of an area, it is an indication that an item can be picked up or moved in some way.
- Curser Changes to Magnifying Glass-This is an indication that a closer look is necessary. This helper will point out hidden games and objects to uncover.
- Sparkling Area-When you notice that an area is sparkling, it means that there is some type of interaction available.
These are valuable aids during active play, but for those times when you find yourself really stumped, rely on this walkthrough to help you all of the way to your graduation from this hellish boarding school.
General Tips
This storyline and game is simple to follow if you know a few pieces of inside information about the basics of playing such as:
- You must collect the Hint Button from the crow at the beginning of the game in order to use it.
- You must wait for the Hint Button to refill before you can use it again. This is indicated by the youth or age of the woman on the icon.
- The bar at the bottom of the screen is your inventory; it will hold all of your necessary items until they are needed.
- Areas that sparkle are hidden object Scenes; take a closer look at these areas to trigger the game.
- The items that you must find in the Hidden Obstacle games are randomly chosen for each game.
- Use the menu button to pause, resume, or exit the game. From this menu option, you may also change the screen size, music, and sound.
- The numbers located in the lower left of the screen indicate the number of Snake Keys that you have collected, and how many are necessary, to complete the collection of 12 and defeat the evil Witch.
Playing Tips and Tricks
When it comes to maneuvering through this game effortlessly, there are a few items that can help make your game a fun, challenging, and entertaining experience. Your game will challenge and entertain if you take these pieces of advice into consideration:
- Before beginning play, select the player setting that best matches your puzzle solving abilities. The difficulty settings come with three choices.
- Casual – Easiest of the settings, this will allow quick refill of the hint button, the skip button, and sparkles will indicate needed action by you.
- Advanced – Medium difficulty level with fewer sparkling hinted areas; the hint and skip buttons reload slower.
- Expert – This is the hardest level with very slow refilling hints and skips.
- Utilize the Skip Button if you are having difficulty with a particular puzzle or area. This will allow you to temporarily leave the game for later. Refer back to this walkthrough for the helping hint or clue to solve the puzzle, game, or area that is perplexing you.
- There is a solution to every puzzle somewhere in the game. Often multiple pieces are necessary to engage hidden games or level advancement.
Walkthrough Witch Hunters – Stolen Beauty
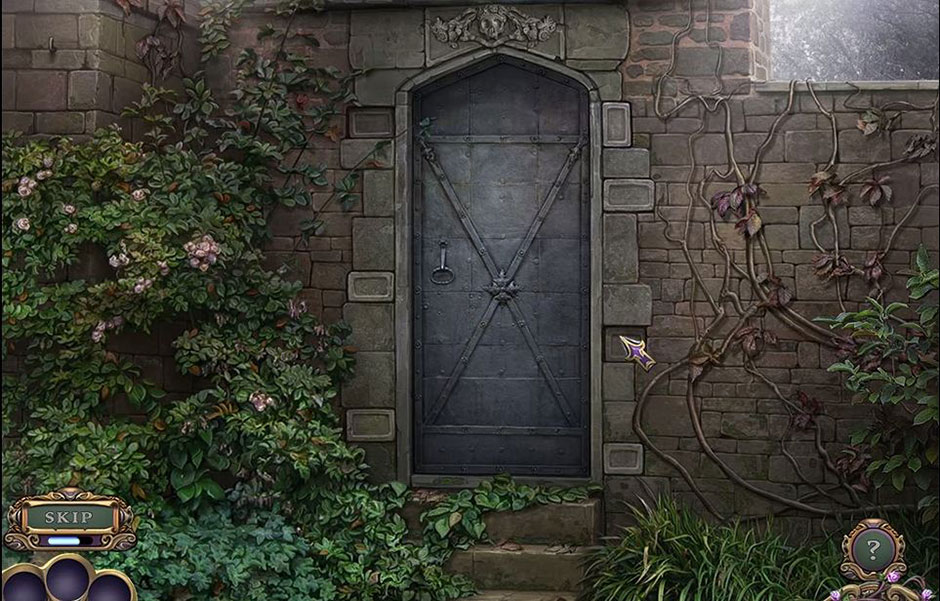
Chapter One: Entrance Exam
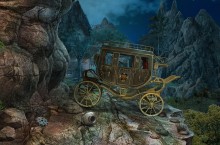
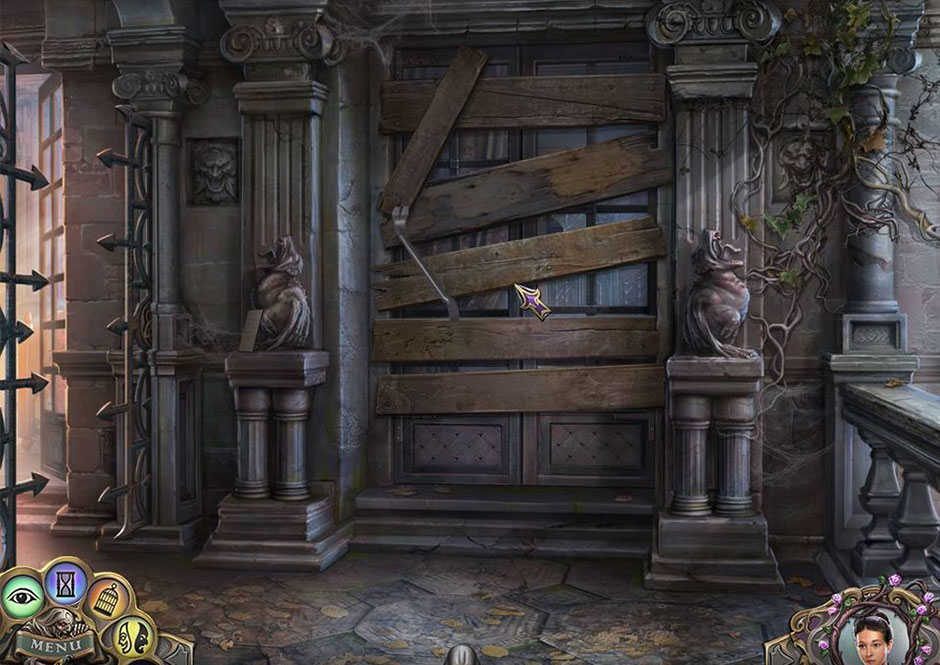
Shoo away the Crow to reveal the Hint Button. Find and collect the necessary parts for the statues; the Statue Hand, the Statue Foot, the Statue Face, and a Wreath along with the Hexagon at the base of the right statue. The sign at the upper right holds a Note and a Snake Key. Place the items from your inventory onto the statues where necessary. There is a hidden game behind the Dead Vines on the right.
Click on the Plaque to the left of the statue to reveal a Red Ring. Use the Red Ring and the Blue Ring to open the gate.
Finding all of the items on this hidden object game will award you a Blue Ring for the gate to the school grounds.
Place the two rings into the spaces on the Gate to unlock and enter the School Yard.
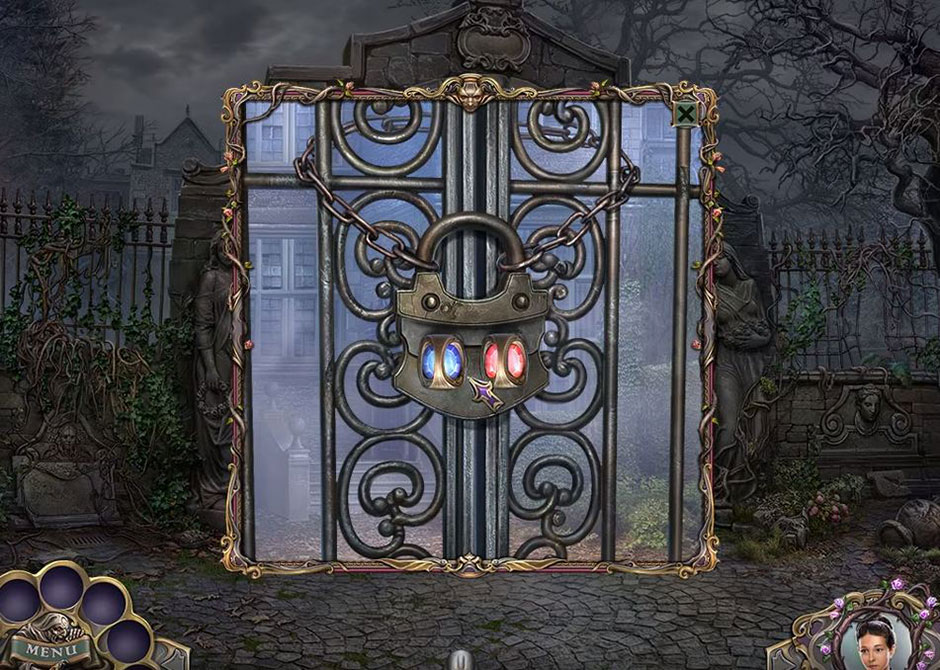
Witch Hunters – Stolen beauty – School Yard Gate
Find a Brick on the ground under the tree. Go through the Door in the fence to the right of the school.
Here you will need to collect a Snake Key and a Weight. The Bricks around the Doorway are a succession puzzle.
Place the Brick from your inventory into the missing space. Go to the Front Door of the school.
Collect a Button and a Hexagon. Hang the Weight in the middle of the Chain on the left wall. Pick up the Brick that falls. Move the stone at the bottom left of the Doorway and observe. Return to the Side Door and the Brick puzzle.
Press on the Bricks around the doorway to solve this puzzle.
The pattern for solving this puzzle is A-G-C-B-E-D-F.
Witch Hunters – Stolen beauty – Bricks Puzzle
This will open the way into the Garden.
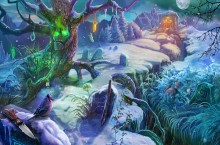
Schooch away the Kitty Cat and collect the Hexagon from the tree directly above that area. Search and find the hidden object game in the rear center of the screen.
Items that are listed on the bottom of the screen need to be located. The green highlighted objects are hidden by other objects and need to be uncovered.
When you have found all of the listed items, you will be rewarded with a Drum. Upon returning to the Garden, put the Drum by the Teddy Bear on the bench. Click the leaf in front of the Teddy Bear to collect a Hexagon and a Button. Collect a Hexagon from the Planter.
Now you may move on to the Gazebo on the left.
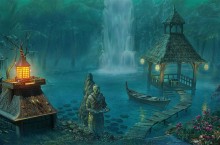
Collect the Snake Key and the Hexagon. Look at the Card on the right. Exit to the Fountain.
Pick up the Trowel from the left. Look at the Valve in the center and collect the Hexagon. Return to the Gazebo.
Look at the missing Hexagon pieces in the floor and replace them with the ones in your inventory. This will trigger a mini-game. The puzzle pieces need to be matched on all sides to complete this puzzle.
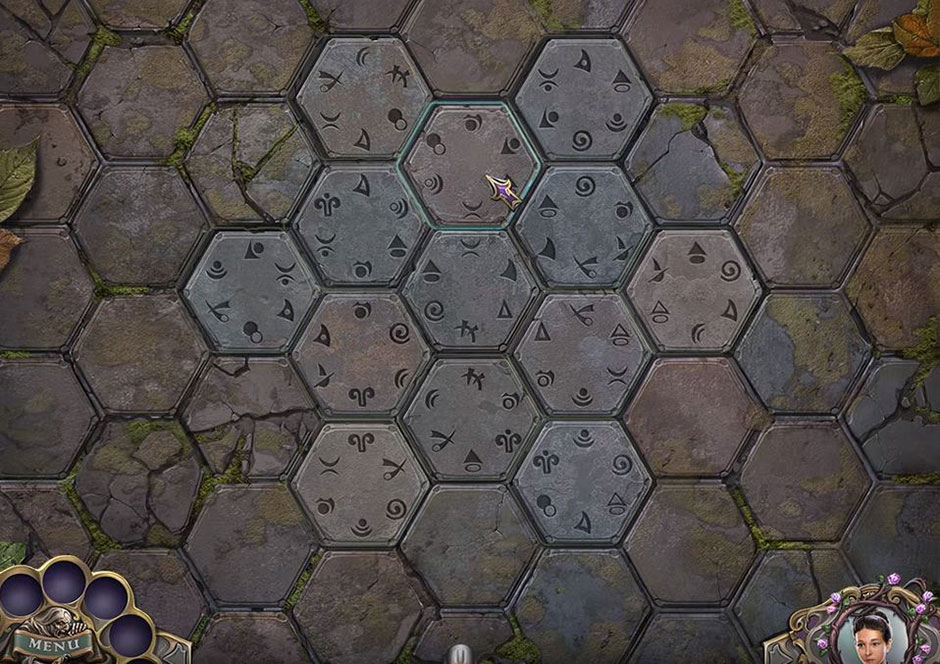
Witch Hunters – Stolen beauty – Hexagon Puzzle Solution
Follow the pattern on the image for the accurate placement of the Hexagons and collect an Ornament that you can take with you back to the Planter.
Look closely at the Planter to use your Trowel to dig up a Bell.
Return to the School Grounds. Place your Ornament into the space on the side of the Pool.
Look closer at the water to find a hidden object game.
Locate all of the items on the list to earn a Bell Clapper. Return to the Front Door of the school.
Take the Bell Clapper and place it in the Bell. Ring the Bell.
Check out the lock on the door; put the Bell in the missing spot to engage a puzzle. Use the pattern (C- E – B); (B –A- G –D); (D –B –C –G –A); (B –A – B –F –E – D) to move on to the Foyer.
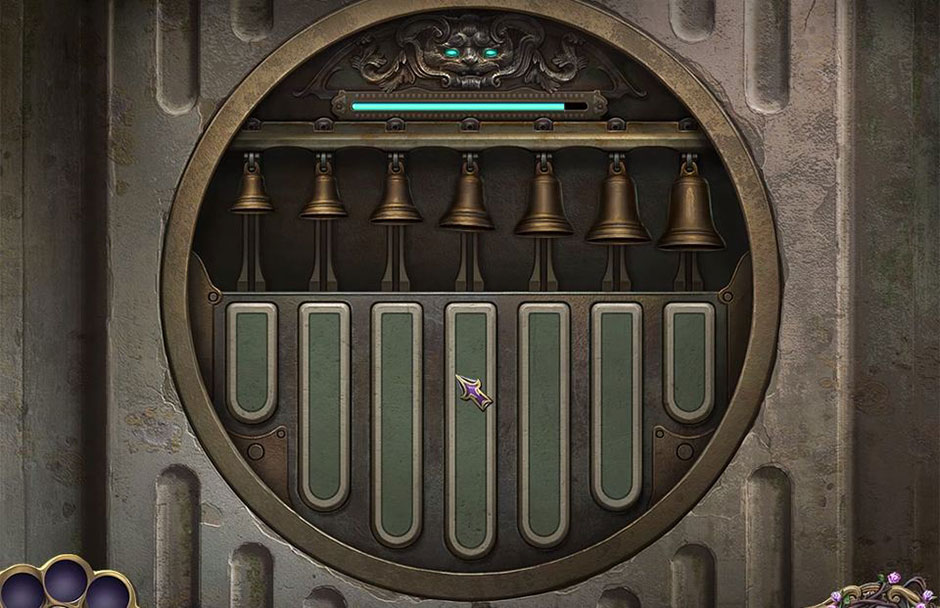
Witch Hunters – Stolen beauty – Doorbell Puzzle
Chapter Two: Mischief and Mayhem
Look at the Note on the right and the Painting on the left.
There is a hidden object game at the far end of the hall. Find all of the listed items to be rewarded a Screwdriver. Go back to the Fountain.
Use the Screwdriver to open the box and collect a Button that you can take with you to the Staircase in the Foyer.
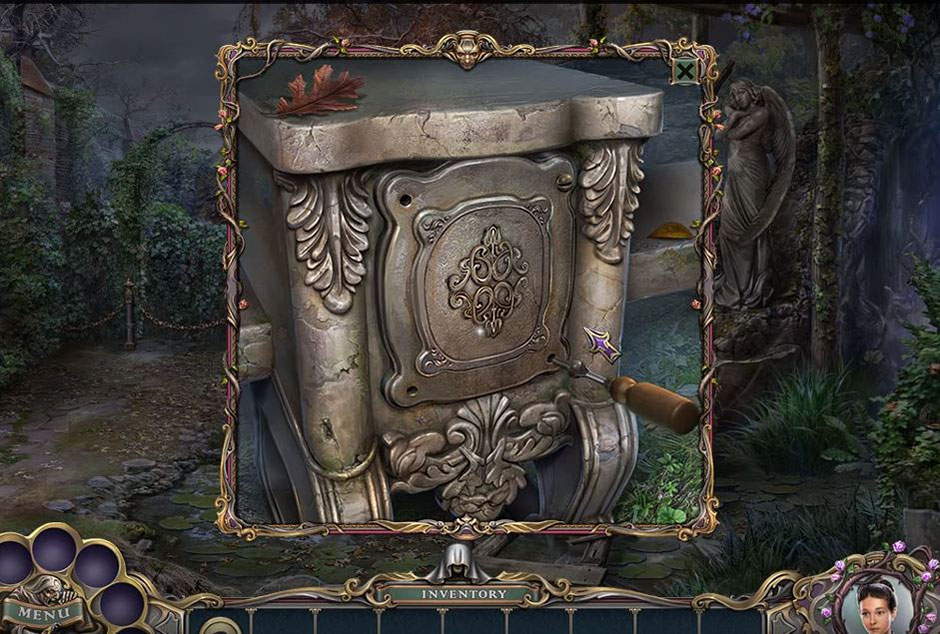
Witch Hunters – Stolen beauty – Box
Look at the Staircase and the Lock on the door to the right.
Use the Coins from your inventory to trigger a puzzle in the Door Lock. Place them in the correct pattern to gain access to the Classroom. Enter the Classroom and look at the Briefcase to click the Key for the Clock Key, click on the Briefcase to collect the Scoop, and collect the Spyglass from the Desk. Use it to look at the Notebook.
Witch Hunters – Stolen beauty – Door Lock Puzzle Solution
Return to the Foyer. Use the Clock Key to open the front of the Clock.
Collect the Knife and return to the Classroom. Use the Knife to break the seal on the Cabinet Doors.
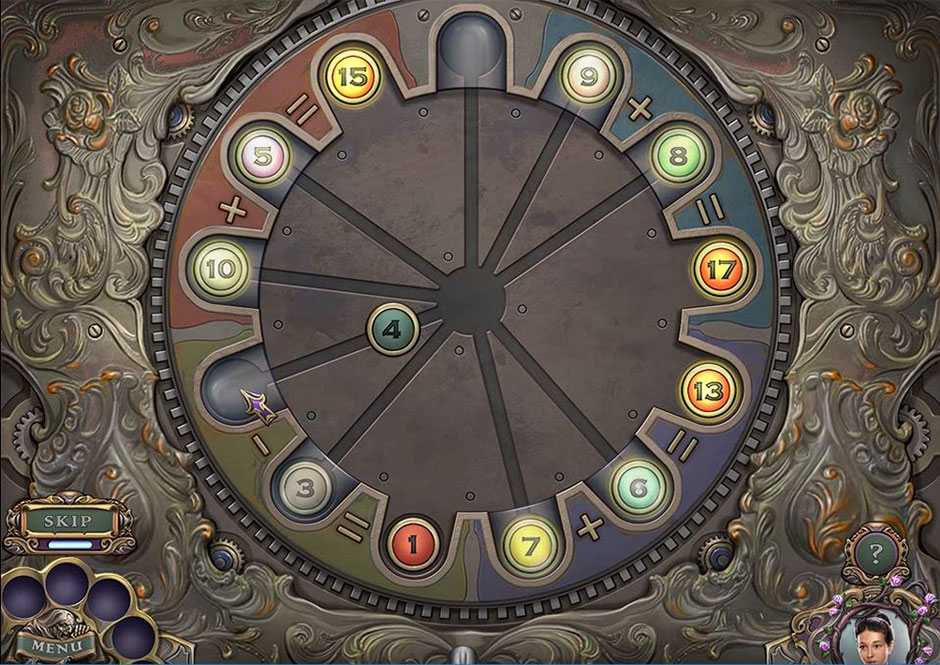
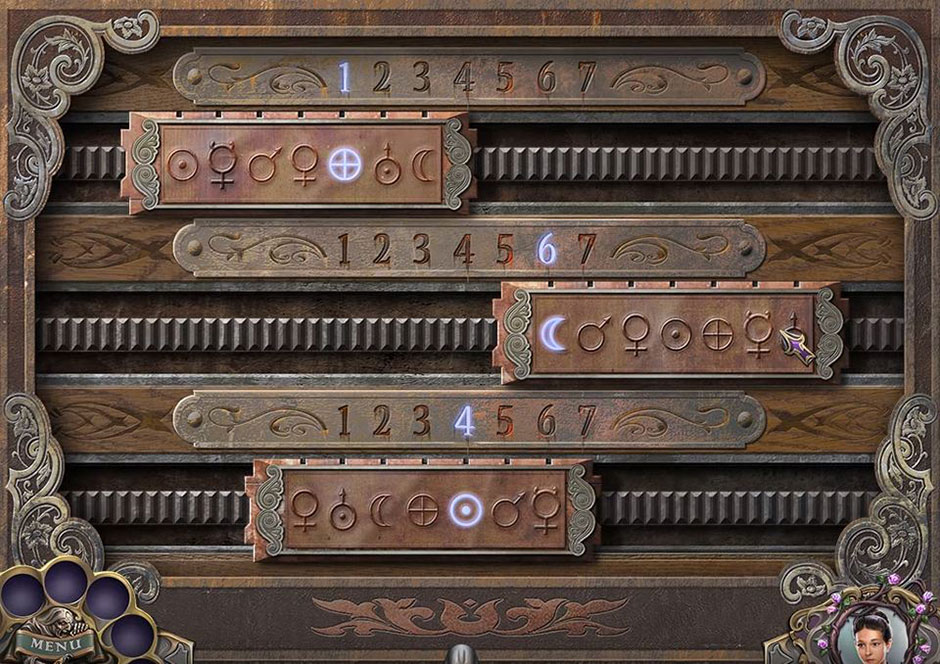
Return to the Foyer with the Clock Weight. Place the Clock Weight into the Clock. This engages a Mini-game.
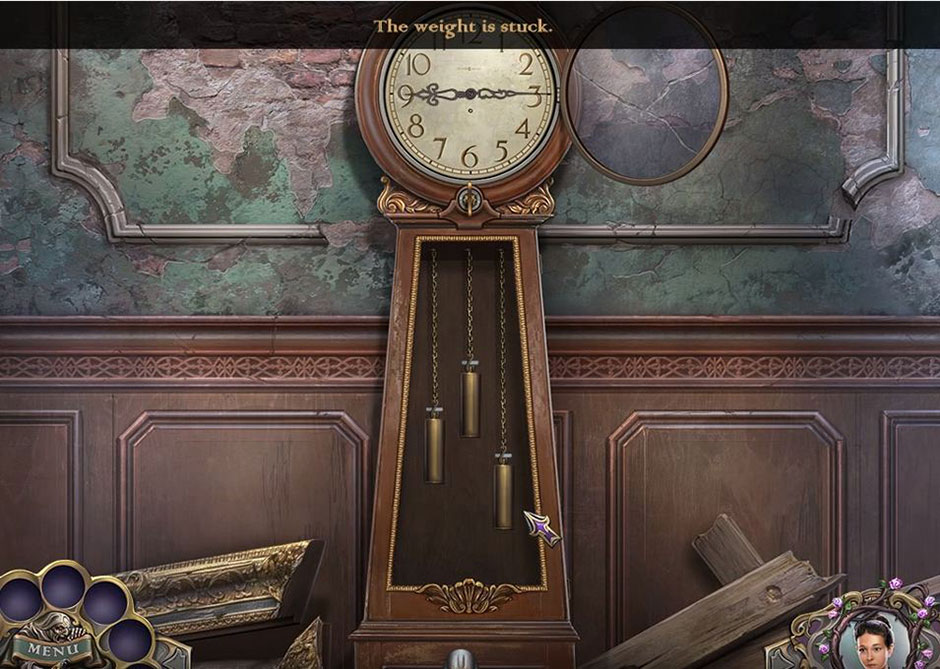
Witch Hunters – Stolen beauty – Clock Weight Puzzle
Follow the pattern to move on to the Dining Room. Retrieve the Nippers from next to the overturned chair. Visit the Curtain to look at the Window. Collect the Pitcher. Use the Spyglass on the Window; use the Nippers to take out the Nails and to get a Coin for the Fountain.
Place the Pitcher into the Fountain and collect the Water Filled Pitcher. Look at the Door Lock on the left to find a puzzle.
Witch Hunters – Stolen beauty – Kitchen Door Puzzle Solution
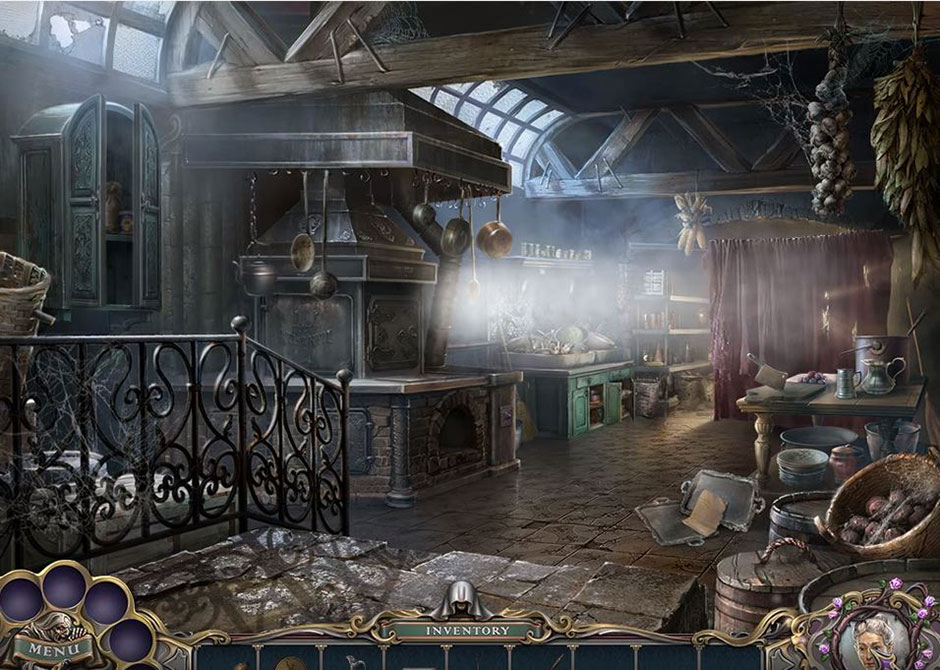
Follow the pattern to unlock the door to the Kitchen. While here, you will need to collect Chalk and an Oil Can by using the Knife from your inventory to open the Cupboard.
Use the Scoop to clean the ashes from the Oven and collect an Ash Filled Scoop. Travel to the Foyer. Return to the door on the left and put the Coin from your inventory into the slot.
Travel back to the Fountain. Use your Oil Can on the Valve to be rewarded a Valve.
Go once again to the Kitchen. Visit the Oven and add the Valve. Visit the Messy Work Area for a hidden object game.
Find all of the objects in this puzzle to collect a Brush.
Back in the Kitchen, look on the Shelf to retrieve a Handle and read the Note.
Return to the Classroom. Look in the Desk. Use the Ash and the Brush from your inventory to reveal the Message.
Visit the Chalkboard to trigger a puzzle.
Use the Chalk to make this pattern: A – B – C- D –E- C – F- G- E- H – I –G-J-K-F- B – L –K – M –J- I- N- M-O- N – H –P – O- L – A – P –D.

Witch Hunters – Stolen beauty – Chalkboard Puzzle Solution
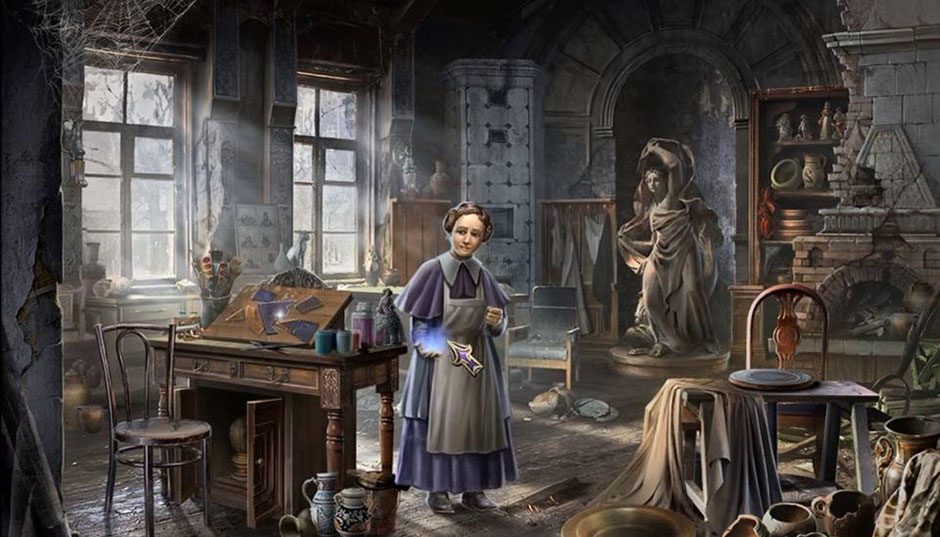
After completing, collect the Power of Revelation from the lady.
Use the Reveal Power Button to open a Hidden Door in the wall. Travel to the Gazebo. Use your new Power of Revelation to find the Shawl.
Travel to the Fountain. Use the Power of Revelation again to discover the passageway on the Overgrown Path.
Travel onward to the Bridge.
Chapter Three: Kitchen Capers
On your way to the Kitchen, stop to pick up a few items.
You will find Firewood and a Sword Gem here on your way to the Foyer.
Give the Shawl to the woman in the painting and earn a Snake Key.
Find the Dining Room. Use the Reveal Power Button on the Table Setting.
Select the Lid to discover the Slingshot and receive a Plate; there is also a Note with valuable information. Move on to the Kitchen. Use the Firewood in the Oven.
Travel to the Staircase. Use your Stone Gem on the Statue.
Travel up the Stairs and to the left. Look close at the Chain and collect the Pottery Room Key.
Use the Reveal Power on the Door and enter the Classroom. Unlock the Door with the Pottery Room Key.
Enter the Pottery Room. Shoo away the Cat.
Use the Reveal Power Button on the Desk Top to collect the Oven Handle. Click the Sheet to gain a Baker’s Paddle. Pour your Pitcher on the Clay to collect a Snake Key. Move to the Kitchen. Use the Oven Handle from your inventory to gain a Music Box Top.
Witch Hunters – Stolen beauty – Oven
Backtrack to the Pottery Room. Peer at the Desk and select the Music Box Top from your inventory. Add it to the Music Box to earn a Ballet Dancer. Visit the Foyer. Look at the Lock on the door and select the Ballet Dancer from your inventory.
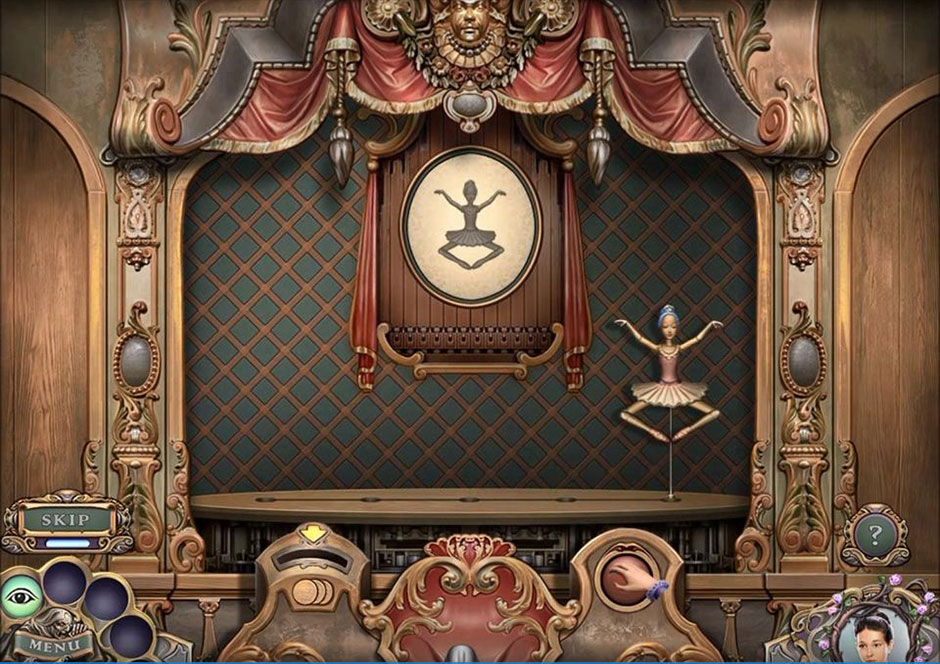
Witch Hunters – Stolen beauty – Ballet Dancer
Turn the Ballet Dancer until the door is unlocked and you can enter the Salon. Play the hidden object game.
Find all items on the list, including the ones in green, which are hidden by other objects.
Earn the Potter’s Wheel for this puzzle. Use your Knife to cut the wood in the Doorway and earn Matches.
Travel to the Classroom. Peer at the Cabinet. Select your Matches to melt the Wax and earn Acid.
Move on to the Pottery Room. Look close at the Table and add the Potter’s Wheel and Clay from your inventory. Select the Clay to create a Clay Bowl. Click the Clay Bowl for an additional spin.
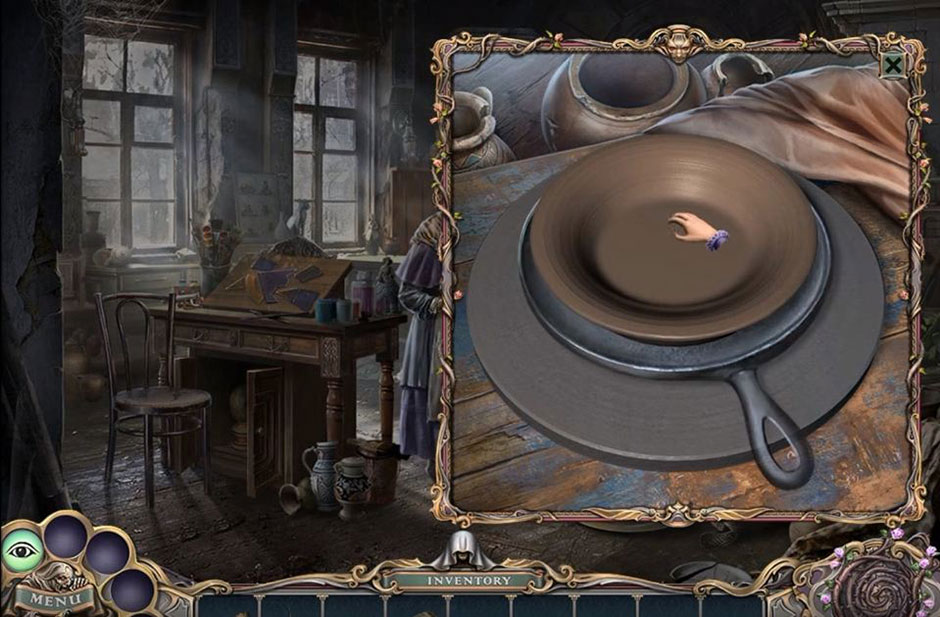
Witch Hunters – Stolen beauty – Clay
Use the Baker’s Paddle to lift the Clay Plate. Go back to the Kitchen. Check the Oven and select the Matches from your inventory to light a fire.
Take the Clay Pot and place it in the Oven to earn a Plate. Pour your Acid into the Teapot. Collect Candles when you click the lid.
Travel up the Stairs and to the right. Select your Candles, put them into the Candelabra, and light them with your Matches.
Find all of the Compass Parts. Return to the Hallway and go left. Use your Acid on the Chain to enter the Library.
Look closer at the Desk to collect a Snake Medallion and a Plate.
Travel back to the Pottery Room.
Chapter Four: Plates To Go
Take your Plates and place them on the Shelf to trigger a puzzle.
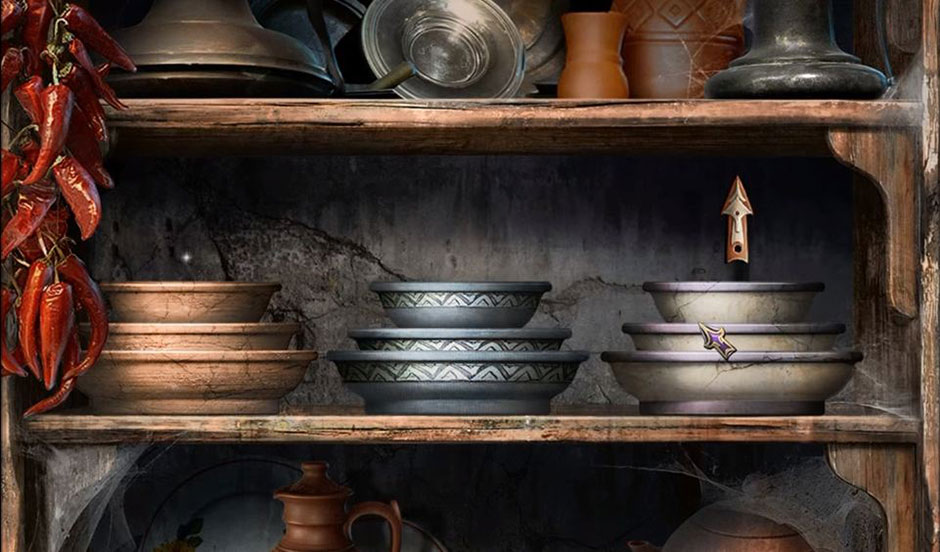
Witch Hunters – Stolen beauty – Plates Puzzle
Matching the two rows of Plates will earn you the Freezing Power from the woman.
Witch Hunters – Stolen beauty – Freezing Power
Journey to the Kitchen. Visit the Messy Work Station to find a hidden object puzzle.
Locate all of the items on the list to earn a Compass Part. Walk Upstairs and take a left. Check out the Curtain and the Table.
Use the Compass Parts in the inventory to complete the Table. Grab the Pea and the Candle before moving on to the Dining Room. Take the Pea and place it on the Plate with the Slingshot.
Travel on to the Bridge. Select the Crank and remove the stick; use your Oil Can to earn a Feather.
Use your Freezing Power to stop the water. There is a hidden object game in the grass on the right to conquer. To move on to the Shack, find all of the items on the list.
Collect the Feather and journey over the Bridge. Use your Knife to cut the Basket next to the door to earn a Book. Insert your Candle into the Pumpkin. Use your Matches to earn a Snake Key.
Collect the Globe Piece from the Window and travel to the School Grounds. Visit the Fountain for a hidden object challenge.
Find all of the items listed to be rewarded a Pattern Piece and move on to the Shack. Use the Pattern Piece on the Door Lock and spin to solve.
Travel back to the Shack. Enlist your Reveal Power on the Wooden Beam to expose a Ladder.
Collect the Book and travel to the Library. Use your Globe Piece to repair the Globe. Take your Books and place them on the Shelf to trigger a Mini-game.
This image will help you to match the Keys to the correct Books. Move on to the Attic. Check the Bag to collect a Puppet Leg, Three Steps, and Snake Key.
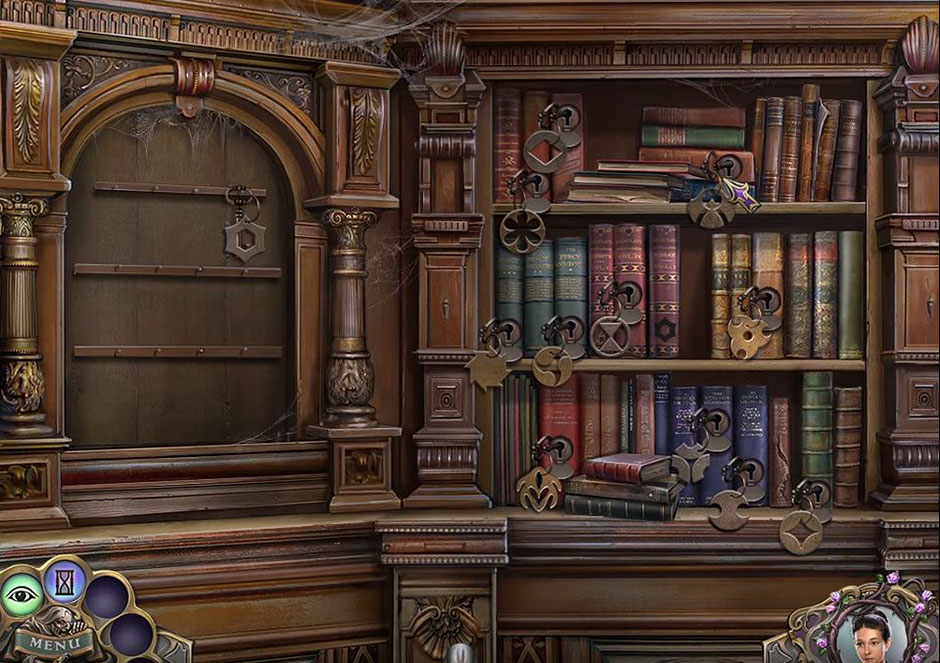
Witch Hunters – Stolen beauty – Books
Use your Steps on the Ladder. At the Window, scare the Bat away and collec theSagebrush. Solve the hidden object game on the bottom left. Locate all of the items listed.
Earn an Umbrella to take to the Foyer.
Chapter Five: Critter Control
Use your Puppet Leg to repair the Puppet.
Travel to the Shack. Look at the Chest and then use your Sagebrush on the Bee Smoker to earn a Bee Smoker. Use the Bee Smoker and your Knife on the Beehive to collect an Eagle Medallion.
Use your Umbrella to move the Glove and earn a Glove to take to the Foyer. Investigate the hidden object area. Solve the puzzle to move on.
Earn a Globe Piece when you find all of the listed items. Travel to the Library. Insert the Globe Piece into the Globe to be rewarded a Bear Medallion.
Move on to the Pottery Room. Use your Glove to acquire the Stained Glass Piece.
Return to the Stairway. Use your Stained Glass Piece to repair the Glass Door.
Engage the Handle to gain entrance to the Study. Check out the Painting. Use your Power Of Revealing to view the Desk. Use the Medallions to fill in the empty areas and earn Bait.
Put the Bait into the Fish Tank to earn a Piano Key to take to the Salon. Visit the hidden object area. Find all of the items listed.
Collect the Bear Key. Use the Bear Key on the Bear to earn a Crocodile Medallion. Use the Crocodile Medallion on the Desk to collect Letters.
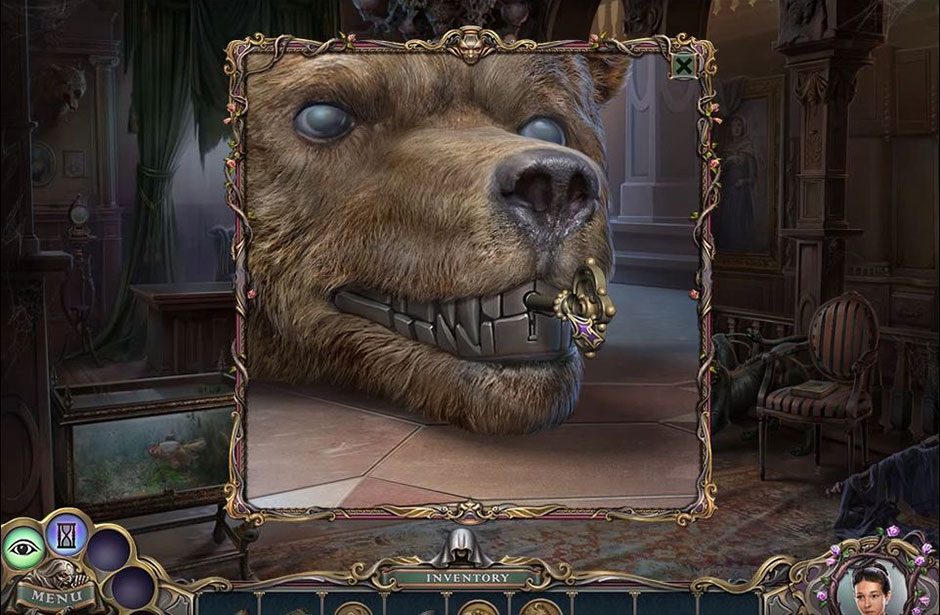
Witch Hunters – Stolen beauty – Bear Key
Travel to the Shack. Give your Letters to the woman to collect the Power To Tame.
Use the Power To Tame on the Dog. Visit the hidden object area. Search and find all of the listed items.
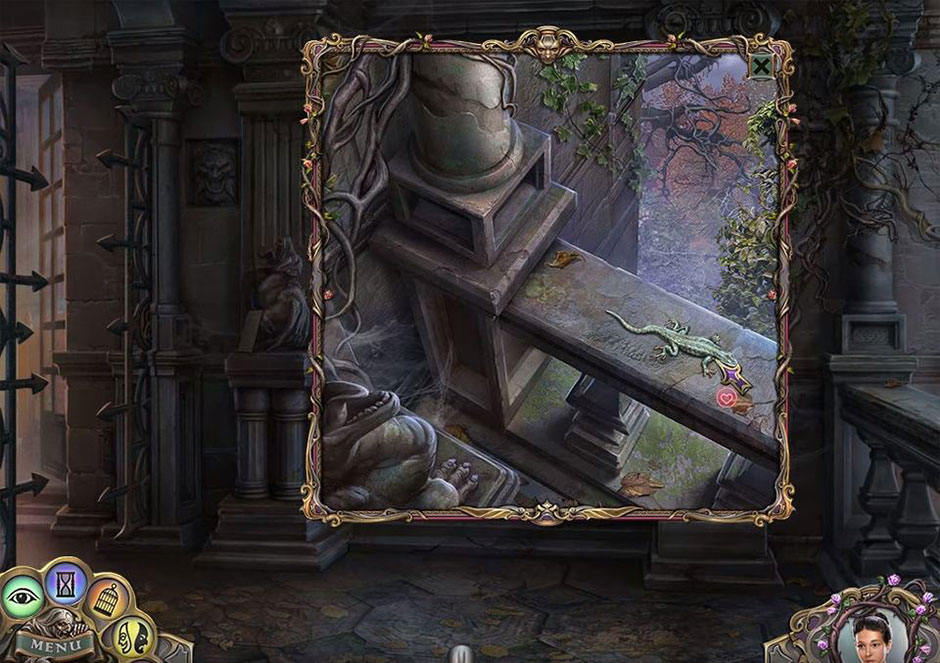
Earn a Puppet’s Head and move on to the Fountain. Use your Power To Tame on the Lizard.
Find a Feather in the Fountain and then travel to the Foyer. Select the Puppet’s Head to repair the Puppet.
Travel upstairs and to the right. Put your Feathers in the Dreamcatcher.
Move on to the Dormitory. Use the Pover of Revelation to uncover the Curtain.
Select the hidden object area. Click all of the items on the list to earn a Puppet Arm.
Select the Curtain to look at the Mirror.
View the Bed to earn a Puppet Key to take to the Foyer. Select the Puppet Arm to repair the Puppet and view the Lock.
Take the Puppet Upstairs. Put the Puppet in the Vines.
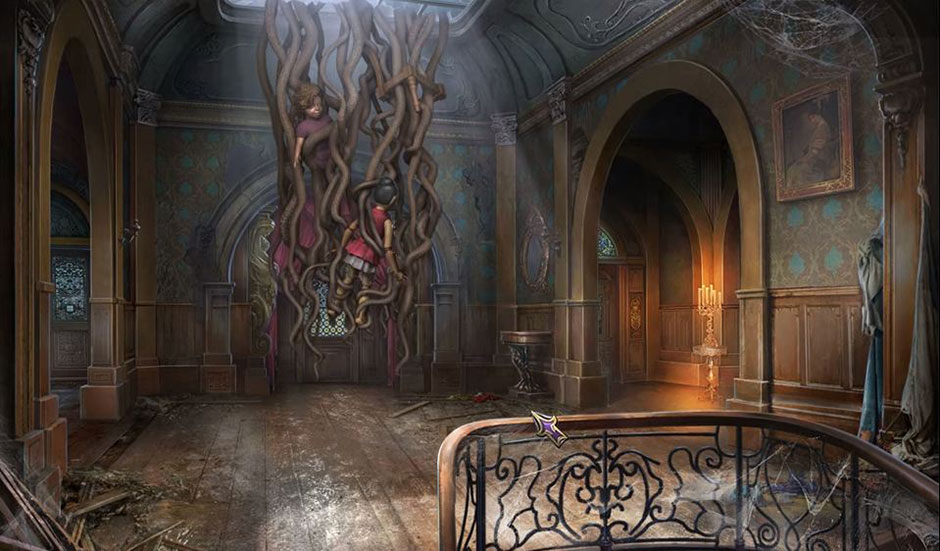
Witch Hunters – Stolen beauty – Puppet Vines
Enter into the Master Suite and then to the Bridge. Visit the hidden object area. Locate all things on the list.
Earn a Hacksaw and take it to the Shack. Take the Hacksaw to the Ladder and use it on the French Horn.
Earn a Newly Crafted Trumpet and travel to the Salon. Visit the Piano and place the Piano Key, Piano Handle, and the Trumpet on top.
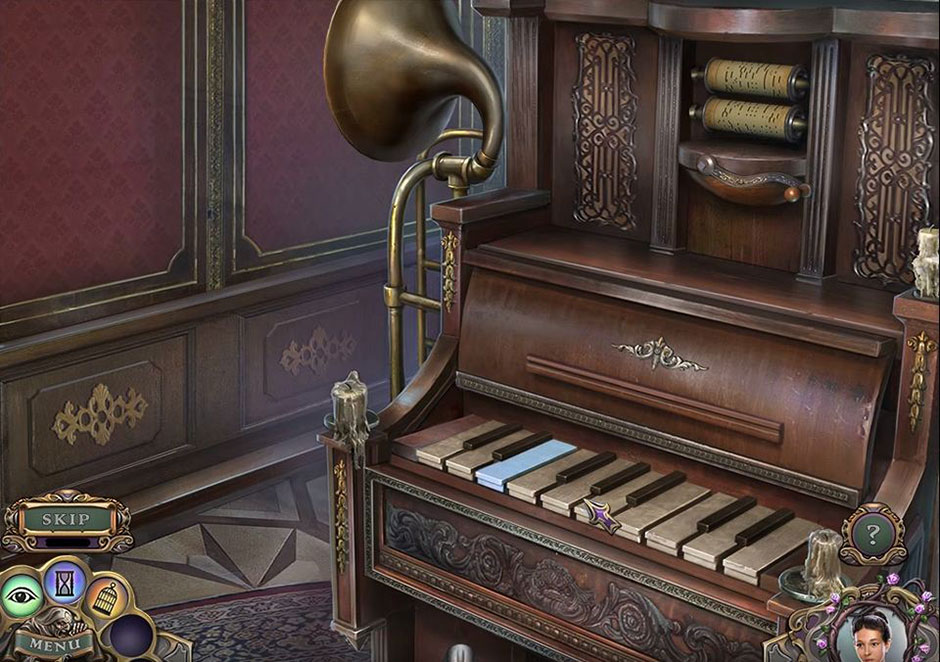
Witch Hunters – Stolen beauty – Piano
Click the handle for a Mini-game of matching the lit Piano Keys to gain access to the Art Room.
Visit the Woman and then the Curtain. Use your Taming Power on the Cat.
Look at the Art Supplies and use your Knife to crack the Paint.
Pick up the Pearl and move on to the Dormitory. Investigate the Bed. Use your Pearl on the Case Top.
Gain the Eraser and visit the hidden object game. Find all of the items listed.
Earn a Clip and return to the Art Room.
Chapter Six: School Spirit
View the Art Supplies and use your Clip to attain a Broken Pencil.
Travel to the Study. Investigate the Desk and use your Broken Pencil in the Sharpener. This will earn a Pencil.
Return to the Art Room. Select the Pencil and Eraser to erase all mistakes on the Easel. Make corrections with the Pencil.
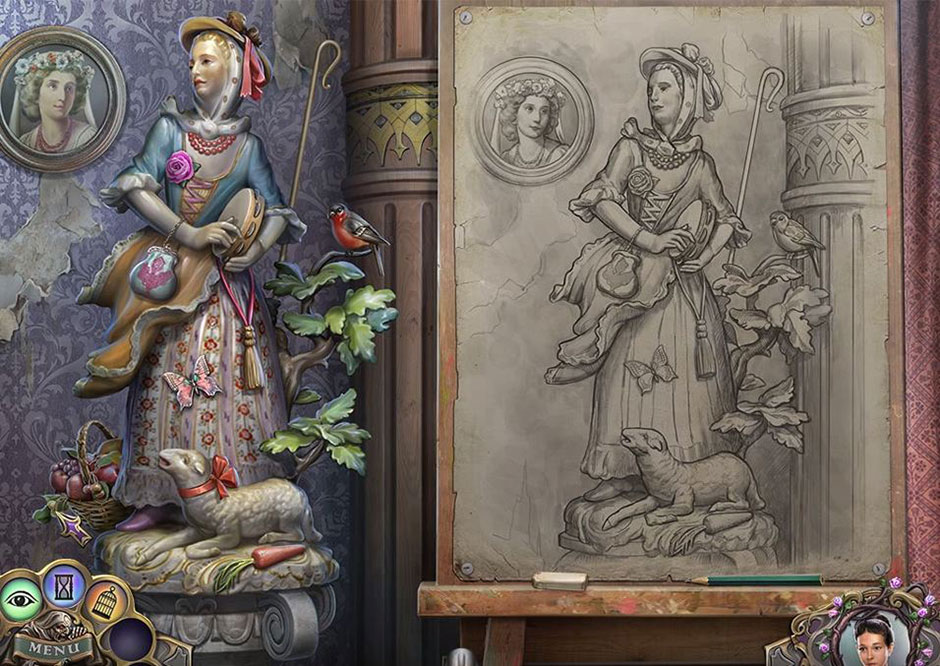
Witch Hunters – Stolen beauty – Corrections
Receive the Turn Good Powe from the Woman. Move on to the Dormitory. Use the Door Handle to open the Door.
Go out to the Balcony. Use your Taming Power on the Bird and collect a Snake Key, Music Room Key, and a Recipe Part.
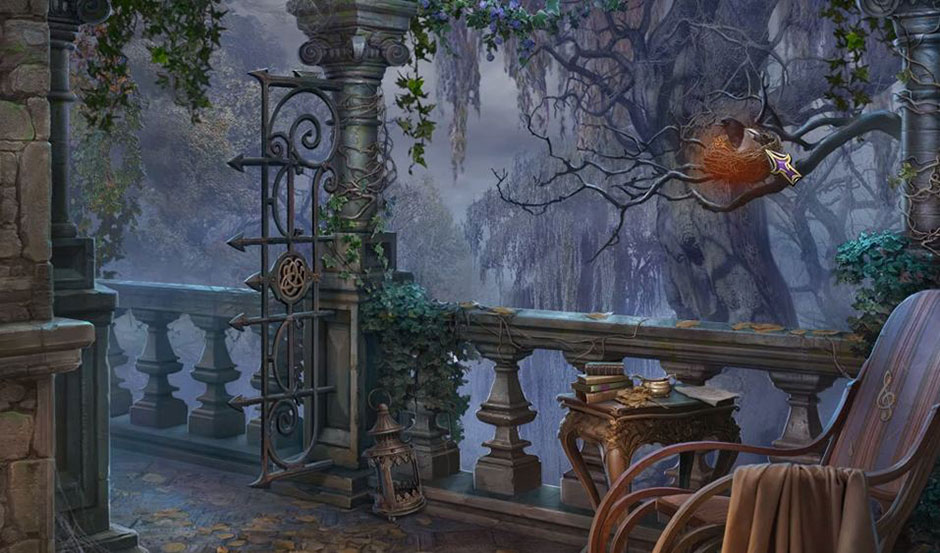
Witch Hunters – Stolen beauty – Bird
Go back to the Hallway. Select the Music Key to unlock the Door.
Enter the Music Room. Collect the Snake Key from the Light and the Scissors from the Piano.
Enter the Dormitory. Look at the Bed and use your Scissors to take the Peg.
Travel to the Balcony. Use your Scissors on the Chair to remove the Thread.
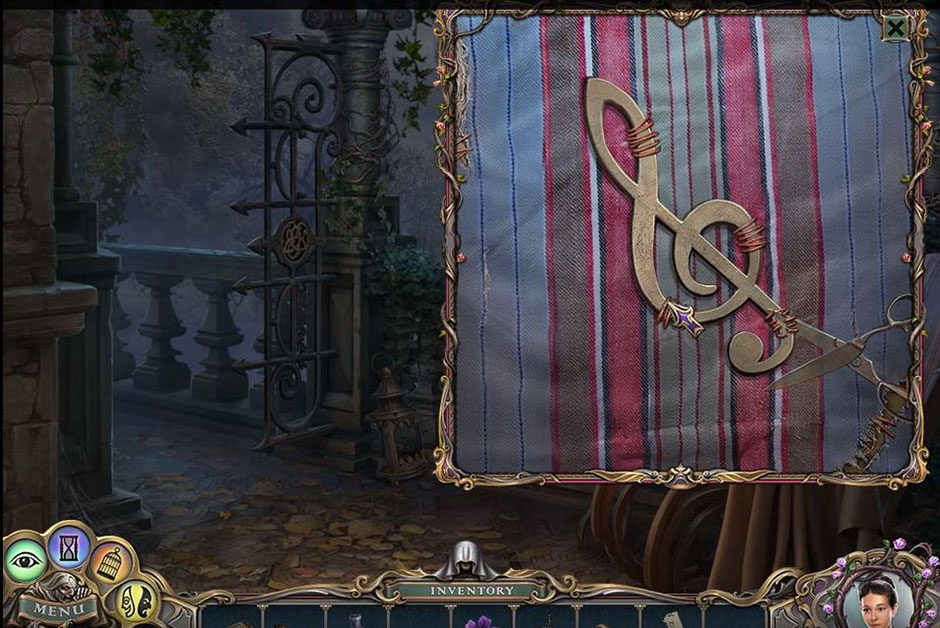
Witch Hunters – Stolen beauty – Remove The Thread
Cut each section of Thread to collect the Treble Clef and move on to the Music Room. Use your Power of Revelation on the Shelf.
Use the Treble Clef in the Lock to trigger a Mini-puzzle. Arrange the instruments in the indicated specific pattern to earn Sheet Music. Investigate the Harp to collect the Sheet Music and the Peg for the Harp.
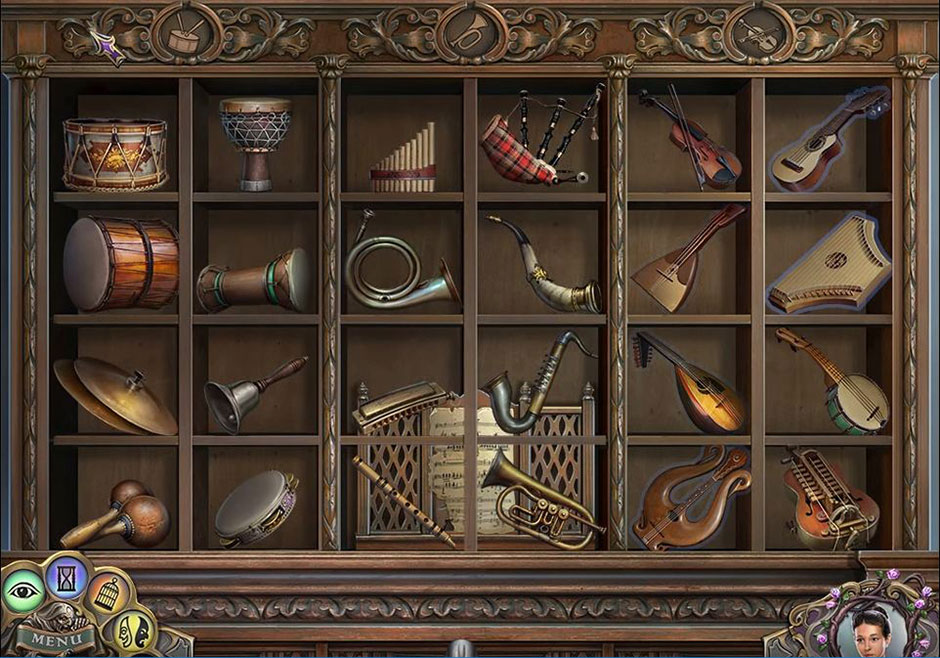
Witch Hunters – Stolen beauty – Instruments
Re-visit the inside of the Shack. Select your Scissors to cut away the Scorched Plants.
Exit the Shack. Utilize your Turn Good Power to turn the Bush into a Flower.
Earn the Flower and travel to the Library. Use the Turn Good Power on the Spider on the Desk.
Take the Ornament Piece and return to the Balcony. Select the Ornament Piece and use it on the Gate.
Use your Matches on the Banister to light the Vines.
Attain a Flask and go to the Study. Use your Taming Power on the Snake.
Collect the Corkscrew from the Chest and then move on to the Attic. Use the Corkscrew by the Window and collect a Caterpillar.
Go to the hidden object game. Find all of the listed items.
Earn the Nail Puller and go to the Balcony. Remove Old Boards with your Nail Puller.
Witch Hunters – Stolen beauty – Old Boards
Journey to the Master Bedroom. Visit the hidden object area.
Search the room for all of the listed items.
Earn a Pedal.
Chapter Seven: Animation Academy
Travel to the Music Room and investigate the Harp.
Use the Pedal on the Harp to collect Animation Power and go to the Balcony. Use your Animation Power on the Lizard on the Banister to earn a Tail.
Witch Hunters – Stolen beauty – Lizard
Return to the Master Bedroom. Use your Animation Power on the Statue. Look at the Table.
Pick up the Bottle Of Fuel. Investigate the Chemist Set in the back.
Use your Recipe Part, Flask, and Bottle Of Fuel on the Science Kit.
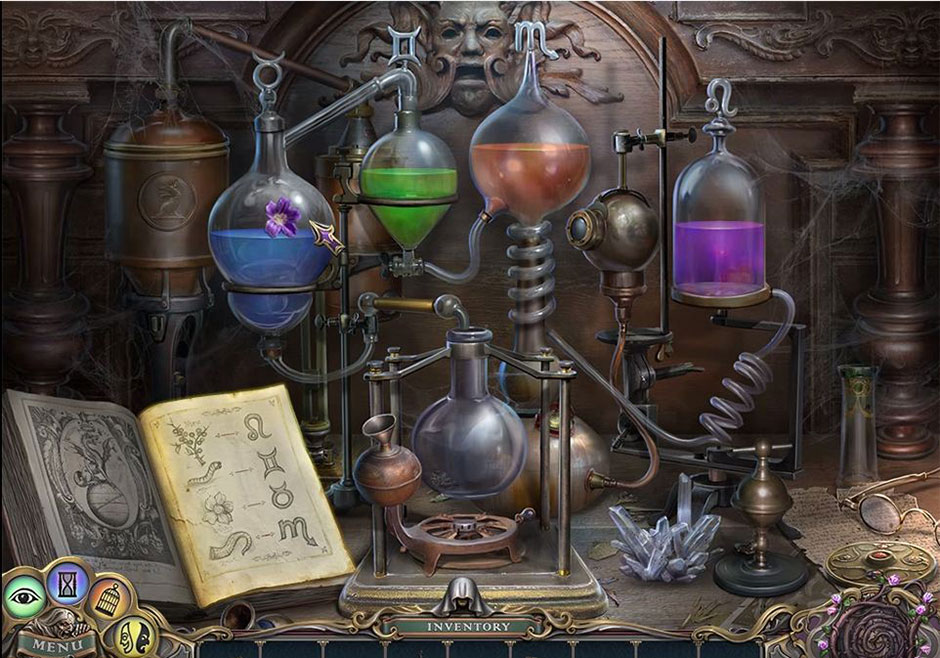
Witch Hunters – Stolen beauty – Potion
To solve this puzzle, use the correct ingredients. Use your Matches to light the Burner and collect the Potion. Investigate the hidden object area.
Find all of the items on the list to collect the Gryphon.
Travel to the Art Room. Use the Animation Power on the Statue.
Gain a Snake Key and enter into the Secret Passage. Use your Matches to light the Torch.
Travel to the Salon. Place the Statuette on the Table.
Earn a Gryphon and travel to the Front Gate. Visit the hidden object sparkles.
Locate and click all of the items on the list.
Attain a Crowbar. Take a closer look at the Plaque and use your Gryphons to add to the Plaque.
Gain a Cat and view the file before traveling to the Secret Passage. Use your Cat and your Animation Power on the Rodents.
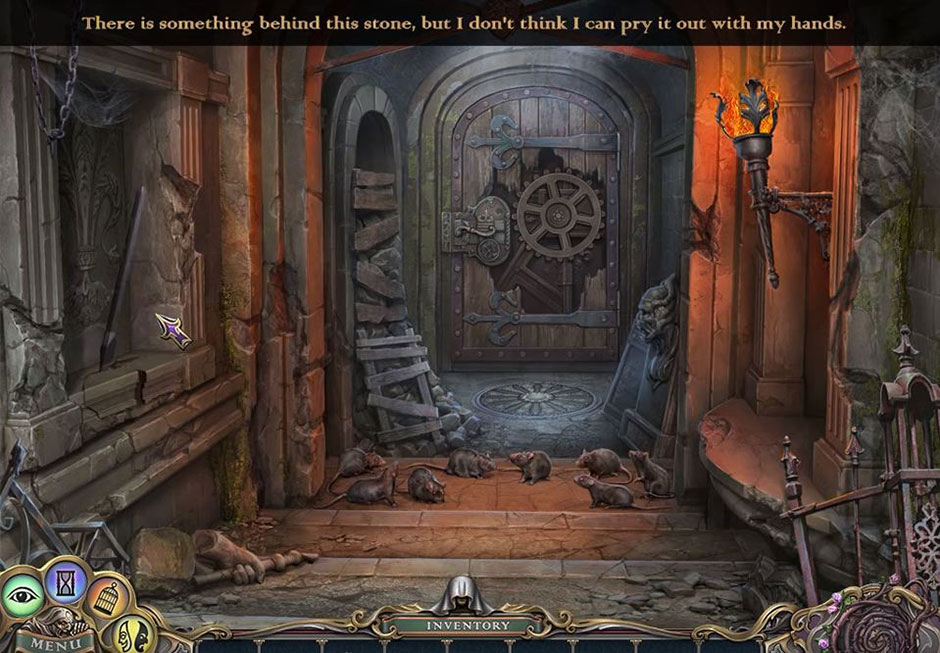
Witch Hunters – Stolen beauty – Book Symbol
Select the Crowbar to break the Wall and gain the Book Symbol.
Chapter Eight: Flunking Flemet
Use the Book in your inventory to add to the book on the Chair.
Use your Revelation Power on the page in the Book.
Gain a Snake Key. Check out the hidden object area.
Complete the puzzle. Locate all of the items on the list.
Attain Lightning and head to the School Grounds. Use your Lightning in the Statue’s Hand.
Choose your Animation Power and use it on the Statue. Look at the Tree to earn a Gear. Travel on to the Secret Passage. Use the Gear on the Door.
Use the Snake Keys to open the Floor Lock. View the Portal to transport to the Classroom.
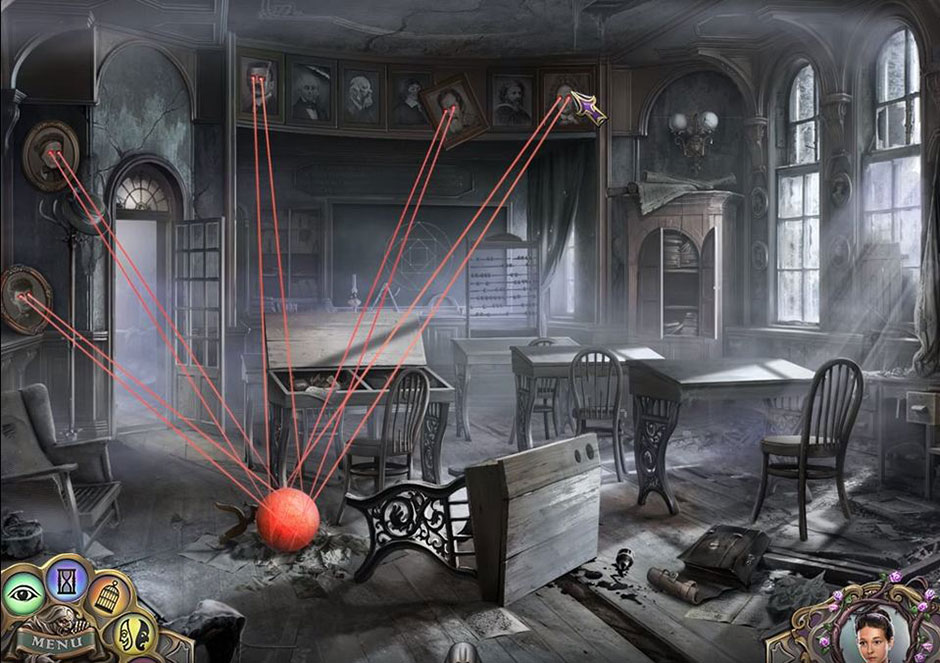
Witch Hunters – Stolen beauty – Laser Eyes
Use the Power Of Revelation on the Picture Frames and line up the Laser Eyes. Take the first of the Portal Stone. Select the Portal Stone and fill the Empty Space to transport to the Pottery Room.
Witch Hunters – Stolen beauty – Pattern
ders
Visit the hidden object area. Search all of the items on the list
Attain the Broom.Use the Broom to clear the Cobwebs.
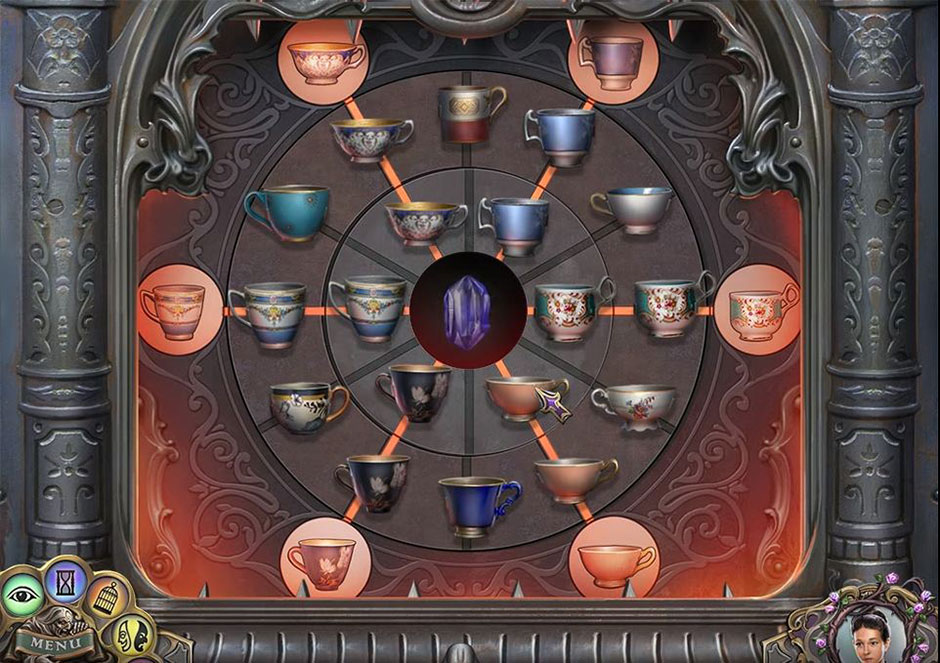
Select the Chest to gain a Portal Stone. Use the Portal Stone in the Third Portal and view the Fourth Portal to transport to the Art Room.
Witch Hunters – Stolen beauty – Portal Stone Puzzle
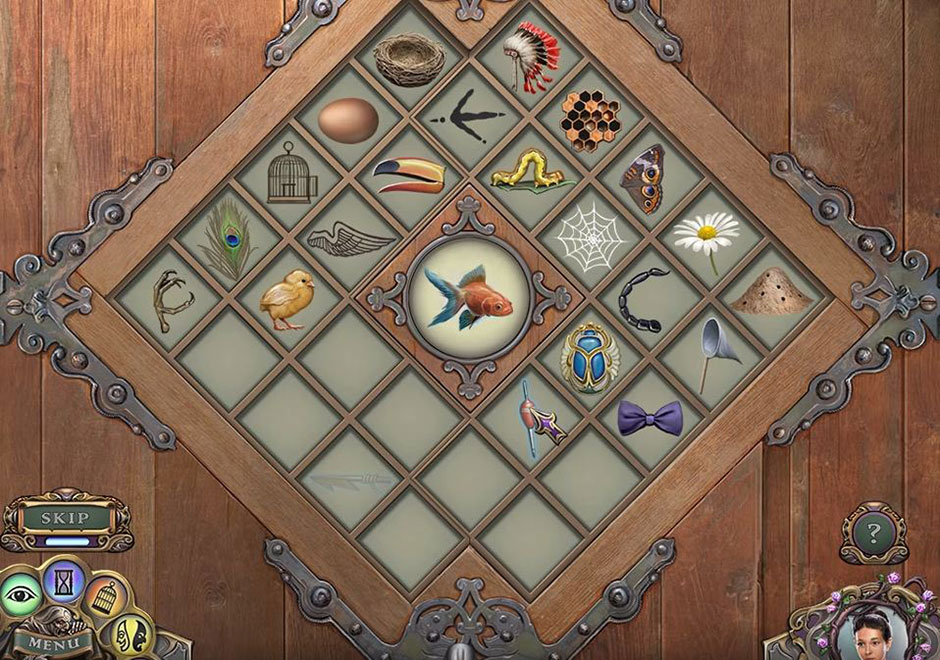
Take the sheets off of the Paintings and use the Turn Good Power on the Canvases. There is a puzzle in the Floor that can be solved by matching items to earn a Portal Stone. Select the Portal Stone to place in the Portal. View the last Portal and be transported to the Music Room.
View the Painting to play a matching game.
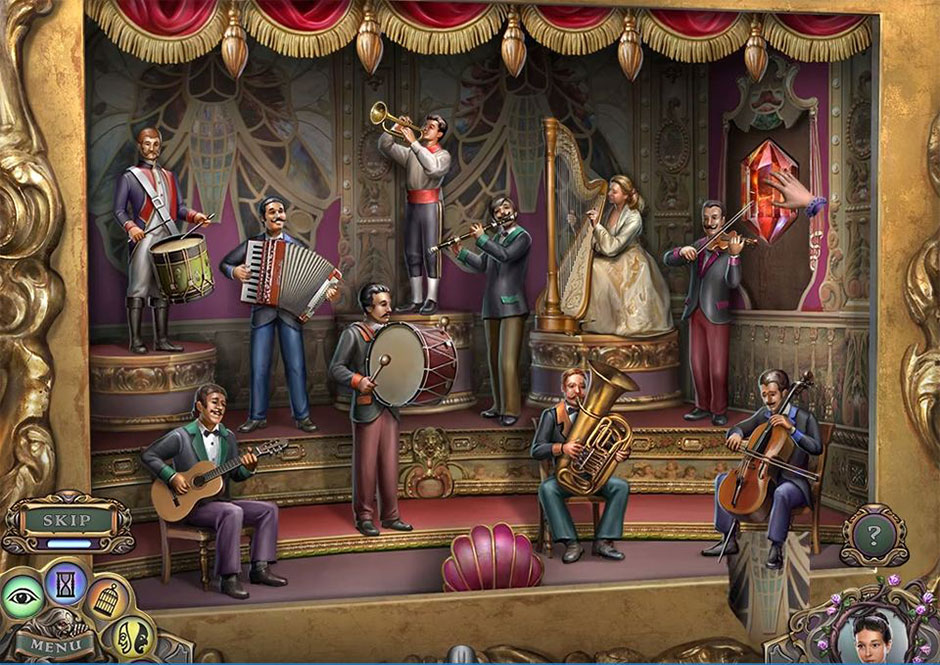
Witch Hunters – Stolen beauty – Painting
Select the Animation Power for the Musicians and earn the last Portal Stone. Select the Portal Stone and place it in the last Portal.
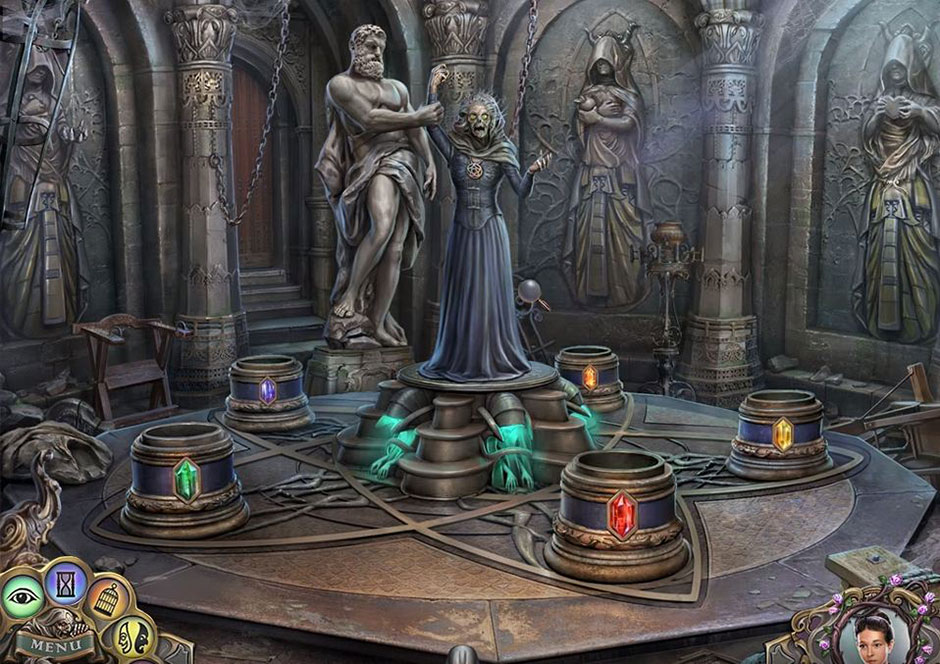
Witch Hunters – Stolen beauty – Evil Witch
Use the Taming Power on the Bird. Use your Turn Good Power and the Animation Power on the Statue. Choose your Freeze Motion Power and the Potion to use on Flemet. Victorious, you are free to exit through the open door as young and beautiful as ever.
It is not too often that you have to battle an evil witch to defend your youth, but when you do, this informational guide will help you to conquer the evil in Witch Hunters – Stolen Beauty. Enlist in this Witch Hunters – Stolen Beauty walkthrough to overcome the perplexing puzzles, mini-games, and other tricky mind testers of this entertaining game.
For more great tips and tricks, visit our blog!
Delicious – Emily’s Hopes and Fears Walkthrough
The Witch Hunters – Stolen Beauty Walkthrough is meant as a guide and does not contain cheats, hacks or serials.